Welcome to Part 2 of how I made the Winter Soldier Arm, a wearable piece for cosplay and photography I was commissioned to make that replicated, as accurately as possible, the cybernetic arm seen in Marvel Studios’ Captain America: The Winter Soldier!
In Part 1 I went over sculpting, molding, and casting. If you haven’t read that yet and are curious about those parts of the process, I suggest you give it a read first. And of course, if you’re more interested in grabbing a Winter Soldier Arm of your own than learning how I made mine, I’ve got you covered:
- If you want to finish your own kit: Winter Soldier Arm (Resin Kit)
- If you just want one delivered to your door: Winter Soldier Arm (Chrome Plated)
In this part, I’ll cover the 2 things I get asked about most: Chrome and Fiberglass Flanges.

The raw castings are made from Smooth-On ONYX urethane resin. These come out glossy smooth for the most part, but there is still some excess resin (flashing) that needs to be removed to make them wearable. I use a rotary tool cut-off bit to chop out the ends of both the forearm and bicep pieces, and then a sanding-drum to grind down the rest until I’m happy with the thickness.


Once that’s done, I use a cut-off disk to remove the “cutout” portion of the Forearm, being very careful to make the cut as clean as possible. It just so happens that chrome plating will add back almost exactly as much material as a reinforced cut-off disk will remove. Any excess removal of resin will result in empty space, although that’s not the end of the world – I designed the “cutout” to be removed along existing detail lines, so any mistakes here can easily be hidden if needed.


There are a few places where the silicone had some minor issues like bubbles or surface imperfections that transfer to the resin castings. Most of these I just wet-sand with 500 grit paper, though a few need some spot putty first. Because I chrome plate these, any materials used need to be either catalyzed (like bondo), or something that is non-reactive once cured. Spot putty is safe, but only when applied very thin (as directed on the label). Then it’s off to chrome!
I take all my parts to Artcraft Plating in Burbank, California. The owner, Jim, has been working with the film industry for over 30 years in addition to putting chrome on parts for lesser-known entities like Lockheed Martin and the US Army, and he’s a wizard.
I’ll try not to bore you with the details, but the basic process starts with a toxic bath that chemically bonds copper to the plastic. This gives the part an electrically conductive surface. The copper can then be electroplated with nickel, which gives it the smooth, glossy look. The nickel is then usually plated with a third metal. This used to be chromium (real, genuine chrome), but Artcraft has since upgraded to rhodium (since chrome is incredibly toxic). This makes pieces brighter, stronger, scratch-resistant, and immune to tarnish or rust.
(Photo is of Ant-Man, but the copper plating is the same.)

It’s important to point out that a finished Arm is coated with a skin of real metal – it’s not paint, a surface treatment, or anything else. It’s real metal. The skin is only about as thick as a piece of construction paper, and only adds about a pound of weight – a finished Arm still weighs less than 4 lbs – but it adds a ton of strength. That means I can make the urethane incredibly thin. I’ve completely removed the resin from portions of chrome plated parts, leaving just the metal layer, without affecting the structure or stability at all.
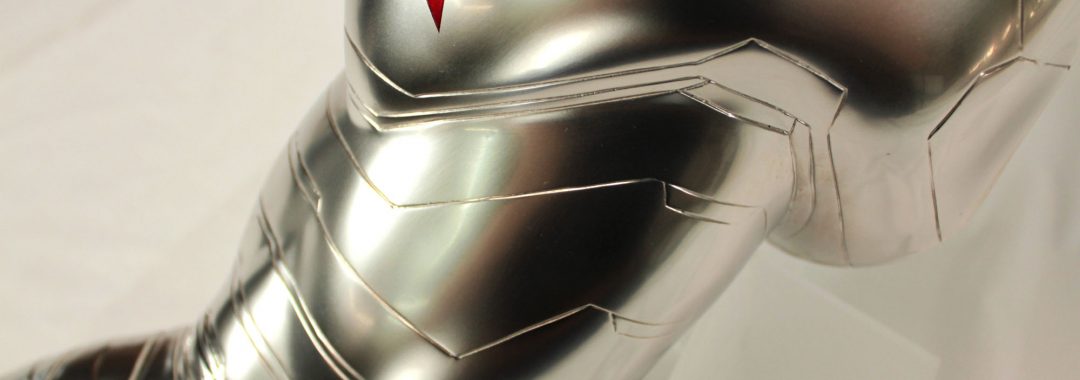
I’ve worked with Artcraft Plating enough now that we have 4 different finishes for the Arm, each with a different look: Polished, Satin, Brushed Metal, and a new one we just developed together he’s calling Bright Satin. Bright Satin is my personal favorite, and the one I think captures the look of the “real” Arm best, though the brushed metal look is a close second.
Here’s a comparison of Satin vs Polished.


After the Arm is chromed, I add fiberglass flanges to the Forearm “cutout” and elbow “break.” First, I epoxy several rare-earth magnets to the part of the Arm that will not have flanges attached. I like JB Weld KwickWeld for this – it’s a steel reinforced epoxy that sets to usable strength in about 5 minutes. After the epoxy sets, I brush a layer of wax over the magnets as well as anywhere I don’t want the flange to stick. In this case, that’s the Forearm piece itself – the “cutout” and Bicep stay clean, since I want the flanges to stay attached to them. The wax acts as a release, which is key to the next part.

Each magnet that was epoxied in place gets a mate dropped in place over the wax. The parts then get aligned and held together with copious amounts of masking tape. Then I brush in a thin coat of fiberglass laminating resin (typically polyester, like you’d get at the hardware store). A neat trick I learned from my friend Frank Ippolito is to add in some loose chopped strand fiberglass, which you can buy, or make yourself by cutting the loose edges off fiberglass cloth. I mix this into the resin until its a runny peanut butter consistency. It makes the resin act almost like a gel coat, and makes the areas around the magnets much stronger than they would be as just resin. I back this with 2 layers of fiberglass cloth.
While I have no photos of this process (it’s pretty messy), I did live-stream it on Twitch, and the entire multi-hour session is now on my YouTube channel as a serious of very long videos! They’re also a good look at the difference between Polished and Satin chrome as it actually moves. I hope to find time edit them down, but for now they remain raw and uncut.
Once the fiberglass has cured, the pieces can be cracked apart. Note this will literally sound like they are cracking apart – it was terrifying the first few times I did it! But if you applied wax to all the surfaces you put fiberglass on, they will separate. The fiberglass will hold onto one half of the magnet pair in the newly made fiberglass flange, and the other magnet stays securely epoxied to the chrome. This fiberglass flange will match exactly with the inner surface of the Arm, and once trimmed and sanded will lock smoothly in place with an audible “click” of the magnets.


These flanges secure the Bicep to the Forearm strongly enough I can hold the entire Arm by the wrist without fear of it falling apart. This way, the Arm is much easier to put on – just remove the Forearm “cutout” and re-insert it once your arm is inside – and the entire Arm can be “locked” into a single, seamless piece for photos.


Because the skin of the Arm is real metal, I clean off all the excess fiberglass and resin with acetone. Once clean, I spray both the inside and outside of the flanges with matte black automotive primer – I’ve found this to be the most inconspicuous finish for them, even when they’re exposed at the elbow. I don’t bother to do more than a quick job of masking – any overspray wipes off with more acetone.
Then I spend some time with a pile of clean paper towels and more acetone, and polish the Arm until it’s clear of any resin, paint, or fingerprints. The red star is masked off with Tamiya tape ( I tack a paper pattern in place and tape around it), and painted directly onto the chrome using Red Duplicolor Metalcast Paint. A simple elastic harness is velcroed into the arm at the top of the shoulder and front of the bicep to keep it in place, and it’s fully wearable!


In Part 3, I’ll cover making the Fingers and Hand-Plates.