
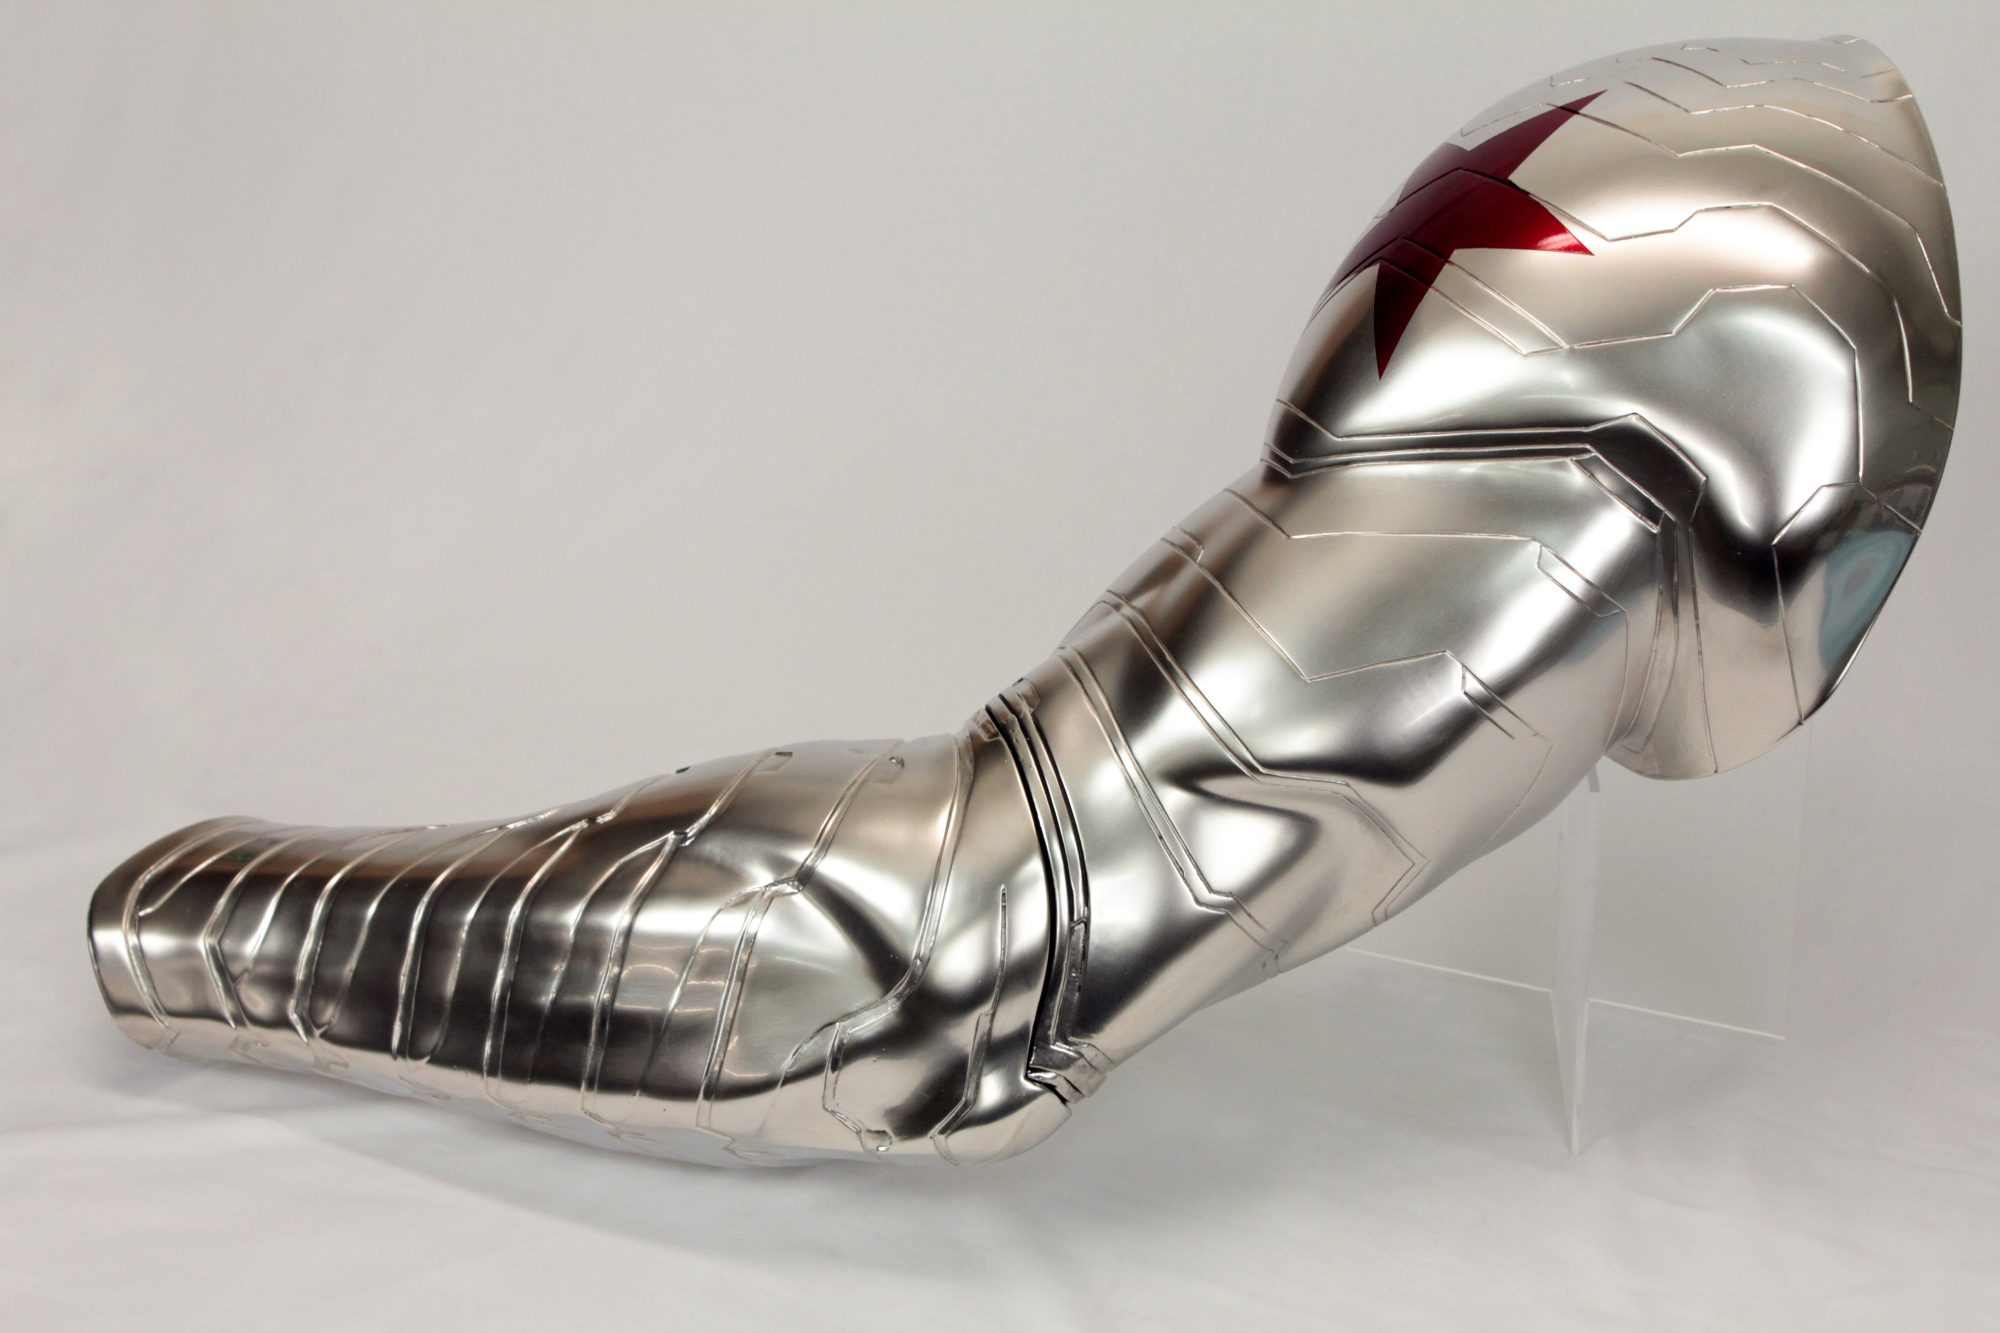
The Winter Soldier Arm is the most time-intensive piece I’ve ever made. So much so, I don’t accurately know the number of man-hours put into it – it’s somewhere over 300 hours (I’ll get to that later)! I was commissioned to make a wearable piece for cosplay and photography that replicated, as accurately as possible, the cybernetic arm seen in Marvel Studios’ Captain America: The Winter Soldier. Since the Arm seen in the movie was almost entirely CGI, I had to find a way to capture the look, without killing the client or making the Arm unwearable. The final Arm is 3 pieces of chrome-plated, cast resin, with a “break” at the elbow,and another slotted piece in the forearm so it can be put on more easily while still being form fitting.
But before I get into this: if you’re more interested in buying one of these than reading about how I made it in the first place, I’ve got you covered!
You can finish your own kit by getting one here: Winter Soldier Arm (Resin Kit)
Or a fully finished, chrome-plated one, here: Winter Soldier Arm (Chrome Plated)
Now, on to the write-up!
I started by taking a mold of the client’s arm in plaster bandages. Together, we tried to imagine the poses he’d be most likely to want for photos, and found a position for his arm that would work with as many of those poses as possible. Then I slush-cast a resin positive to use as a base for sculpting.
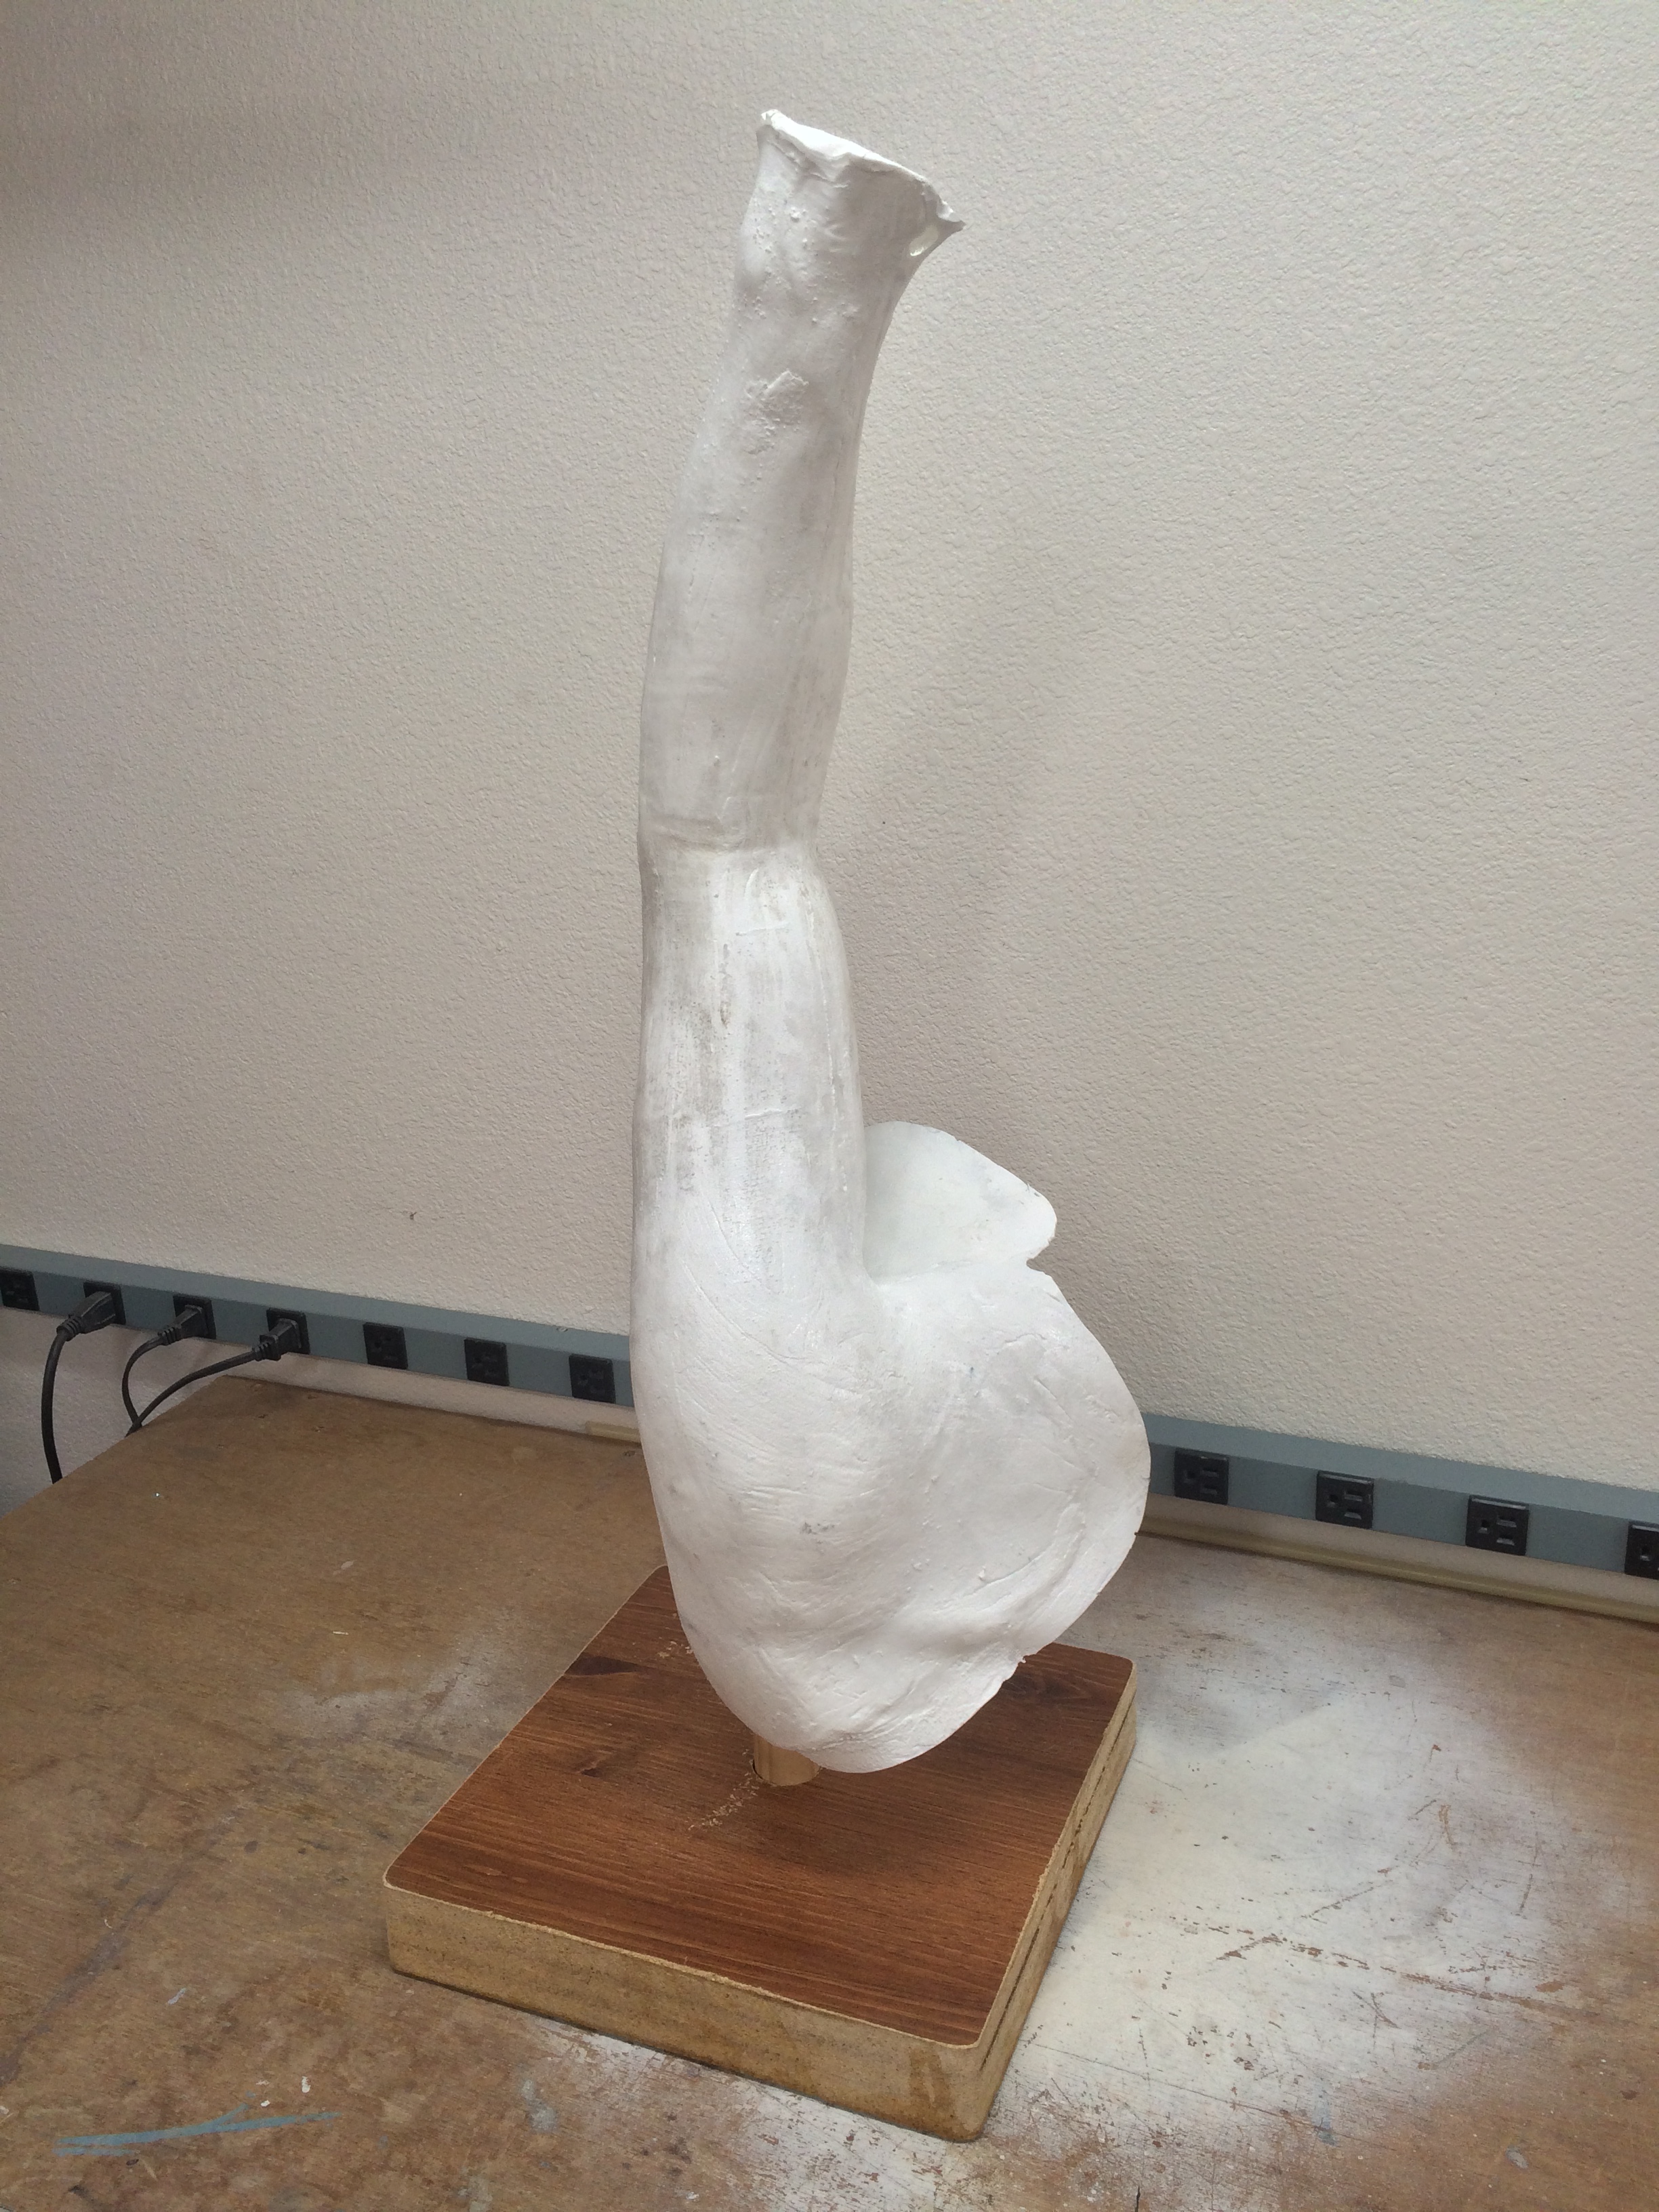
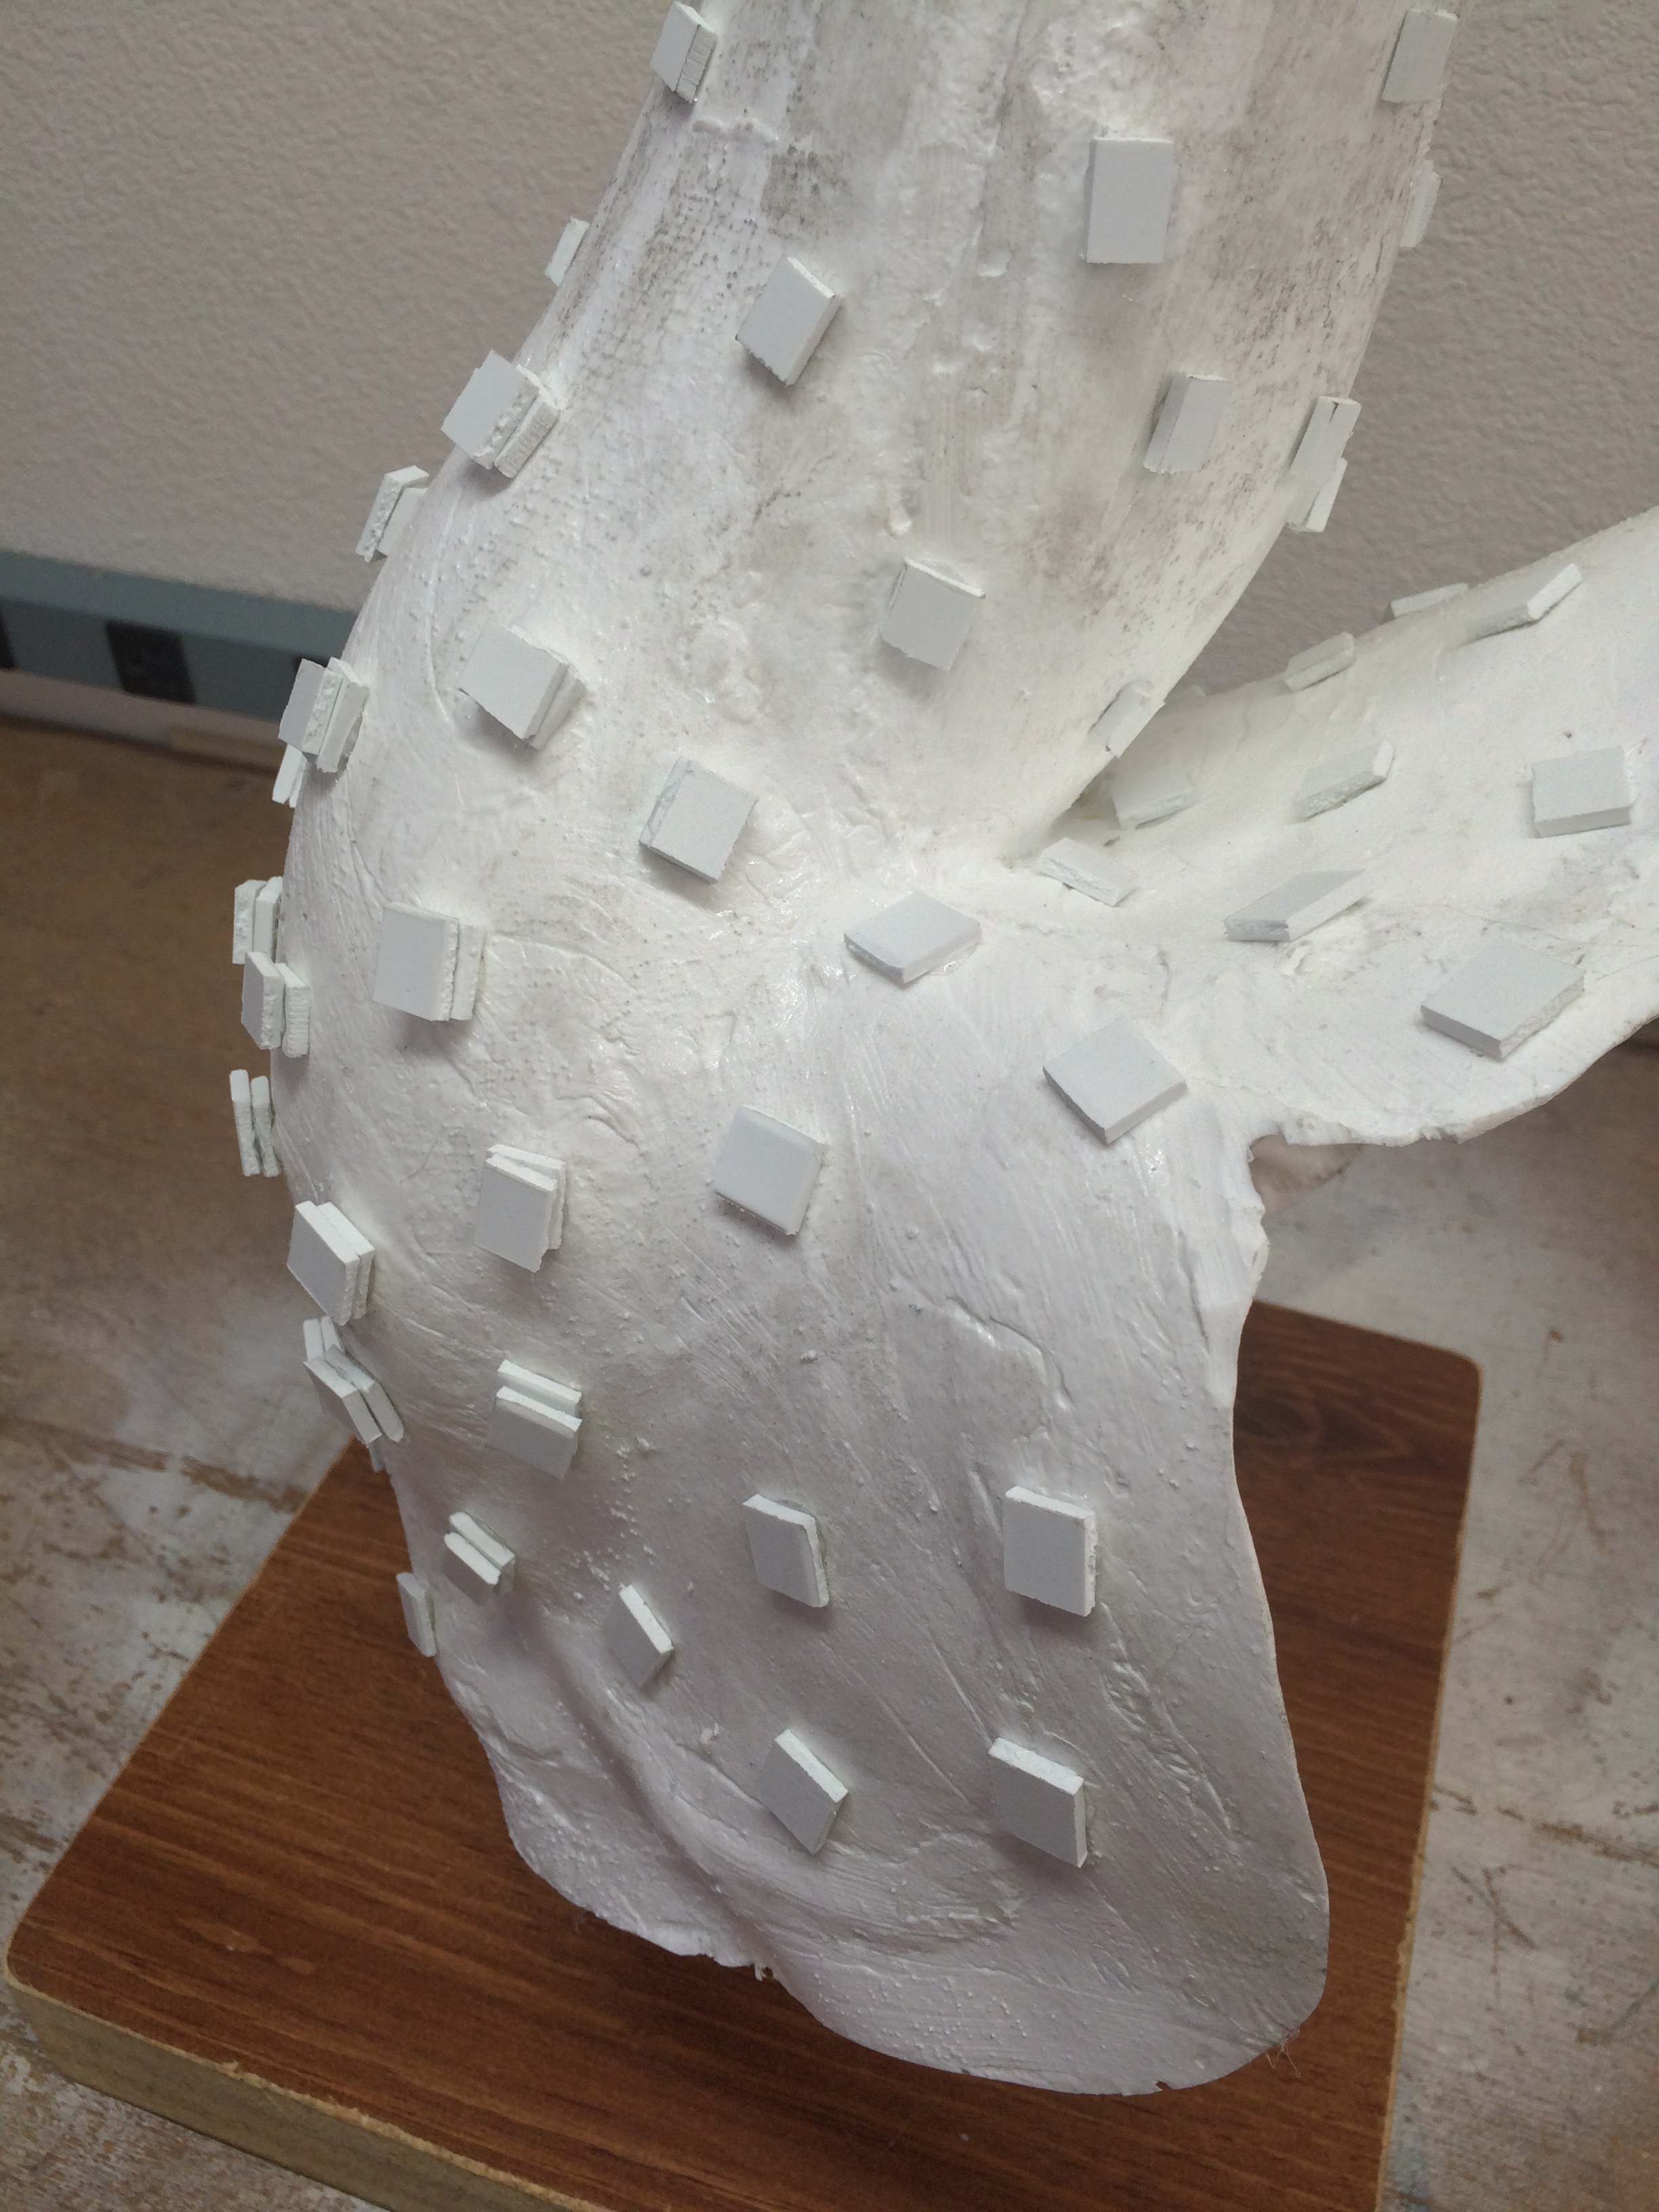
The goal of the first round of sculpting was to bulk out the arm, both so the client would have enough space INSIDE the final casting to be relatively comfortable, and to build the musculature seen in the movie. The idea was to get all the musculature and shapes correct first, in the clay sculpt, before adding all the complex cutouts and inlays that make it identifiable as the Winter Soldier. I used Monster Clay for this, since it’s easy to work with and I have a pile of it from a previous project. In order to make sure I kept a uniform thickness over the arm, especially in places that needed more room for movement (like the elbow and biceps), I glued down layered squares of plastic so that I’d have immediate feedback if I tried to scrape the clay too thin. This turned out to be really helpful during sculpting.


Once I thought I was happy with the size and shape of the clay Arm, I made a second mold, this time using Smooth-On Rebound 25 brushable silicone, with a fiberglass mold jacket. I made this mold really thin, much thinner than I’d ever tried before, because I only needed one good cast from it and it was a BIG mold (my client happened to be exactly the same size as me – a lanky 6’4″). The silicone is only about 1/8″ thick, but worked perfectly fine for the 2 castings I made.
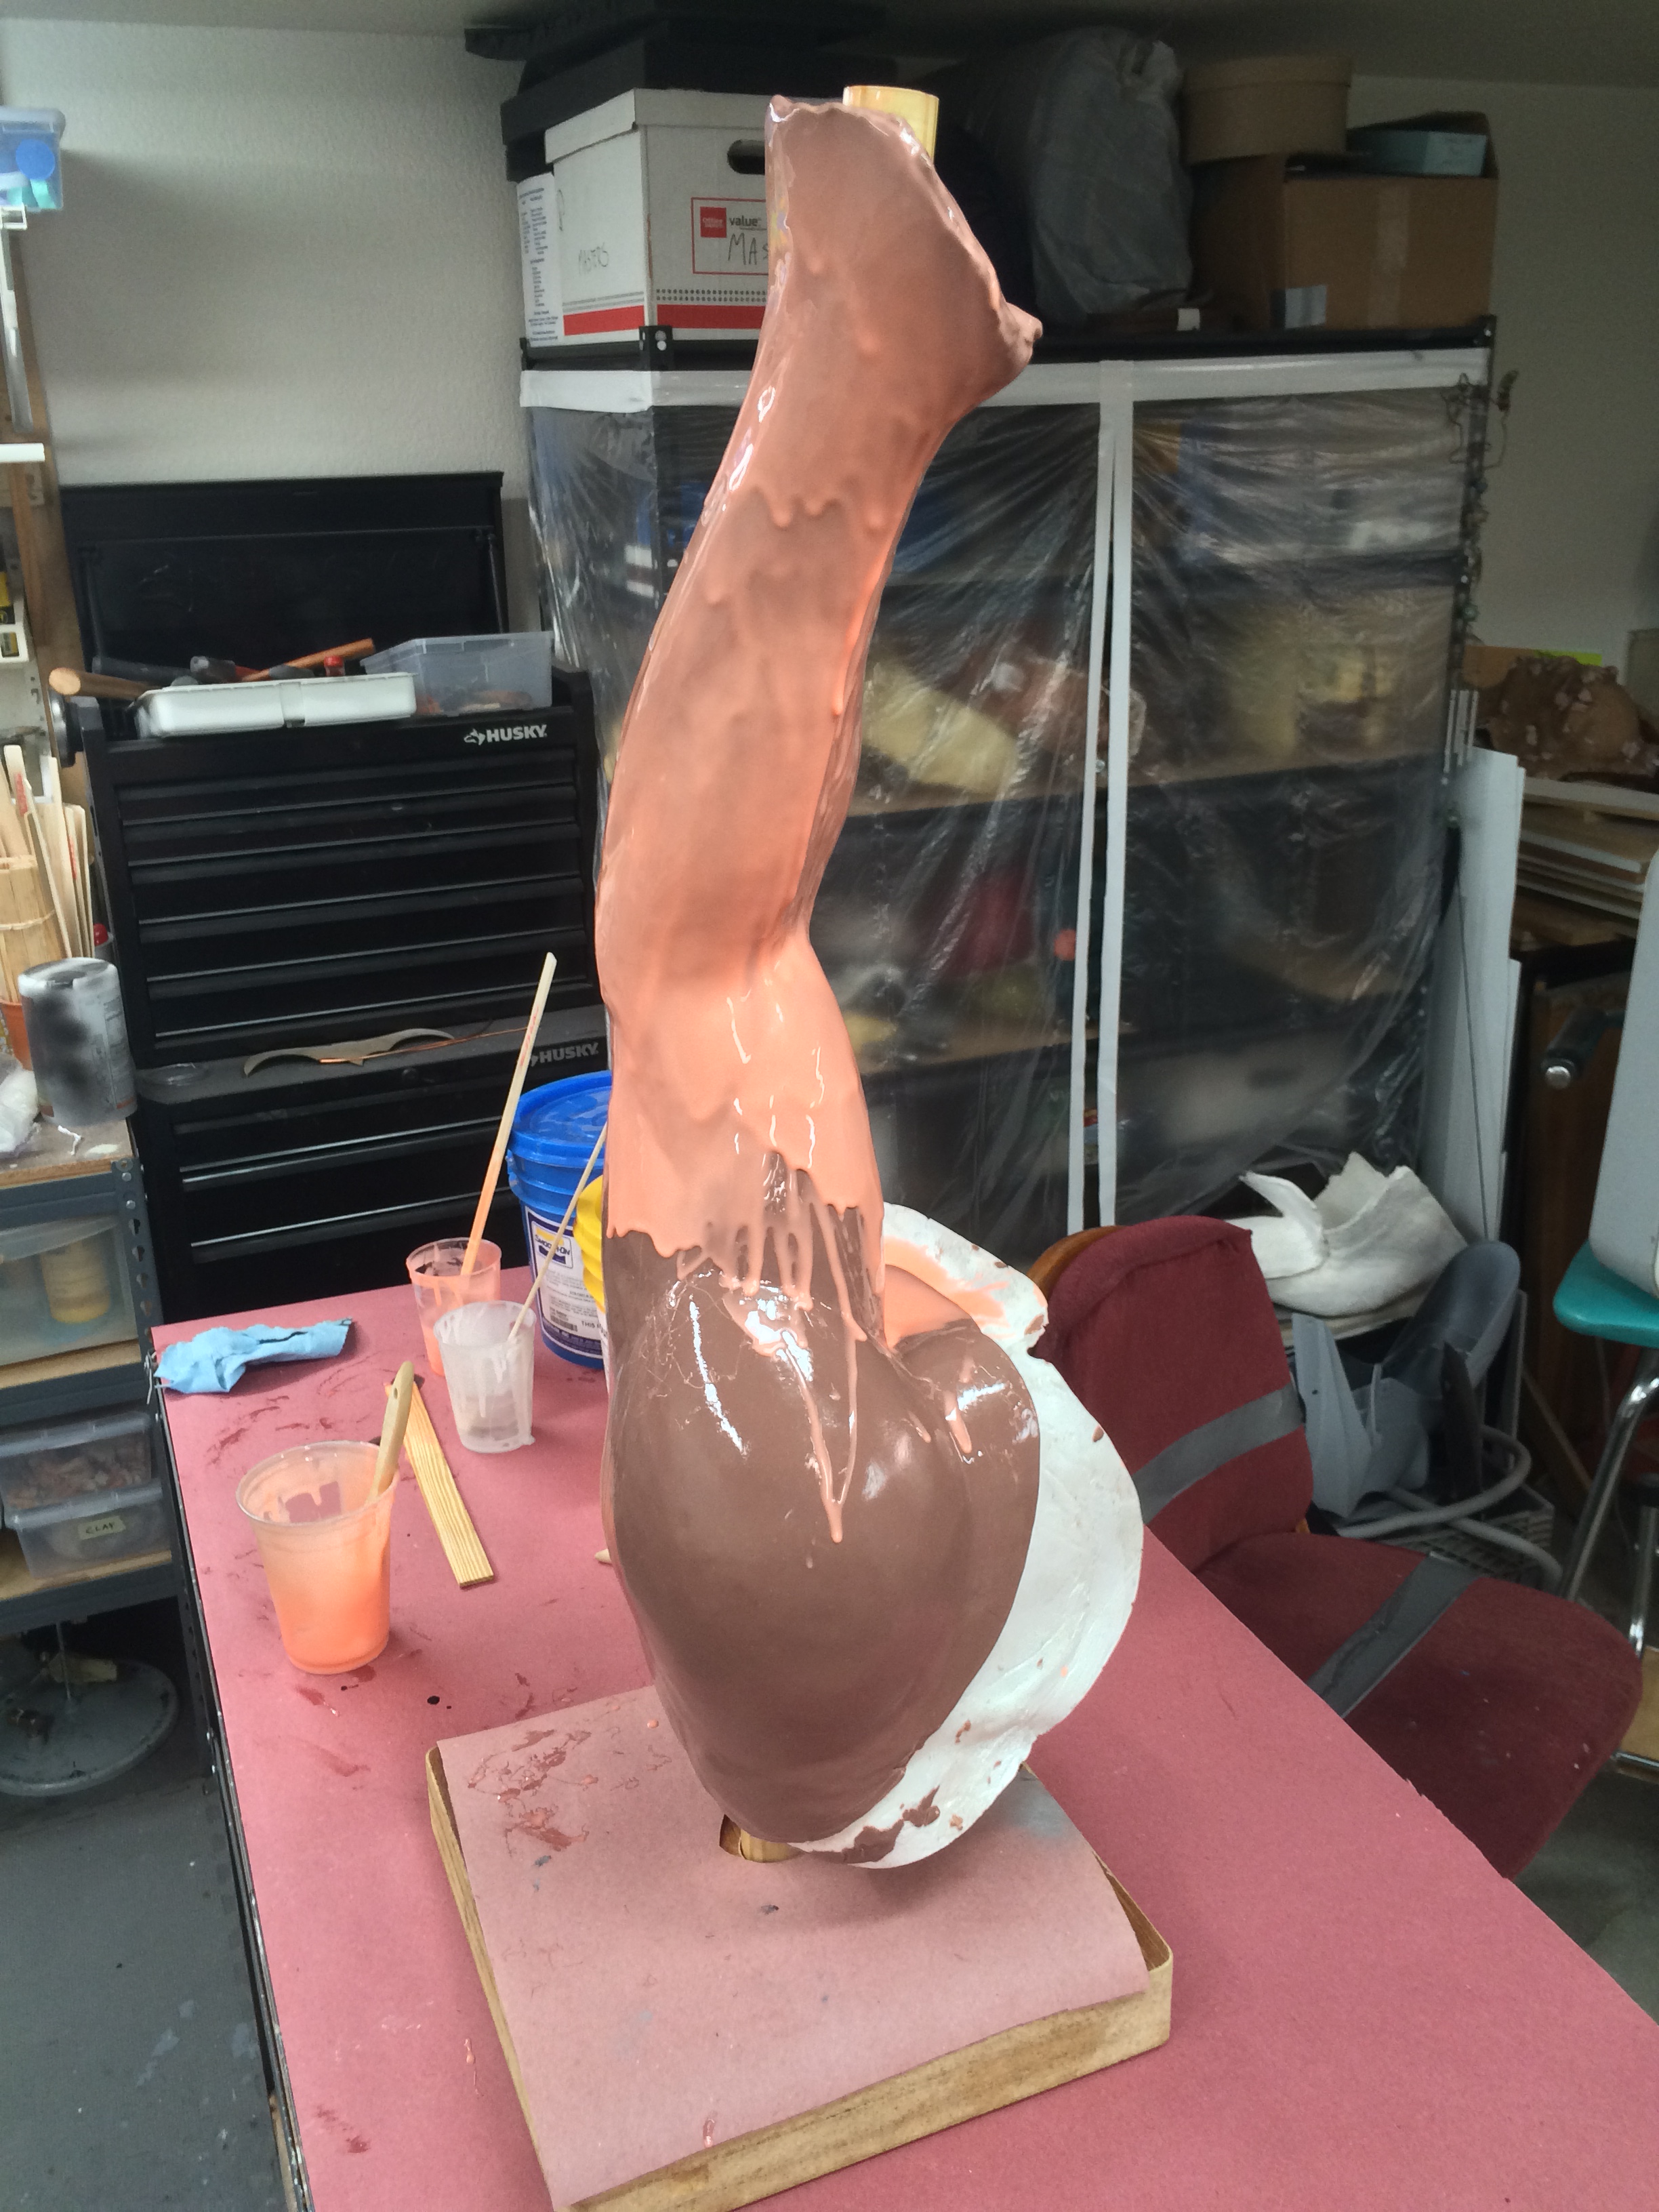

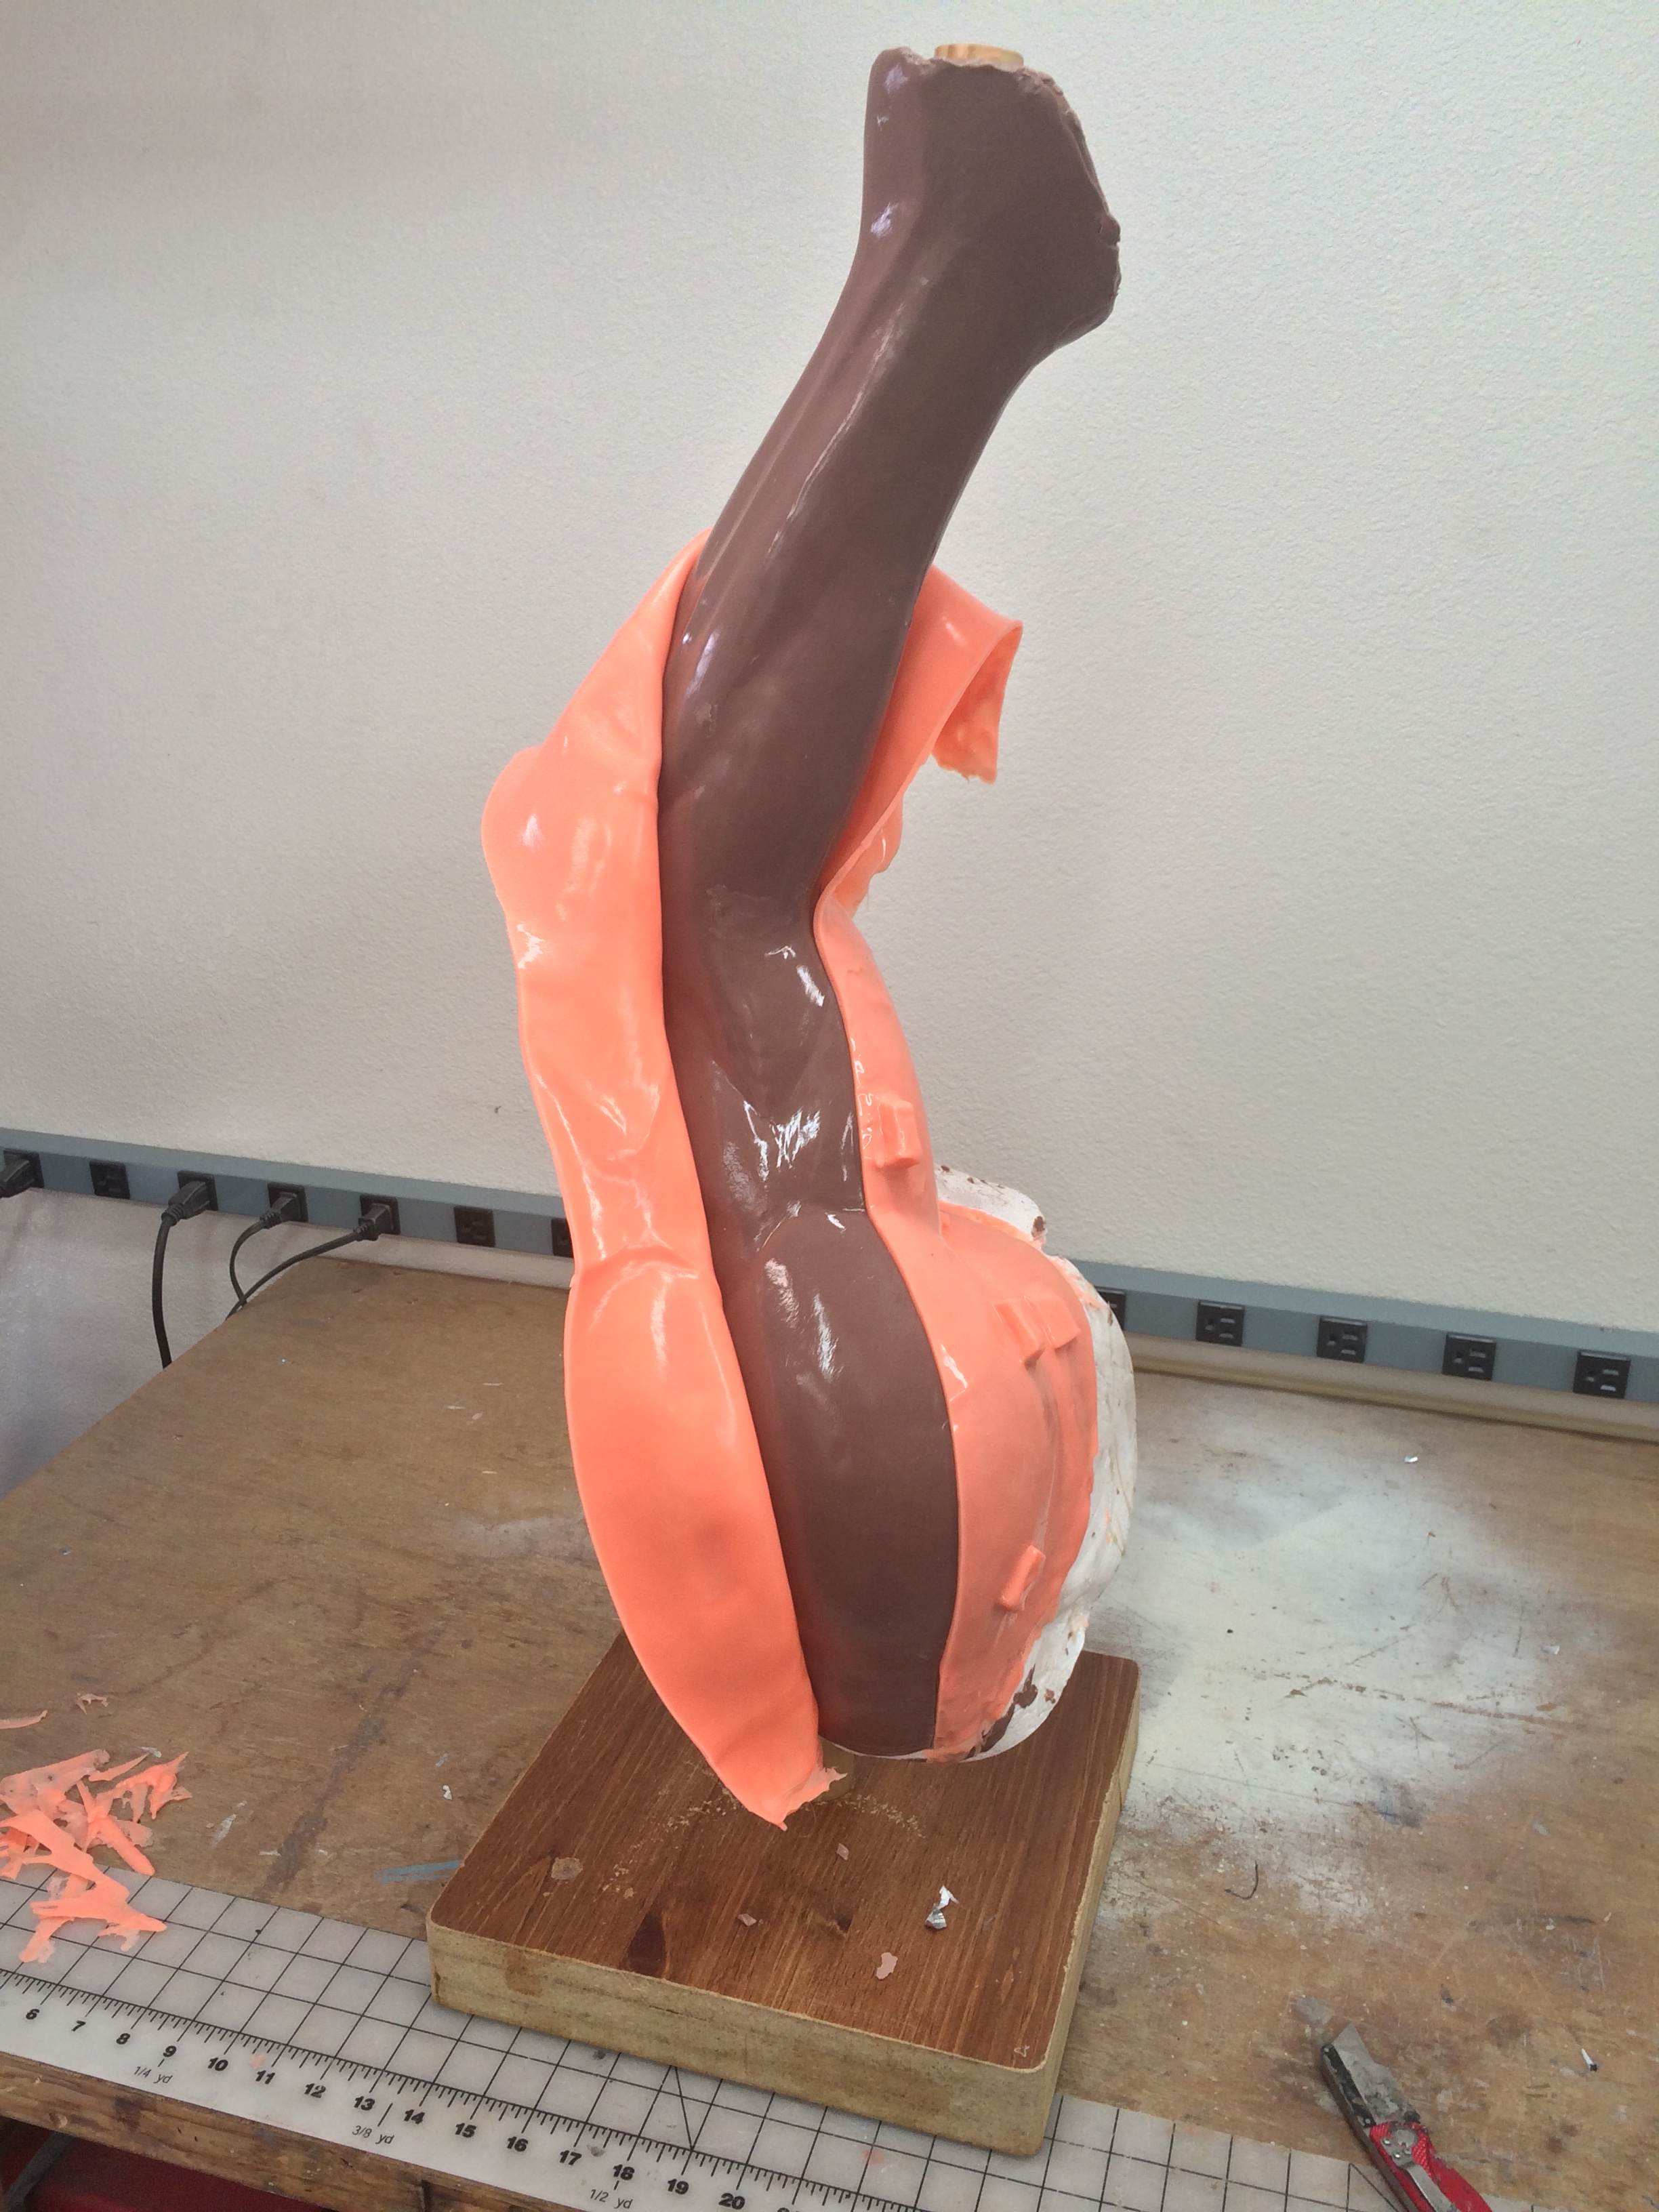
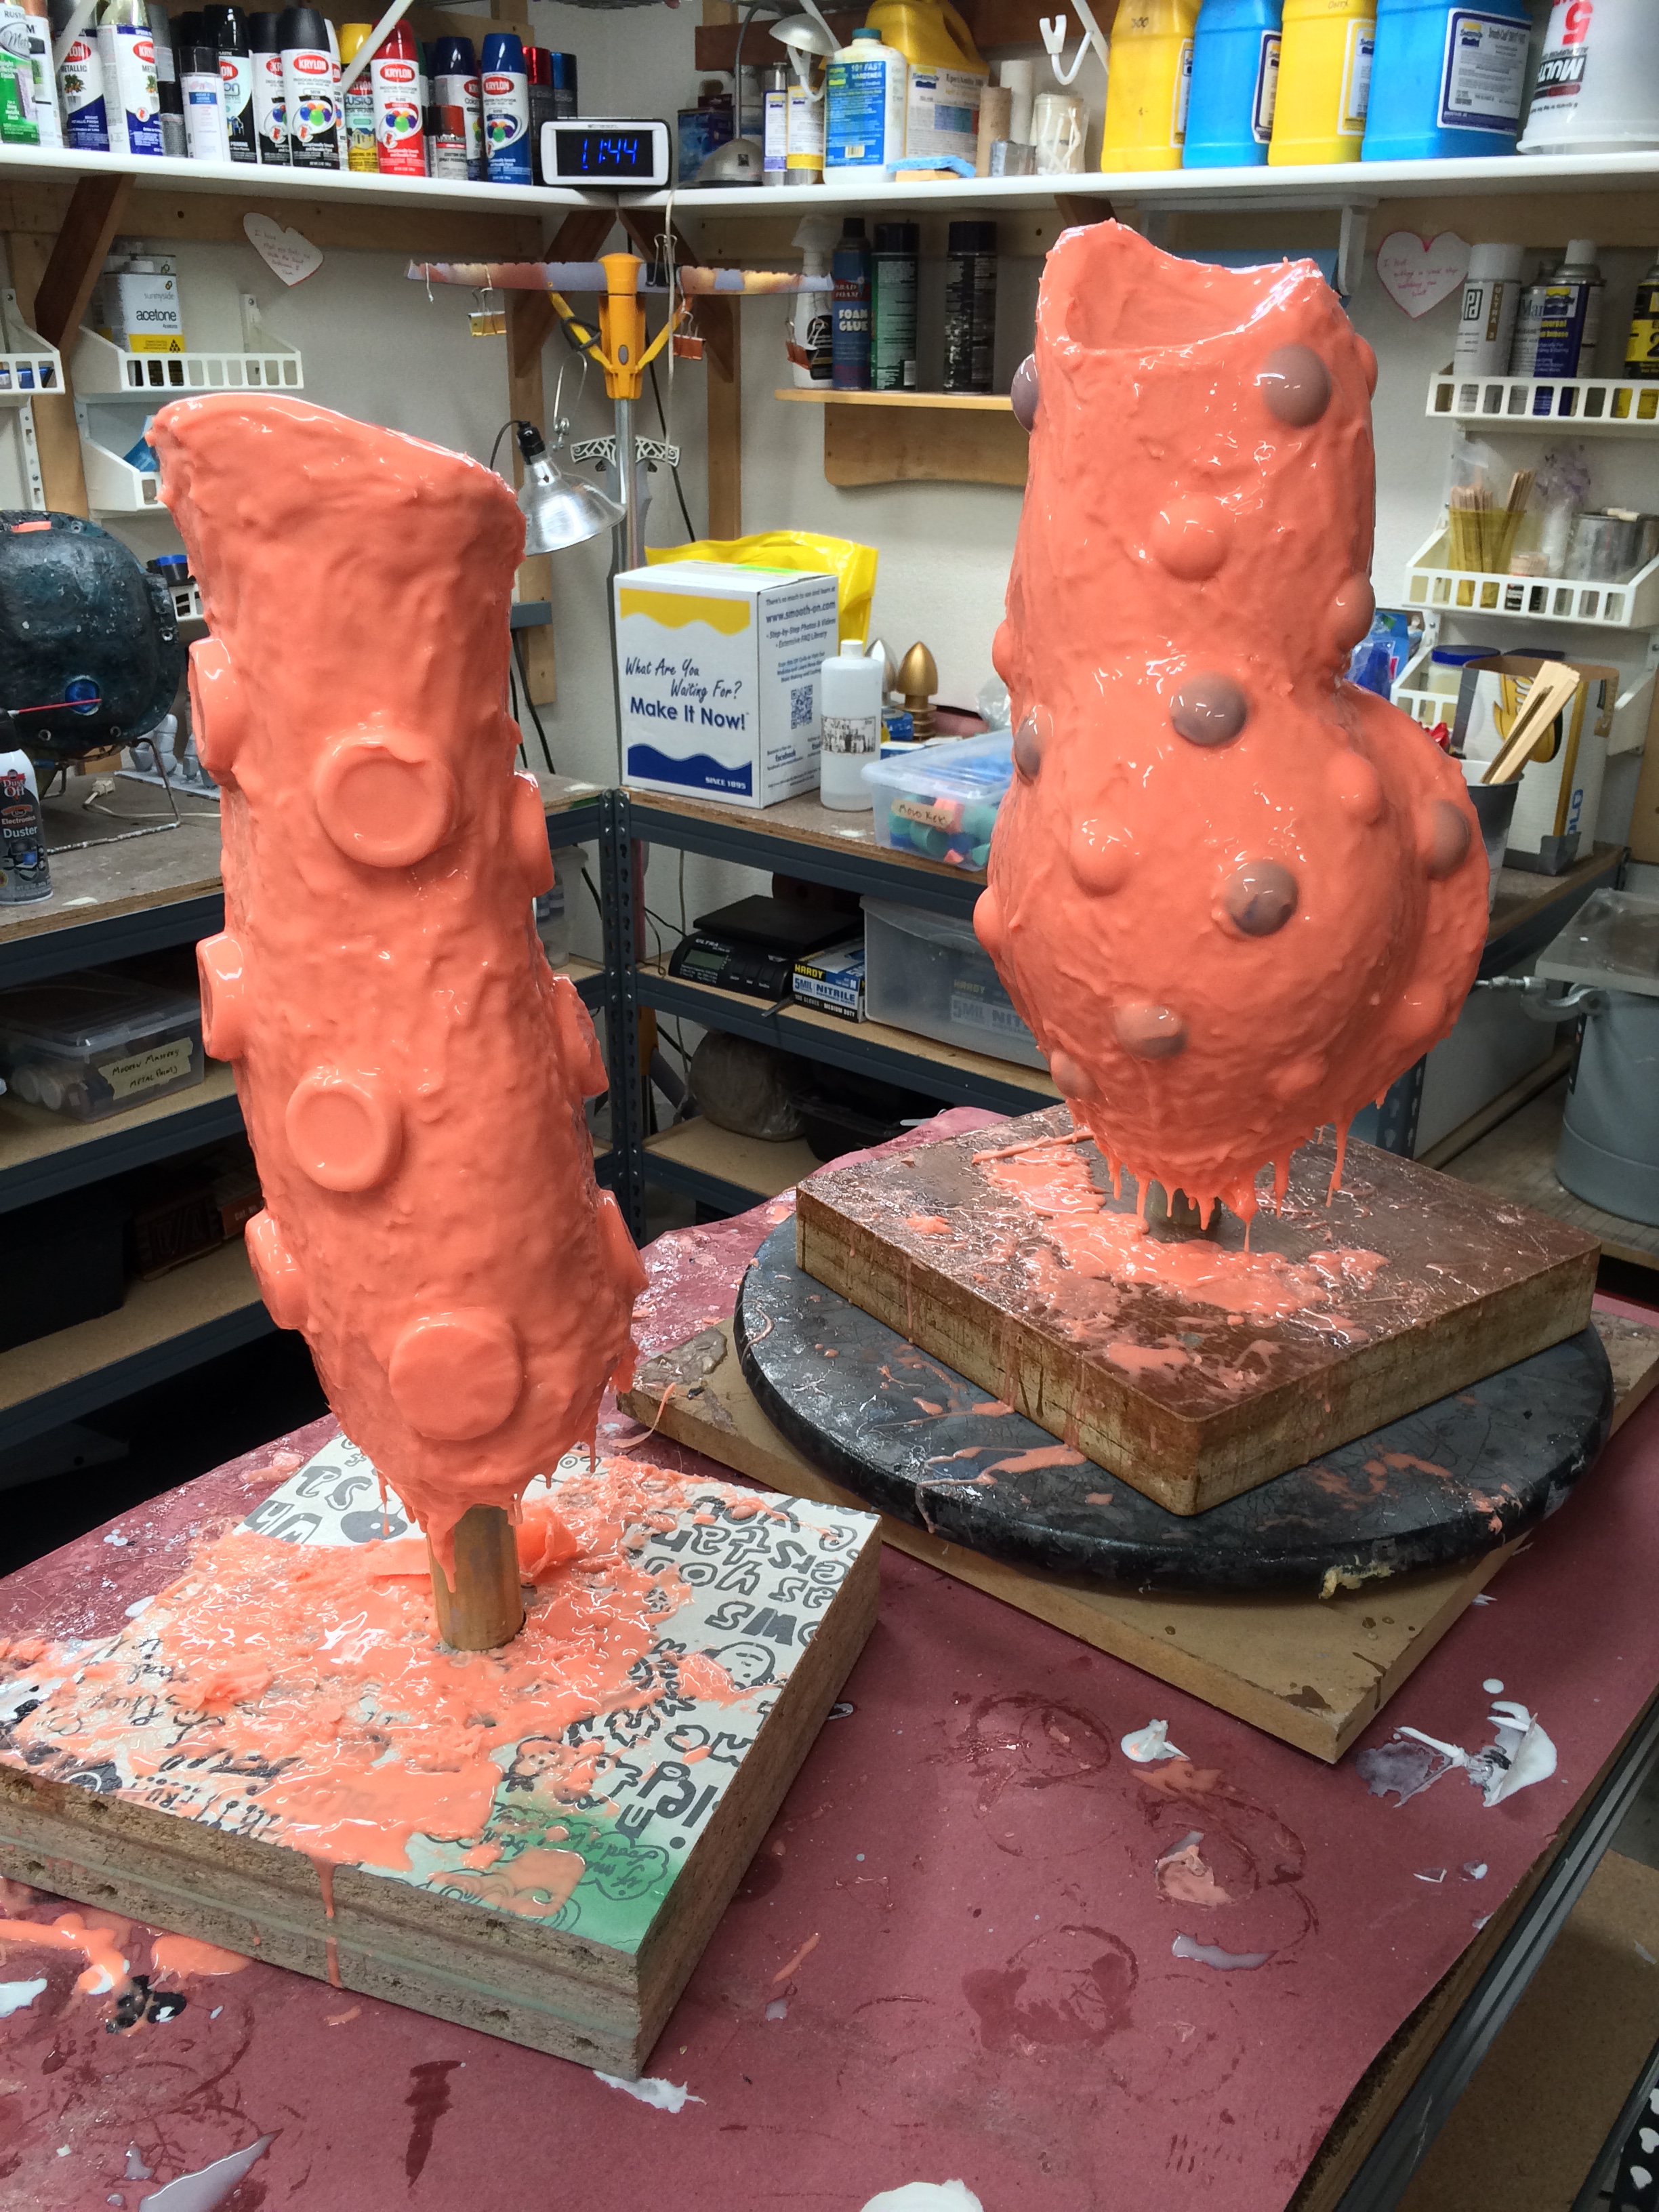
I slush-cast a pair of positives from this new mold so that I’d have a solid base on which to start building all the details of the “real” arm. (The first casting was far too thin in places and bent easily, so I made a second, sturdier casting.) Once I had a good resin copy, I realized I wanted certain areas to be bulkier – so I sculpted more mass onto the cast using Apoxie Sculpt (a 2 part clay that hardens into plastic when dry). That turned out to still not be enough, but I was out of Apoxie Sculpt so I switched to Smooth-On Free Form Air – a true epoxy putty. The Free Form Air turned out to be a good choice – it sands much faster than Apoxie Sculpt (and in this case it didn’t matter that it’s very porous – something that normally makes it a less ideal choice for sculpting).


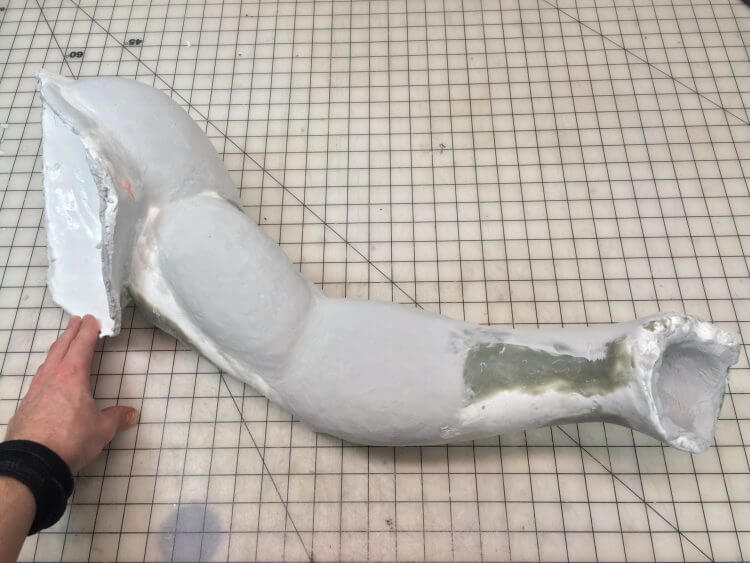
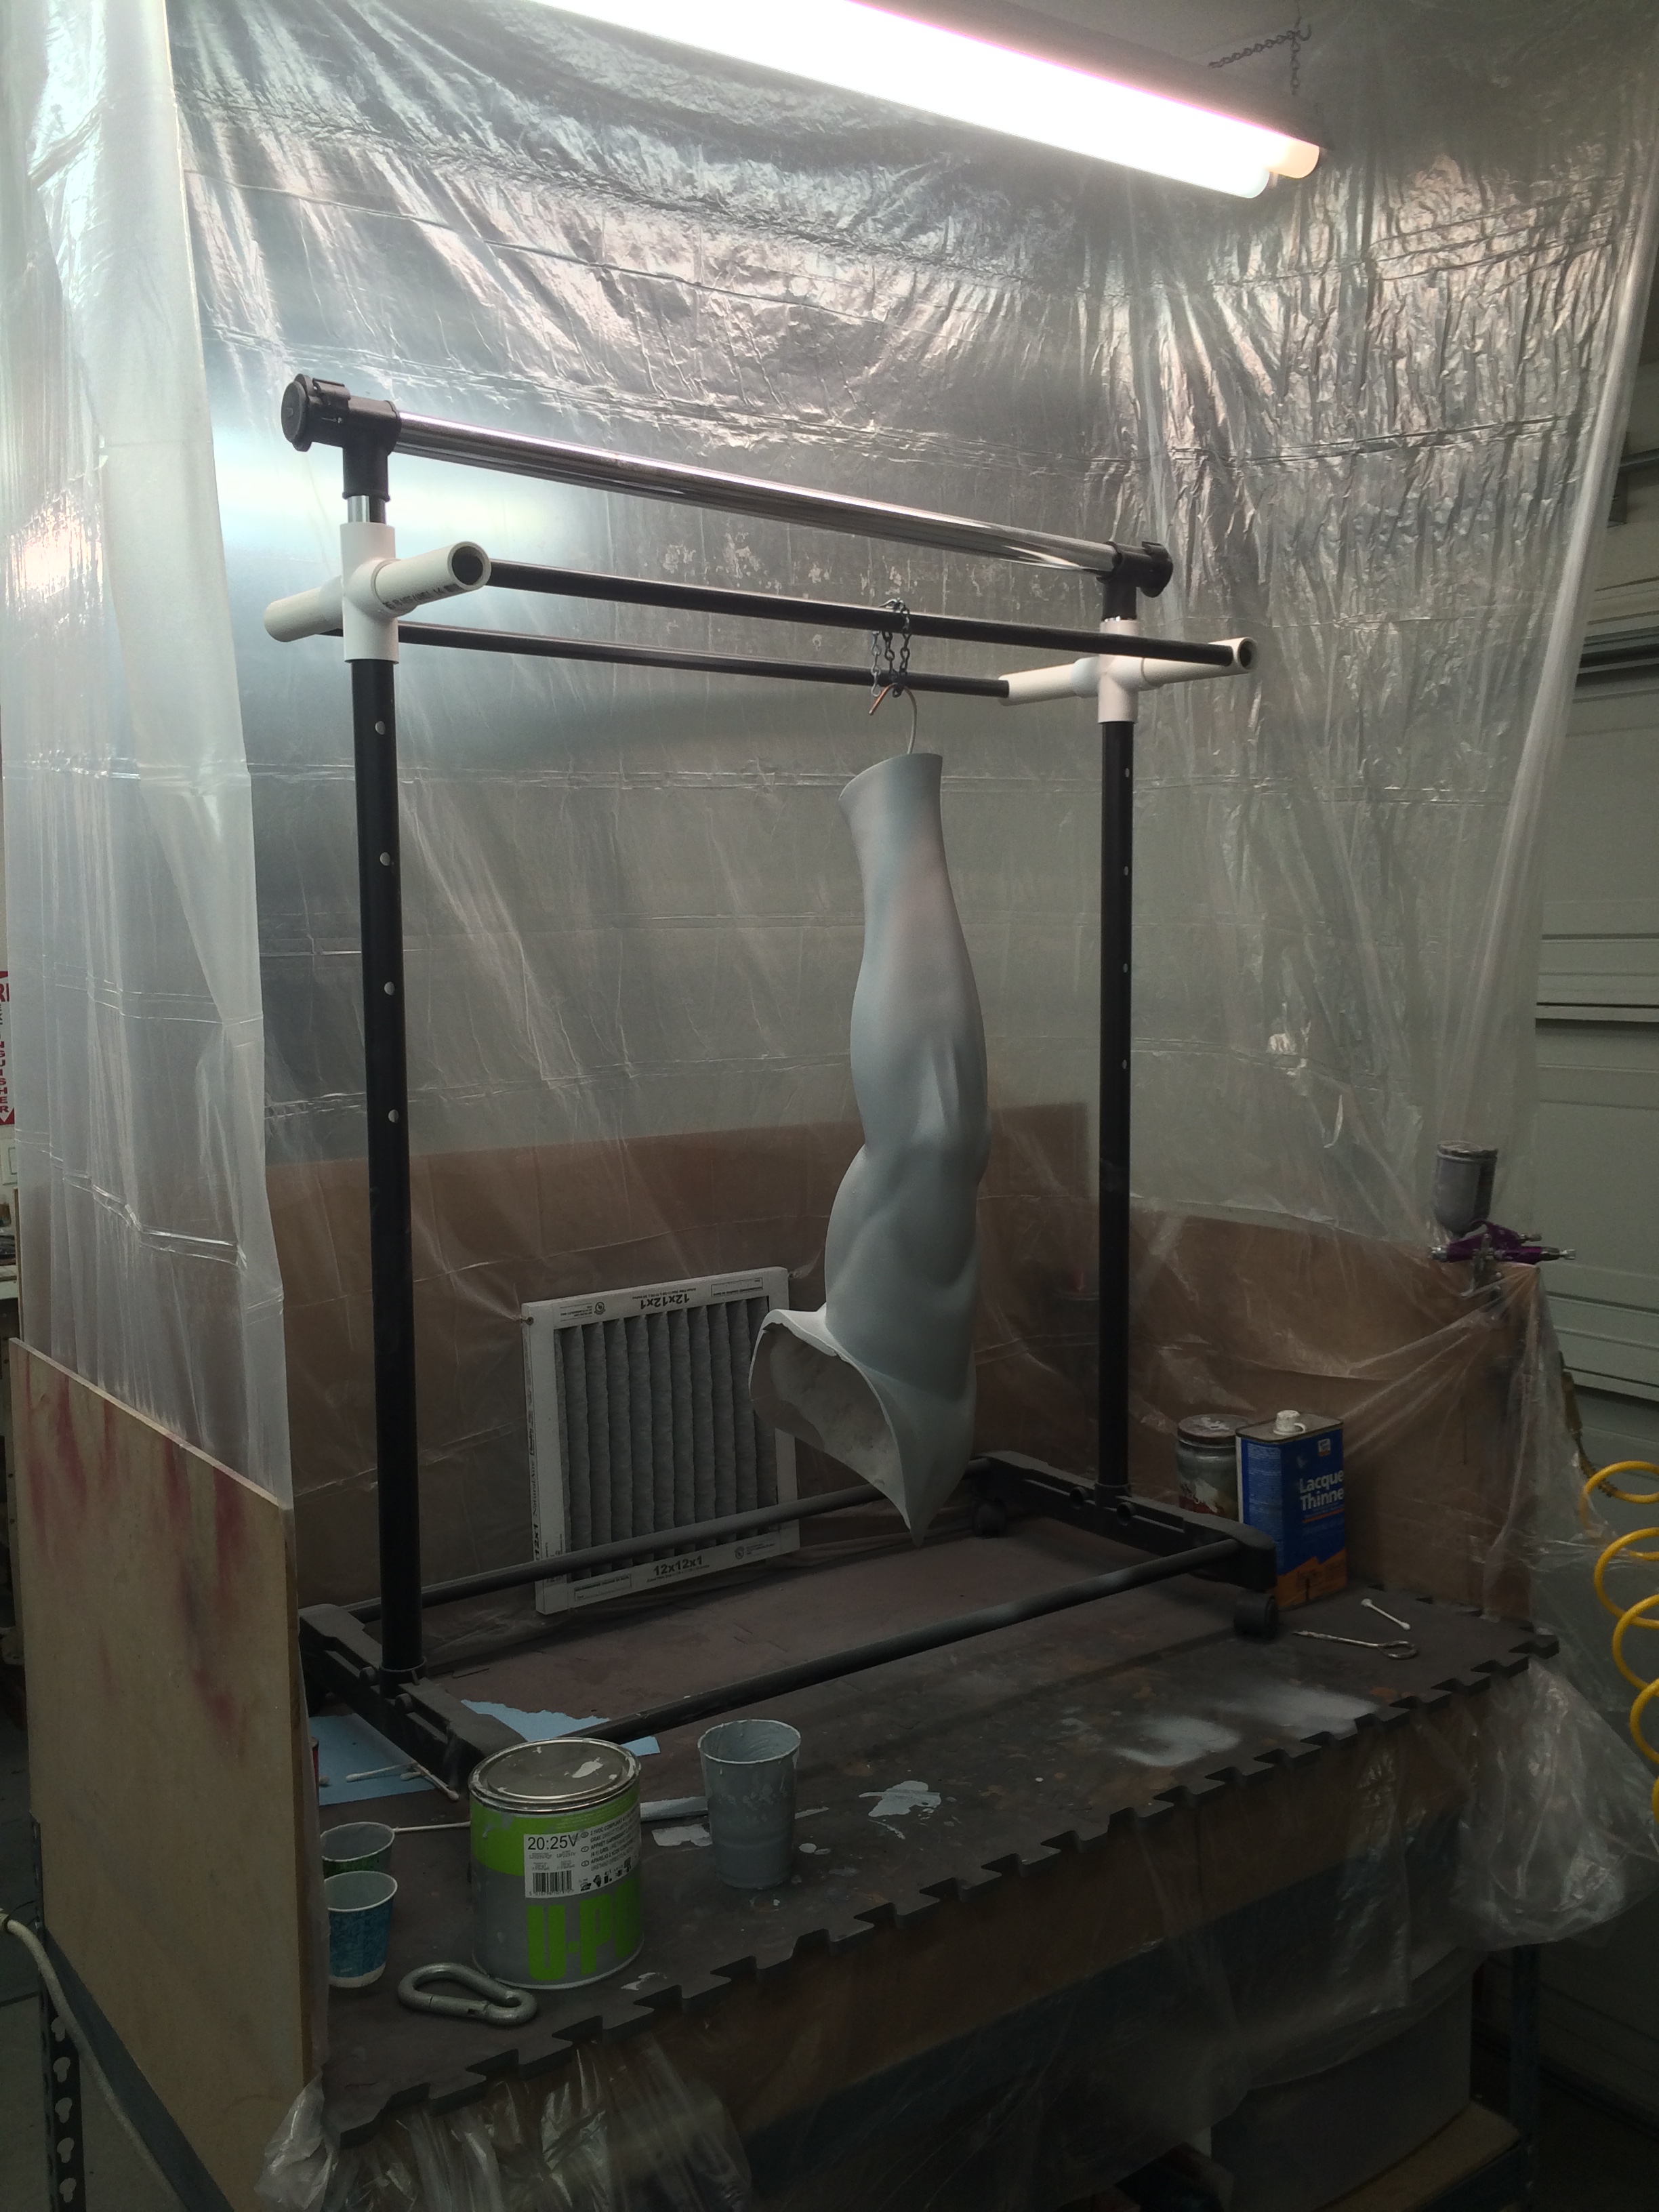
At this point I still wasn’t sure how I was going to add in all the detail lines on the forearm section, so I made the entire Arm smooth. Some bondo and spot putty and sanding, then a pass of rattle-can primer to check the overall shapes, and finally several layers of high-build catalyzed primer. This was also the debut of my “spray booth” – the Arm was just too big to spray without hanging, and I didn’t want to be blasting primer all over my shop. The booth won’t pass any inspections, but it gets the job done!
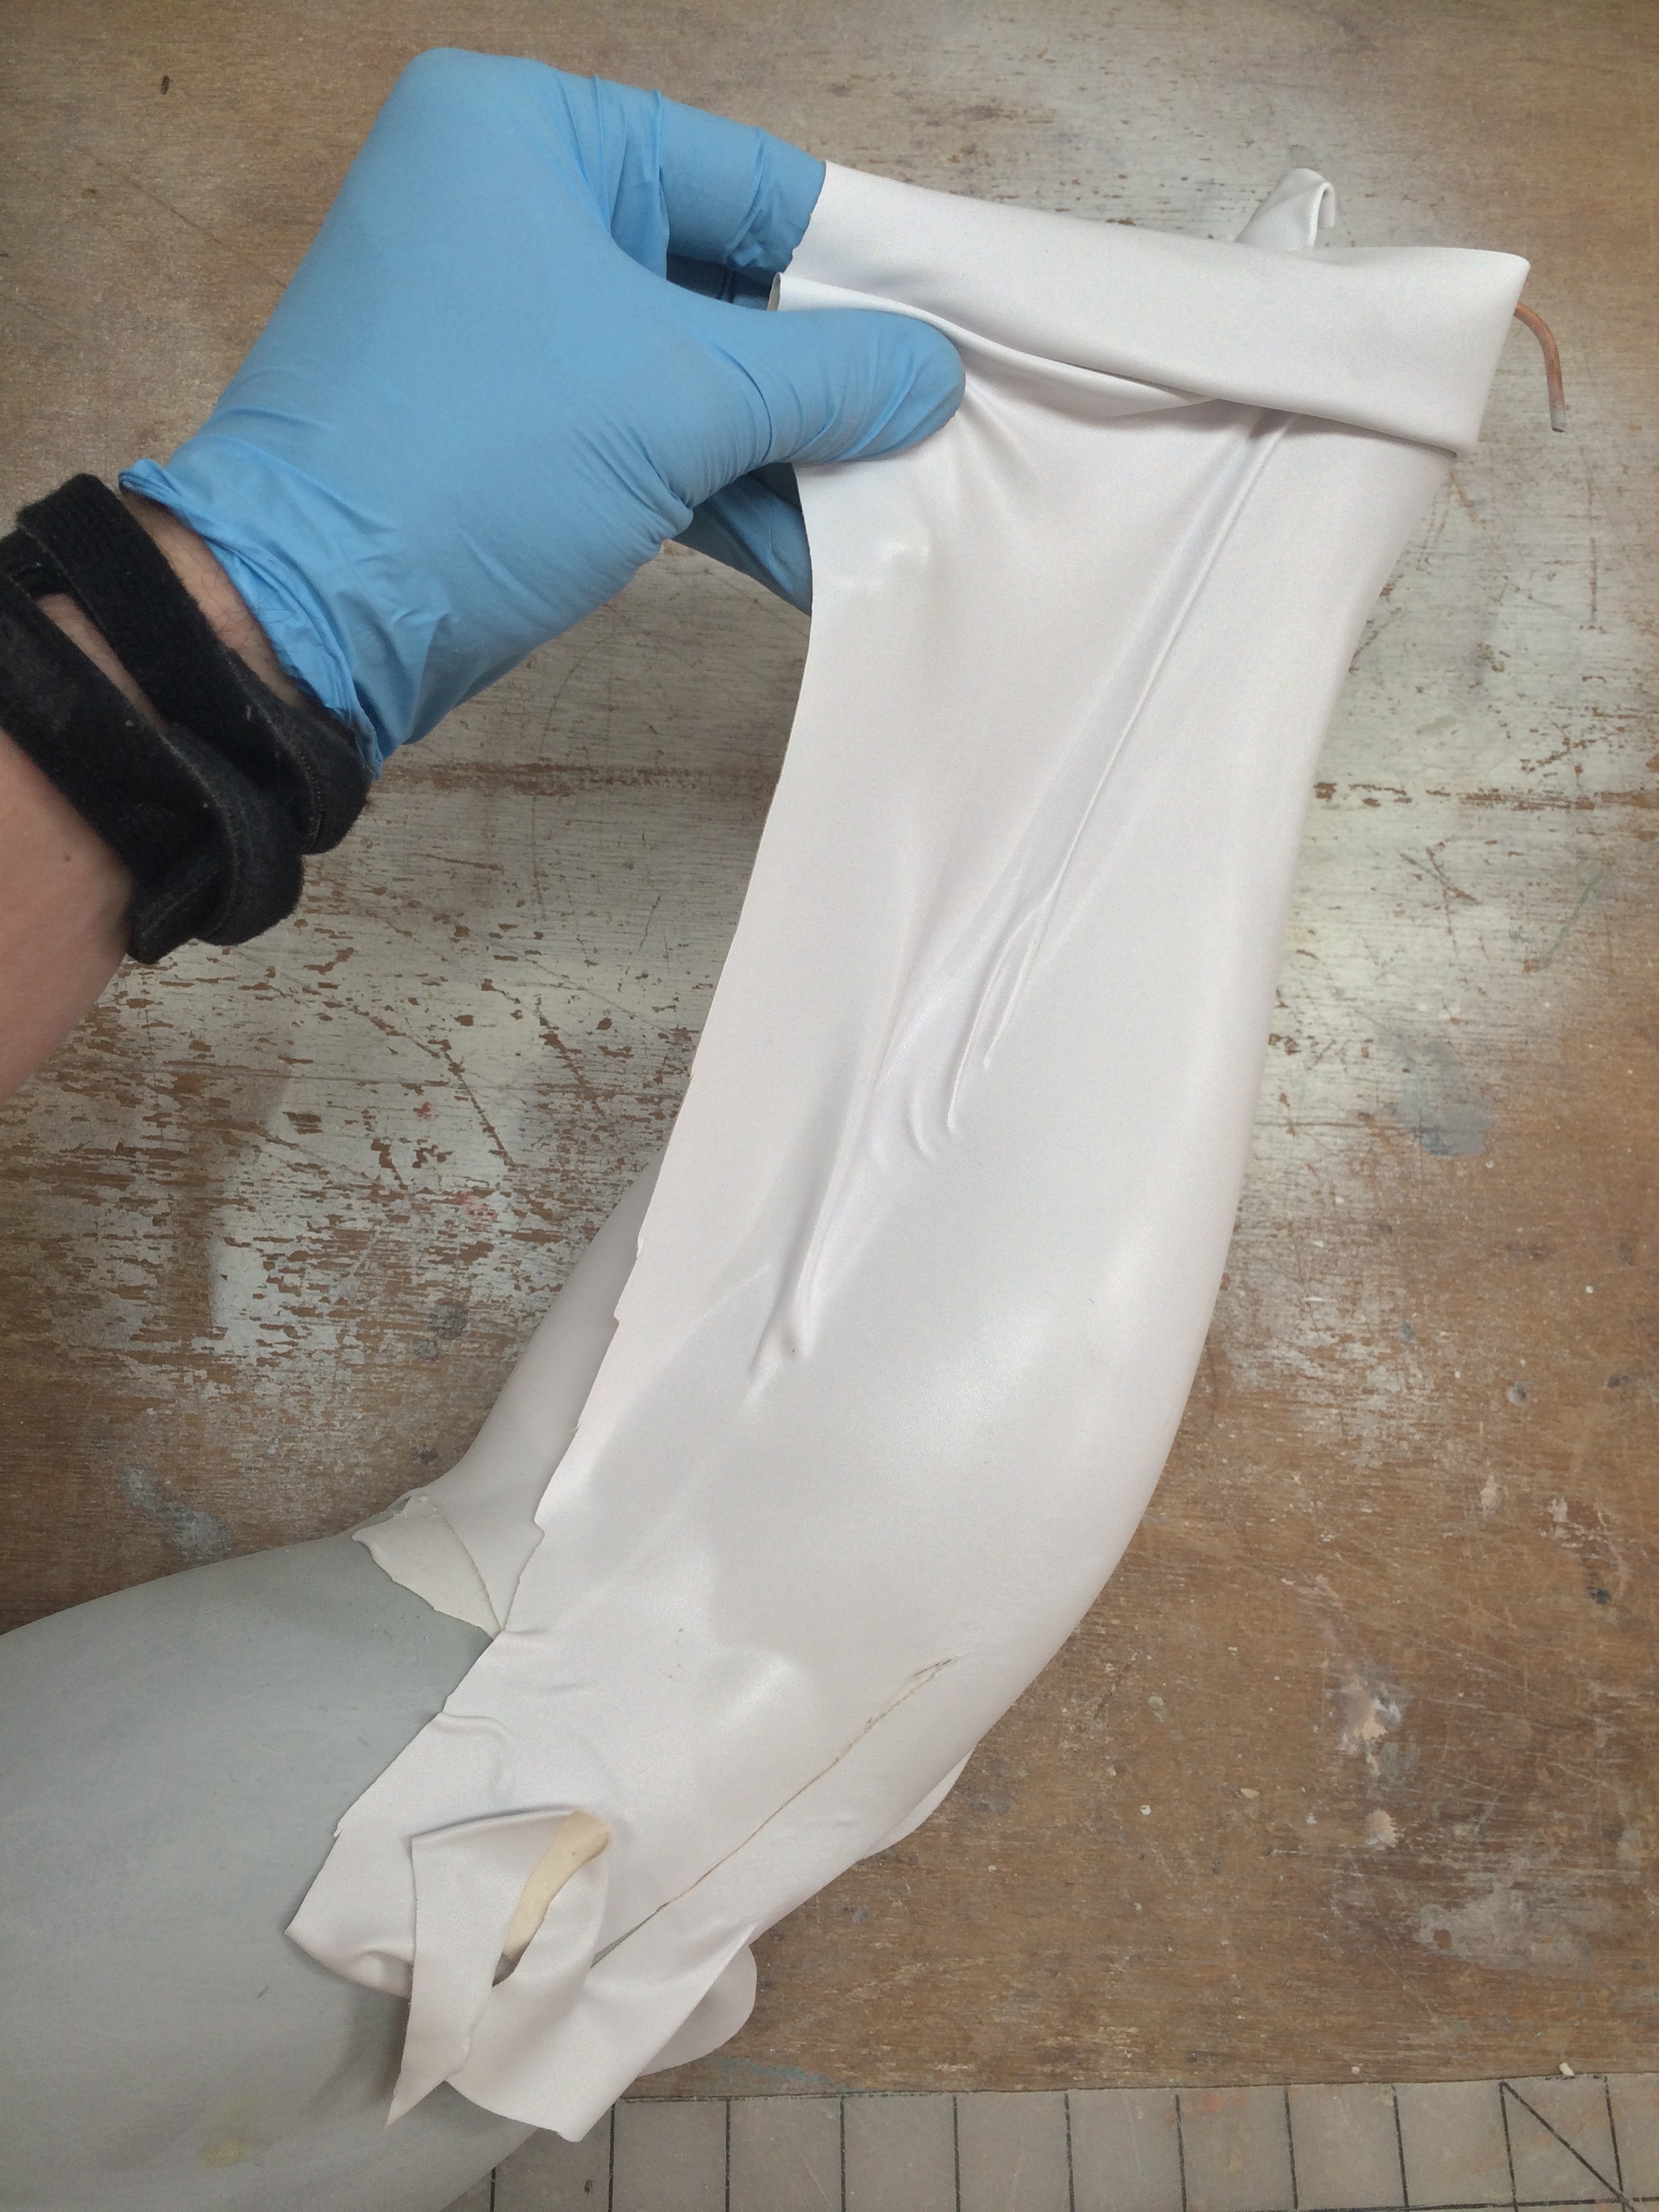
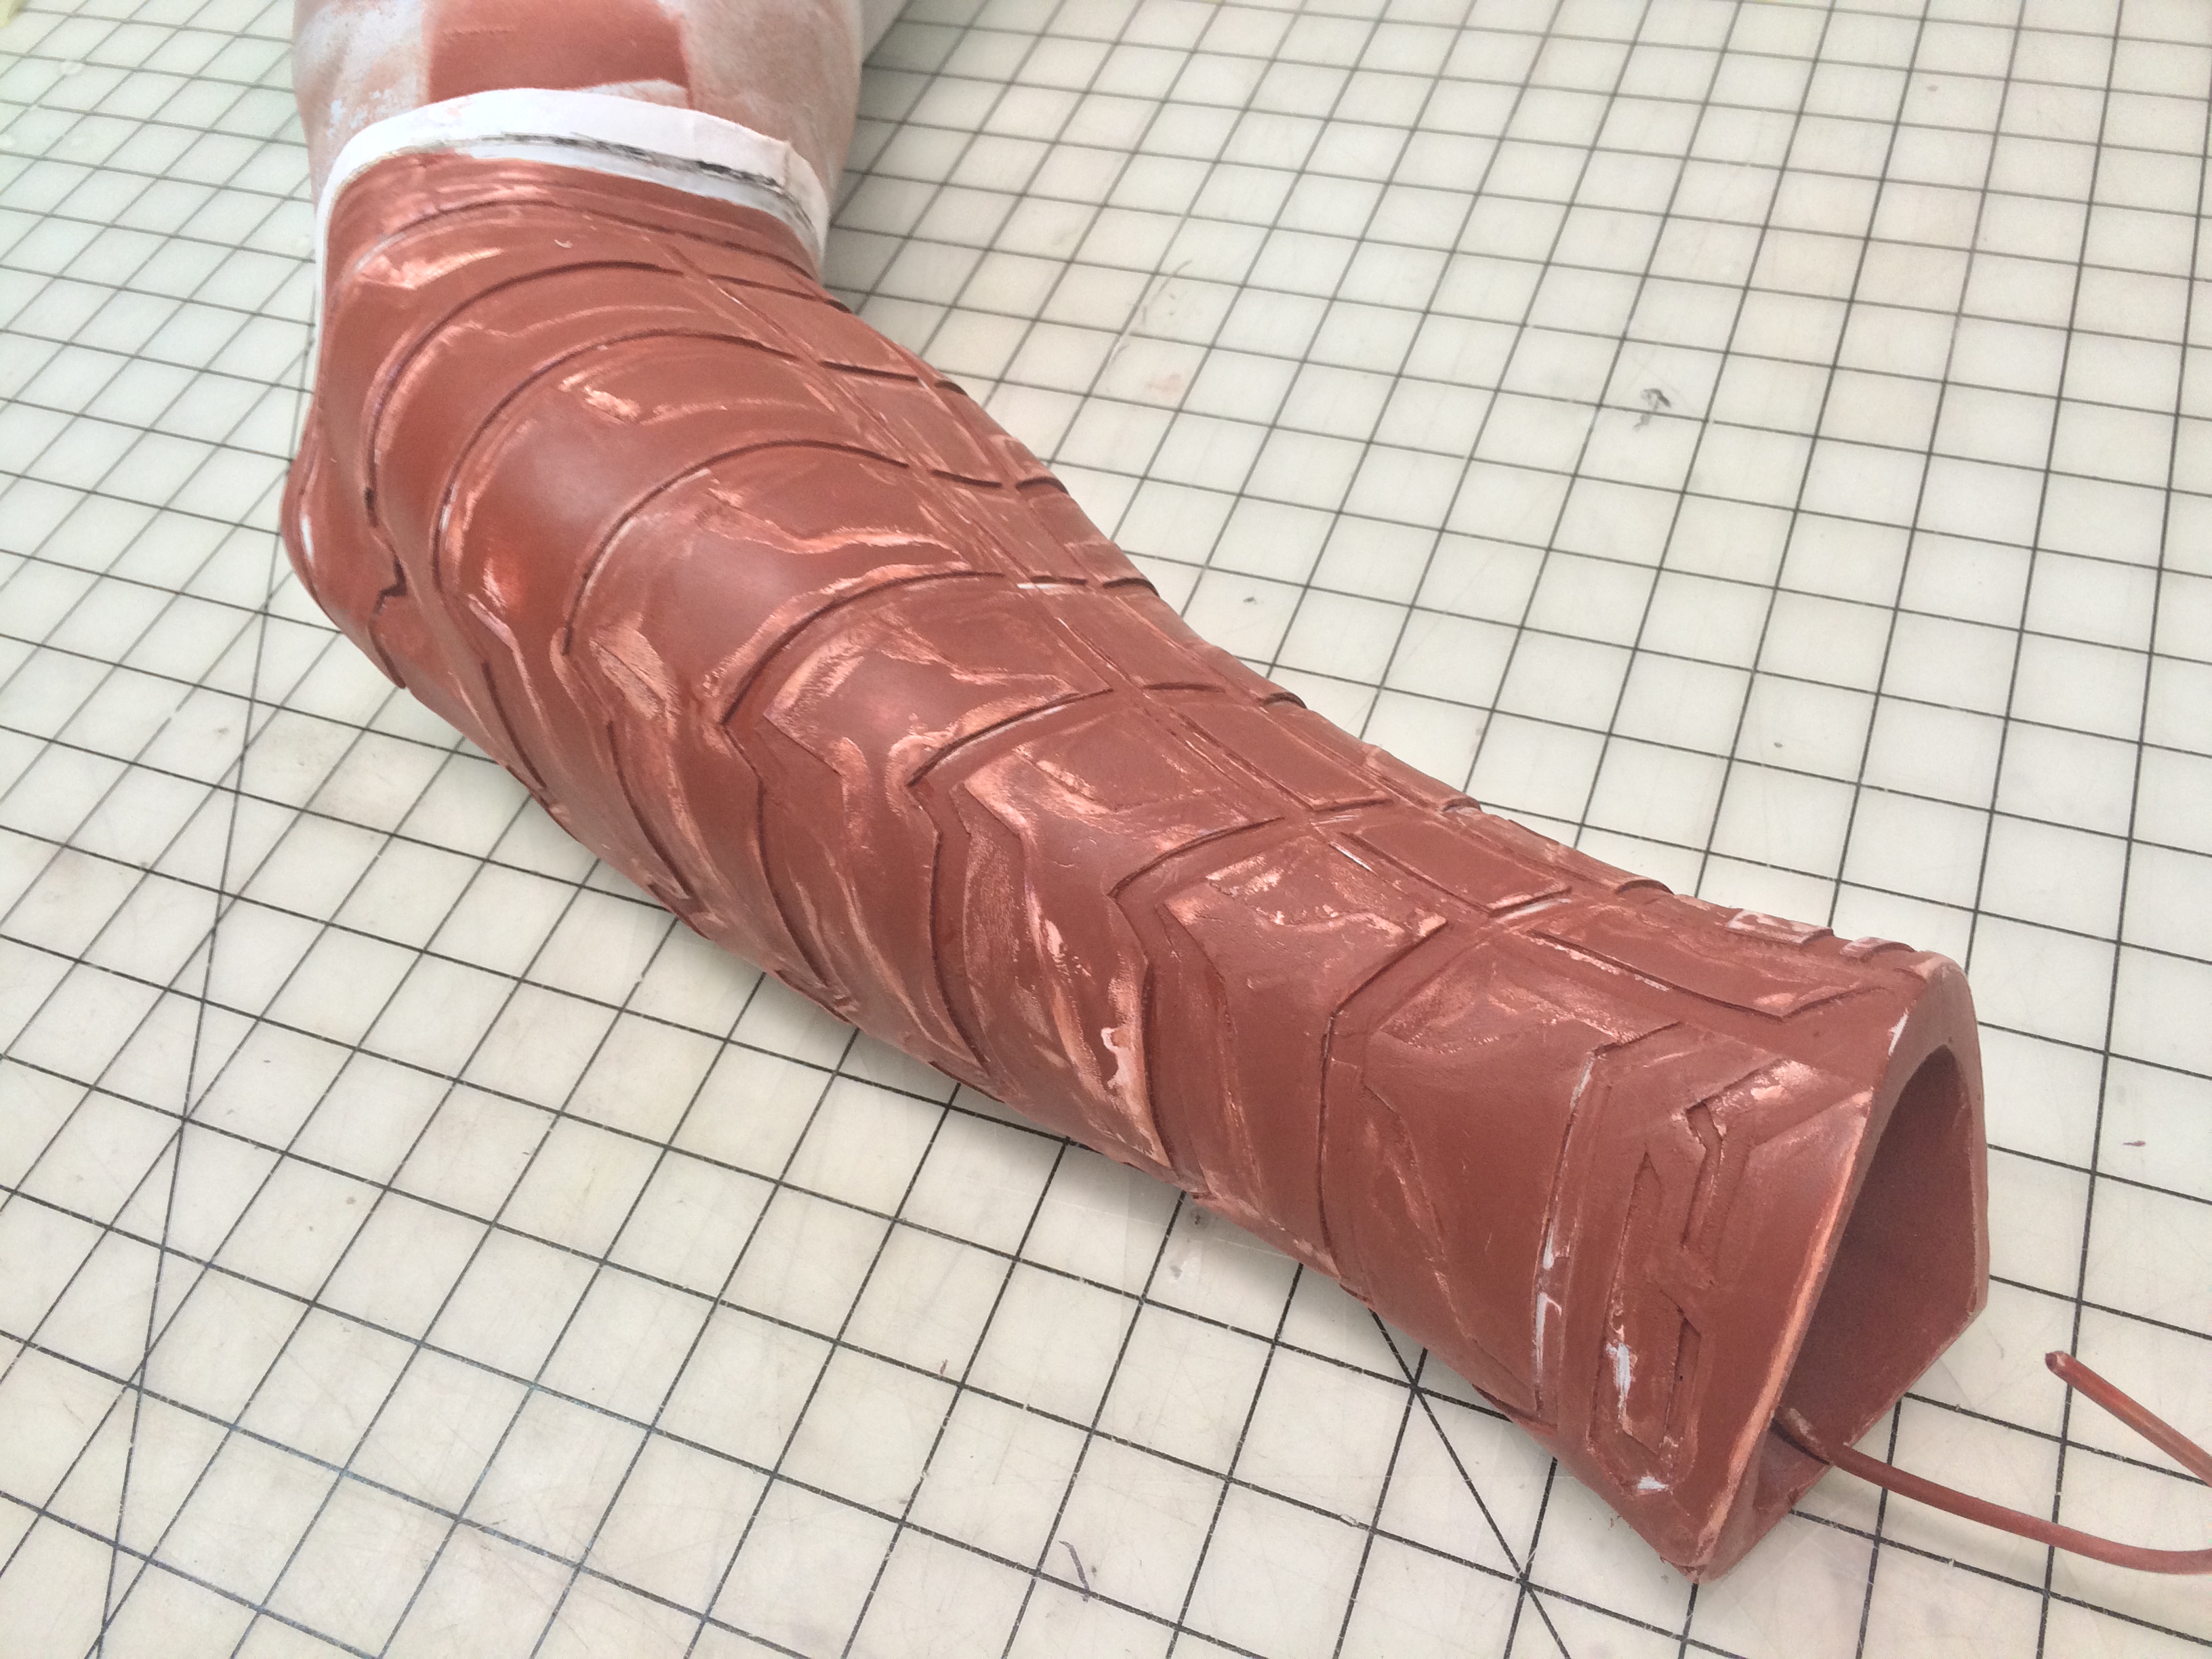
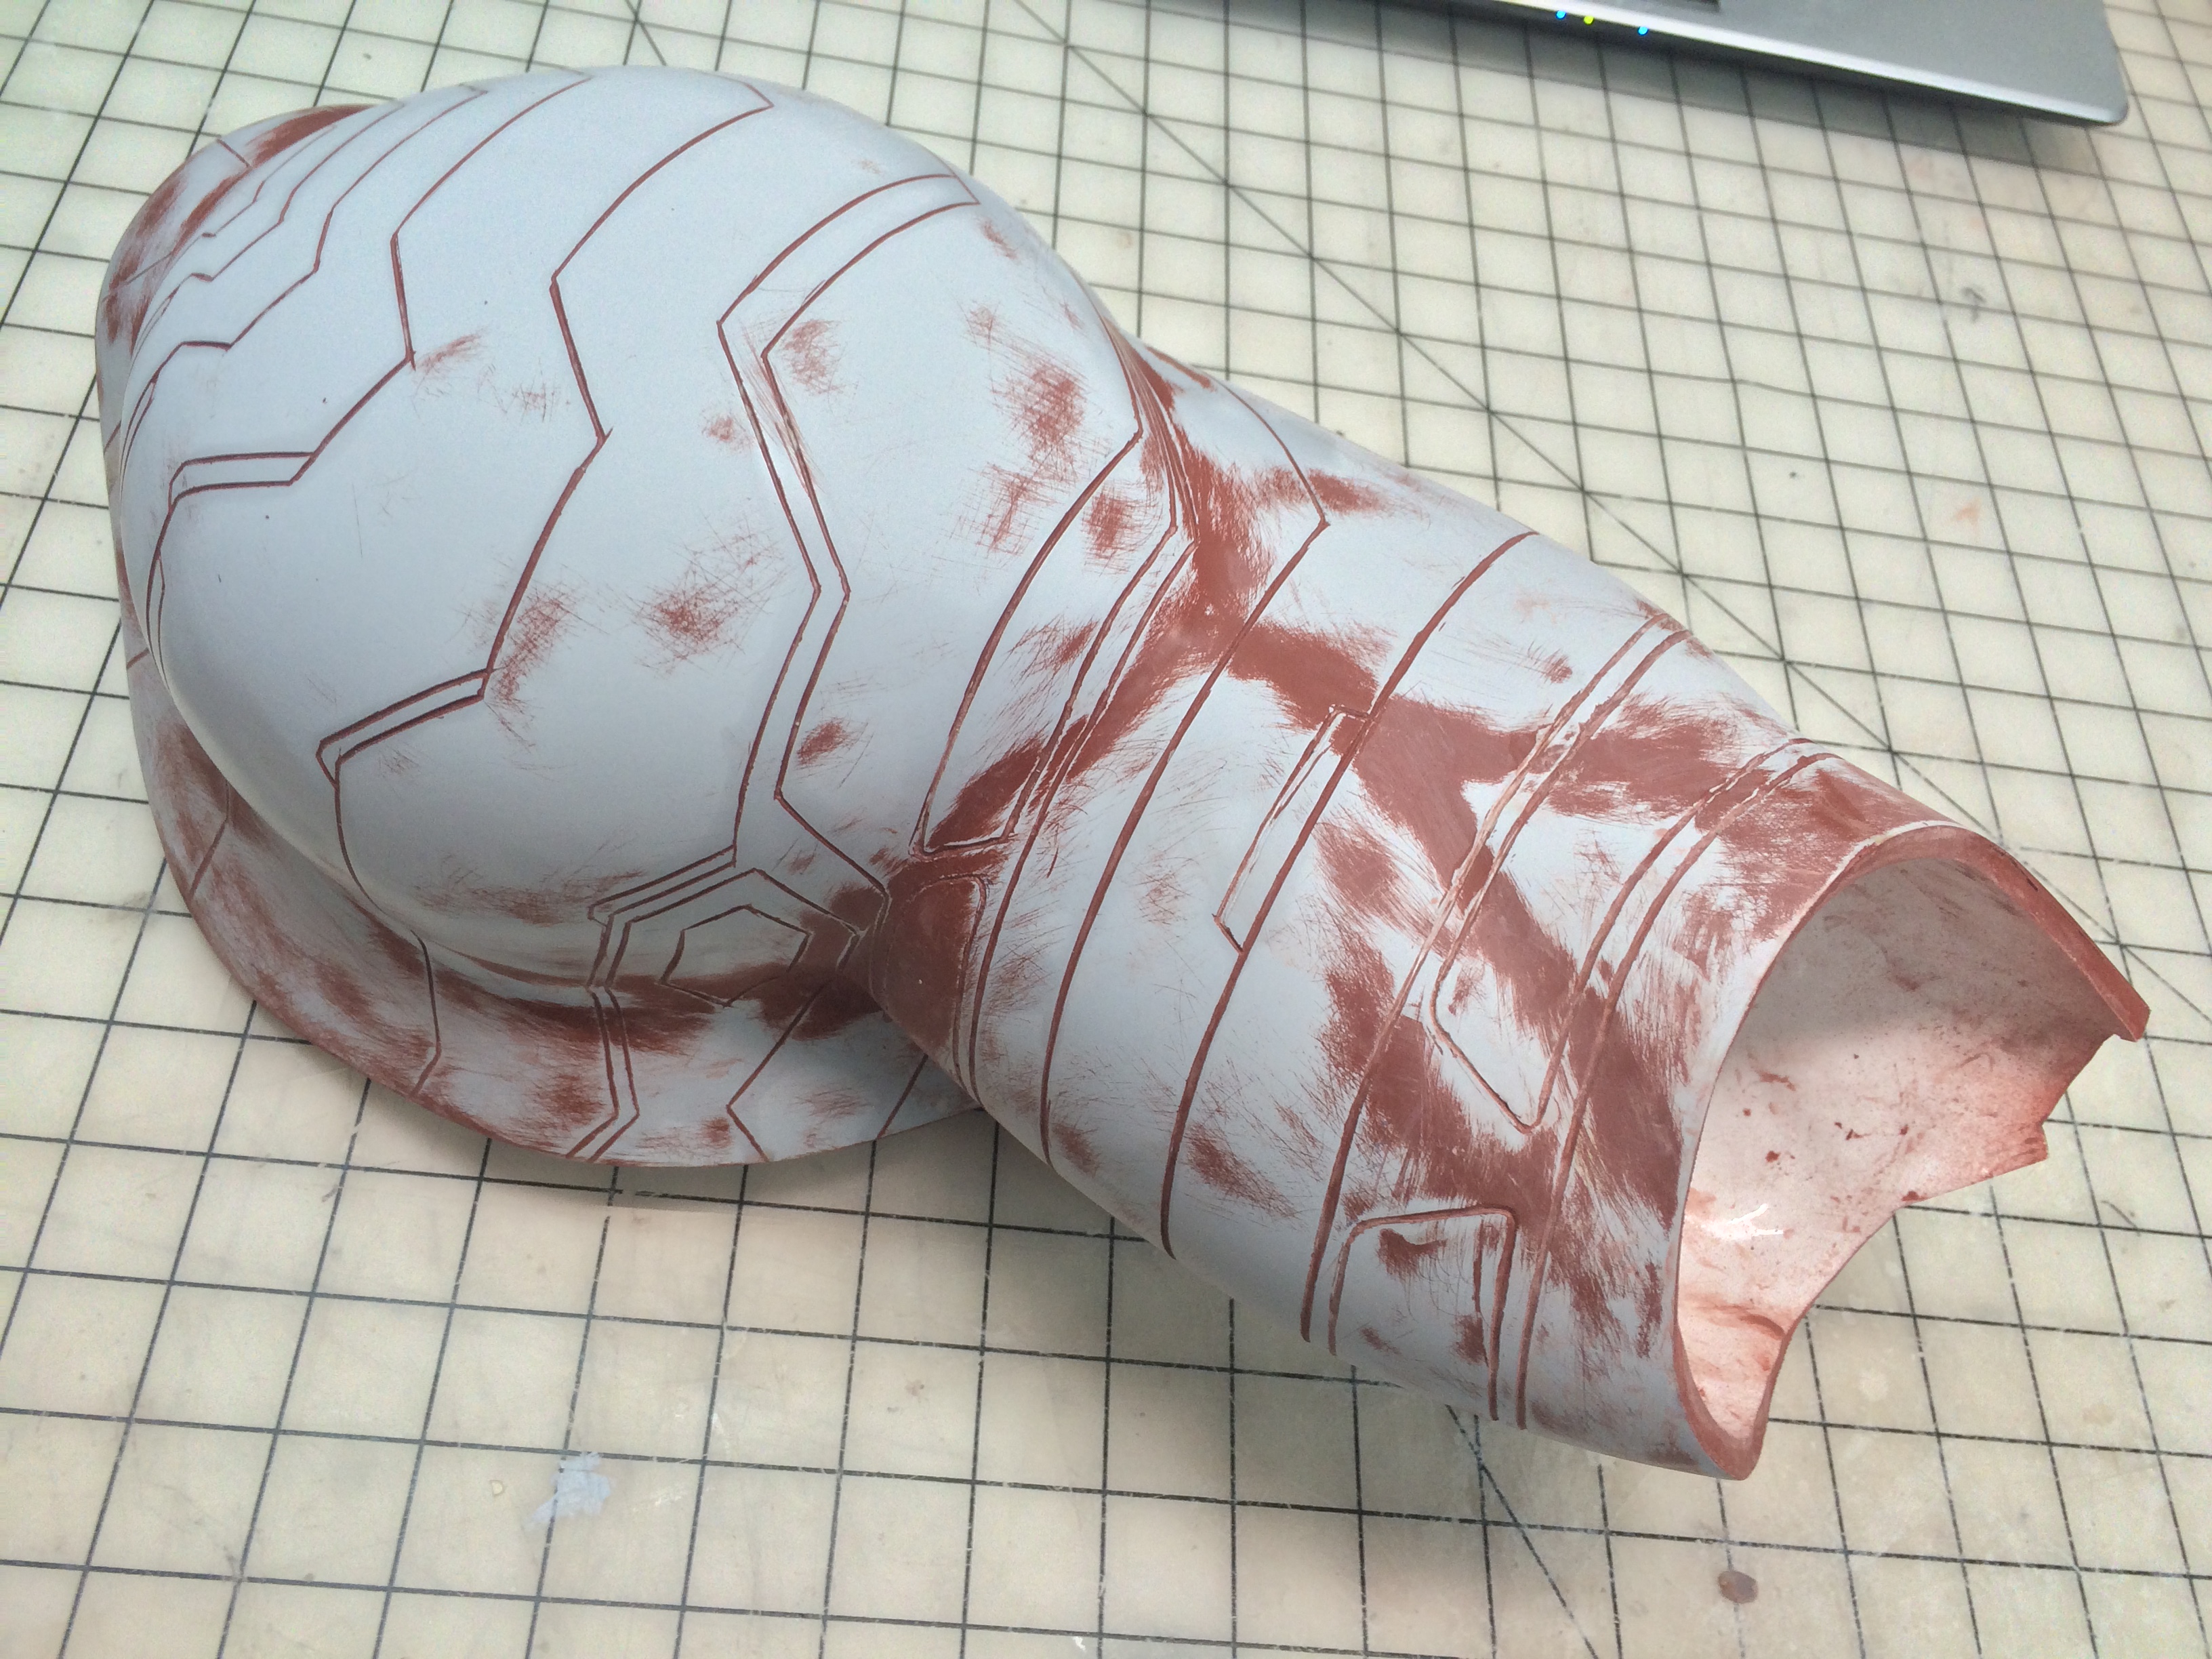
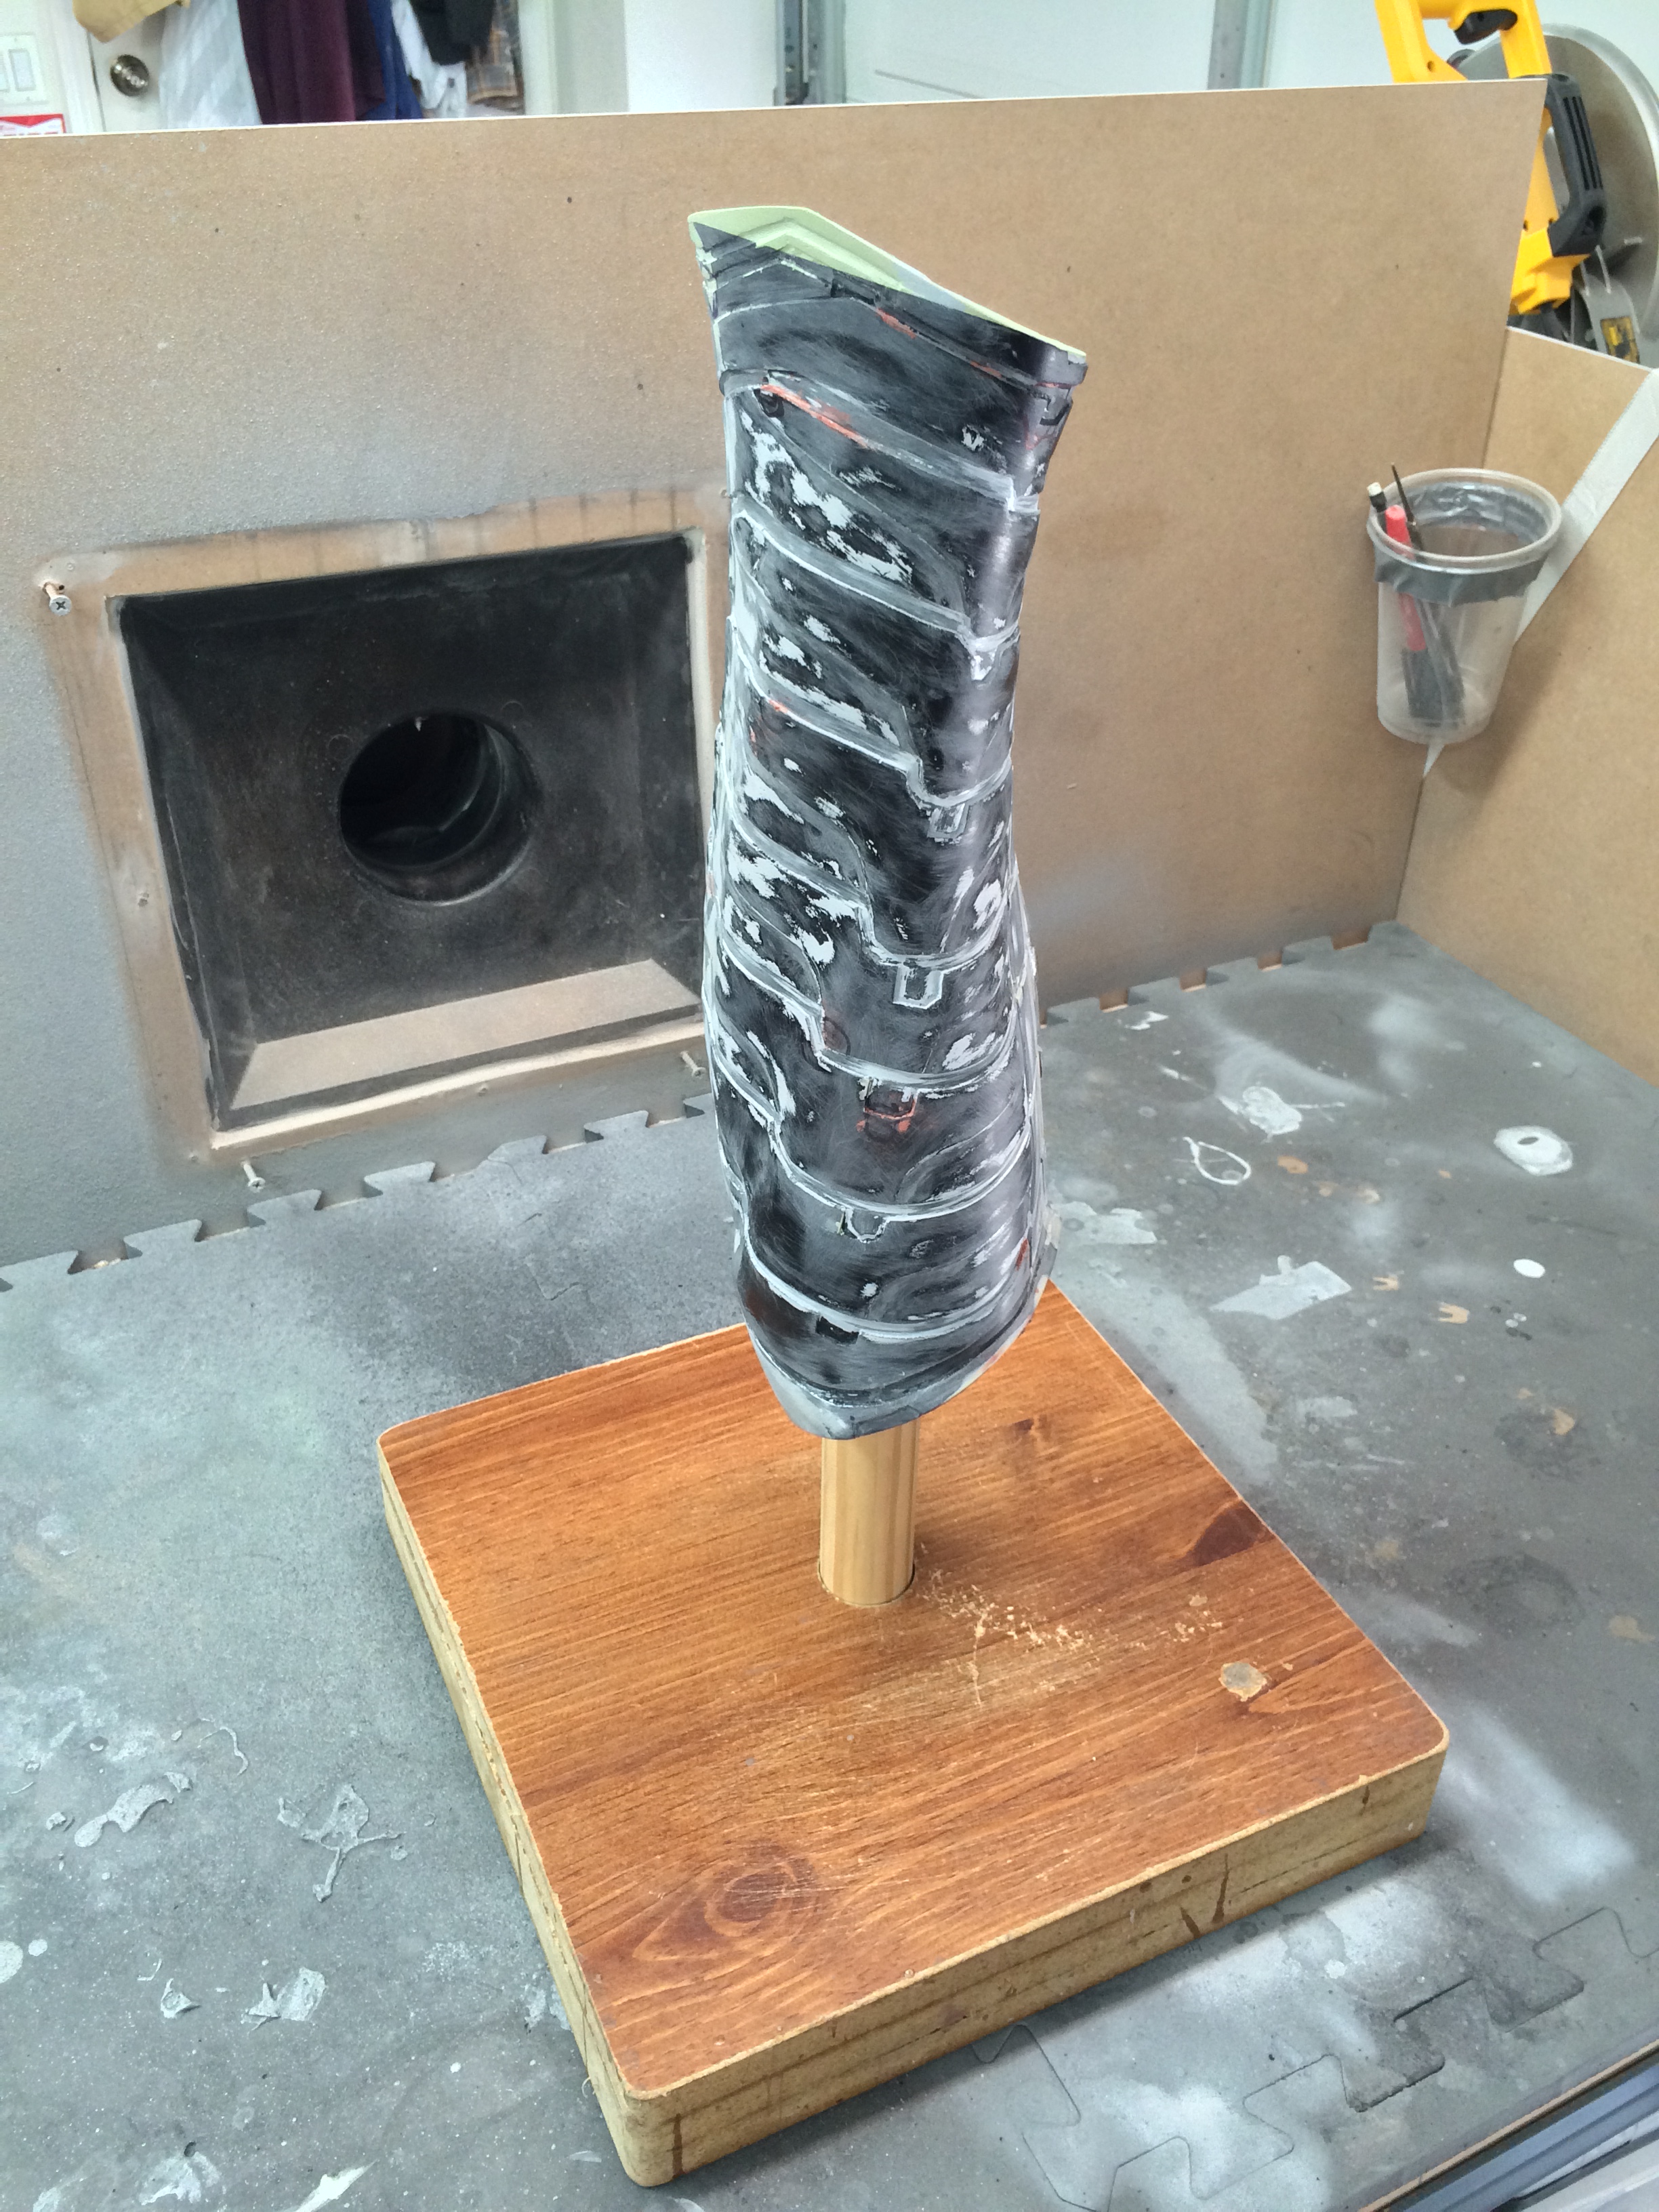
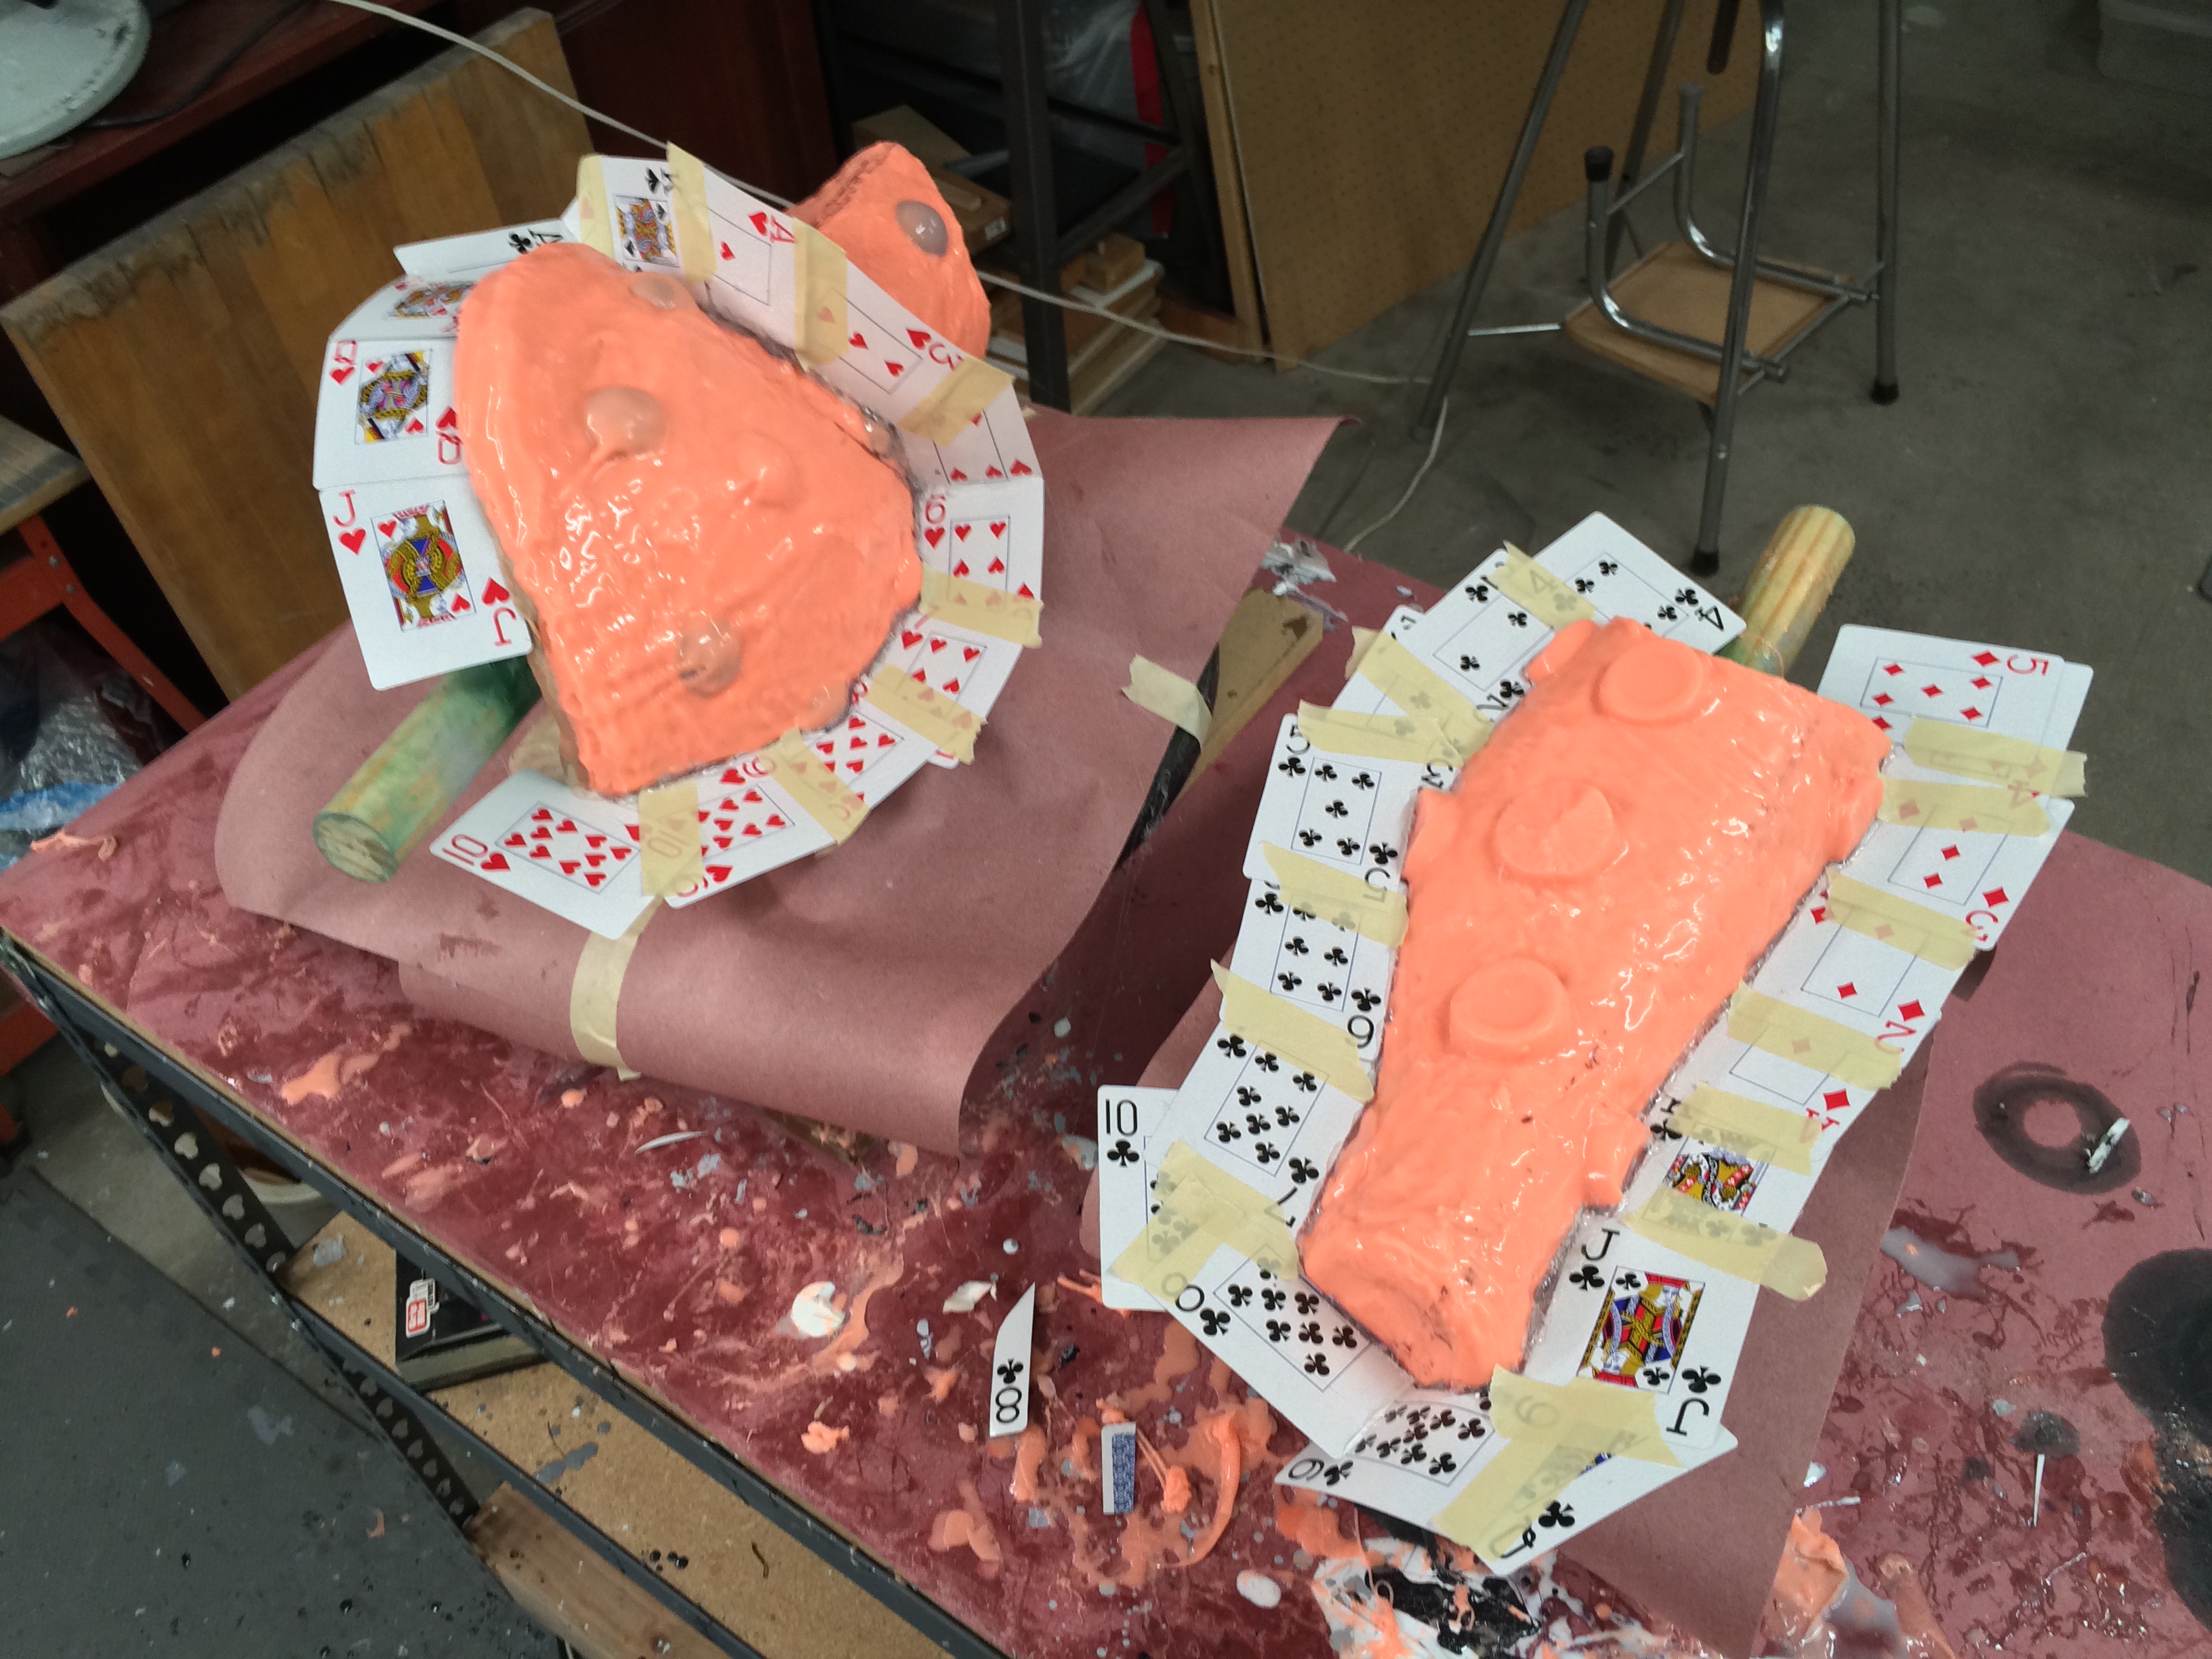
Finally it was time to start adding in all those details! I’d decided to do this by adding layers to the Arm, as opposed to taking material away, because it seemed the most straightforward way to keep the muscles and shapes I’d sculpted already. I had some scraps of a rubberized spandex – a 4-way stretch material with a glossy outer coating. I glued 2 layers of this to the Arm with Super 77 spray adhesive, and cleaned up the seams as best I could. Then I went to work tracing out the accent lines in exacting detail (I’d already done this once, on the first cast of the muscled Arm, before realizing I needed to make alterations and would be painting over it anyway).
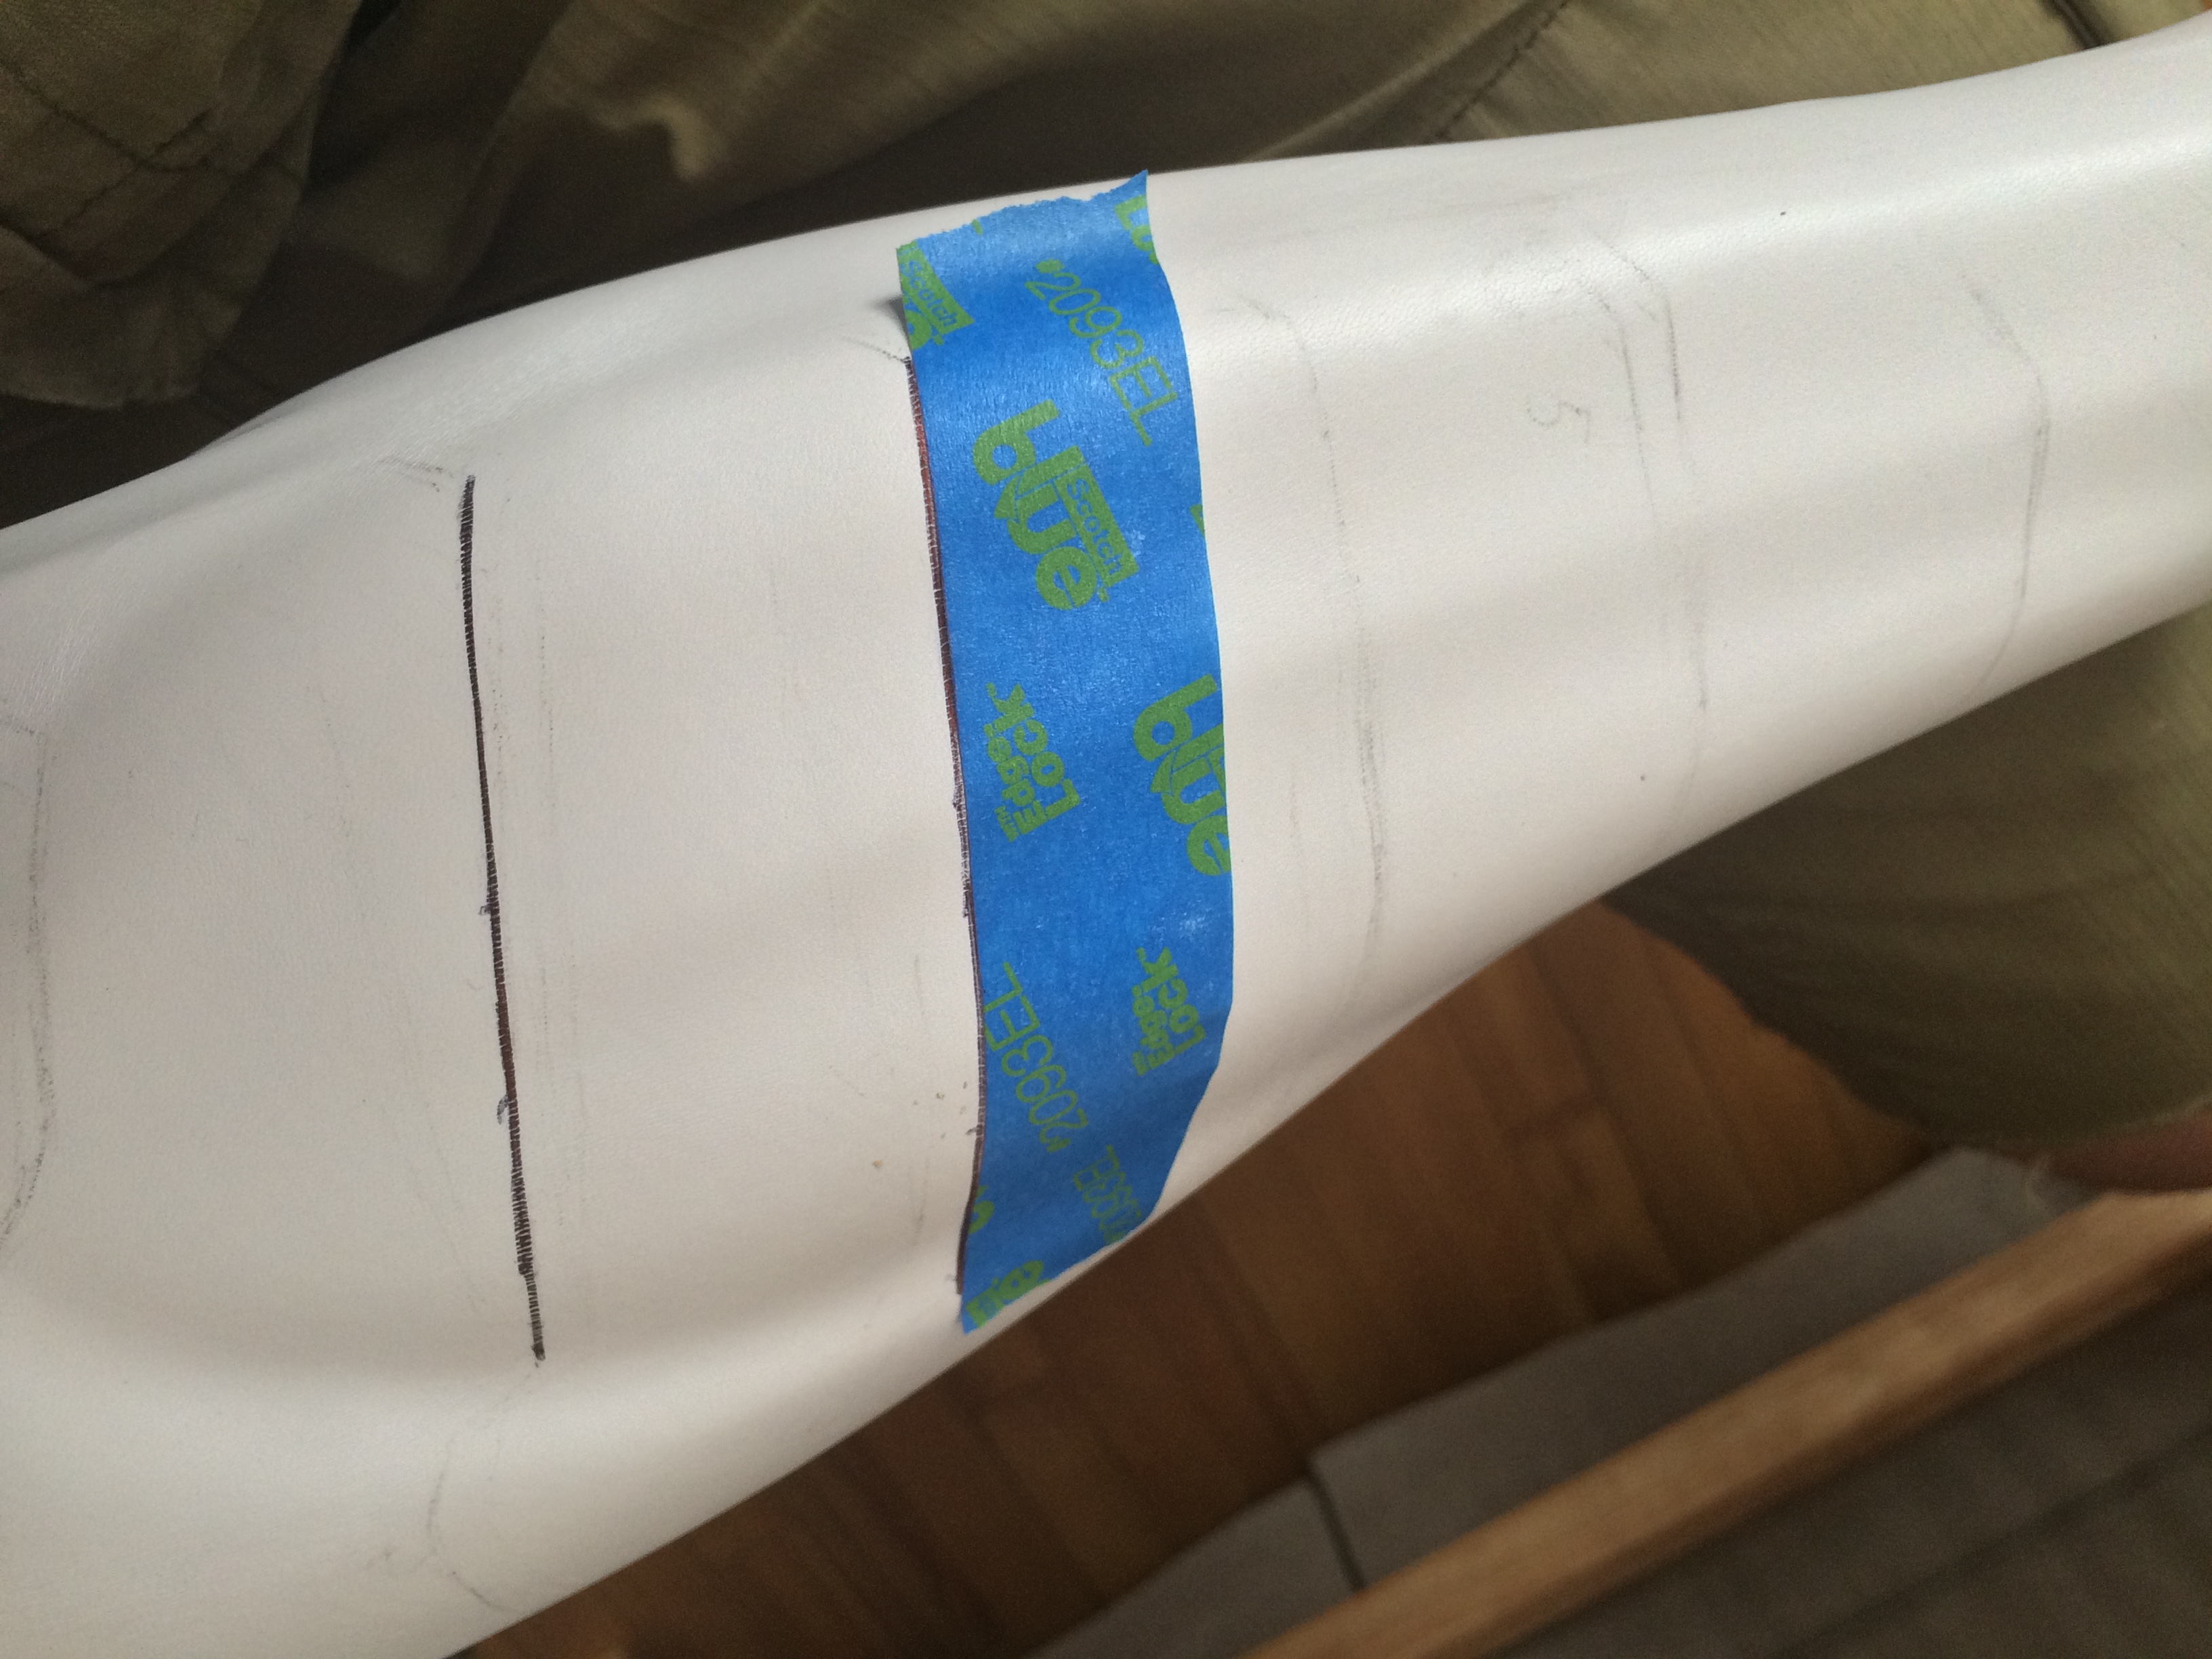
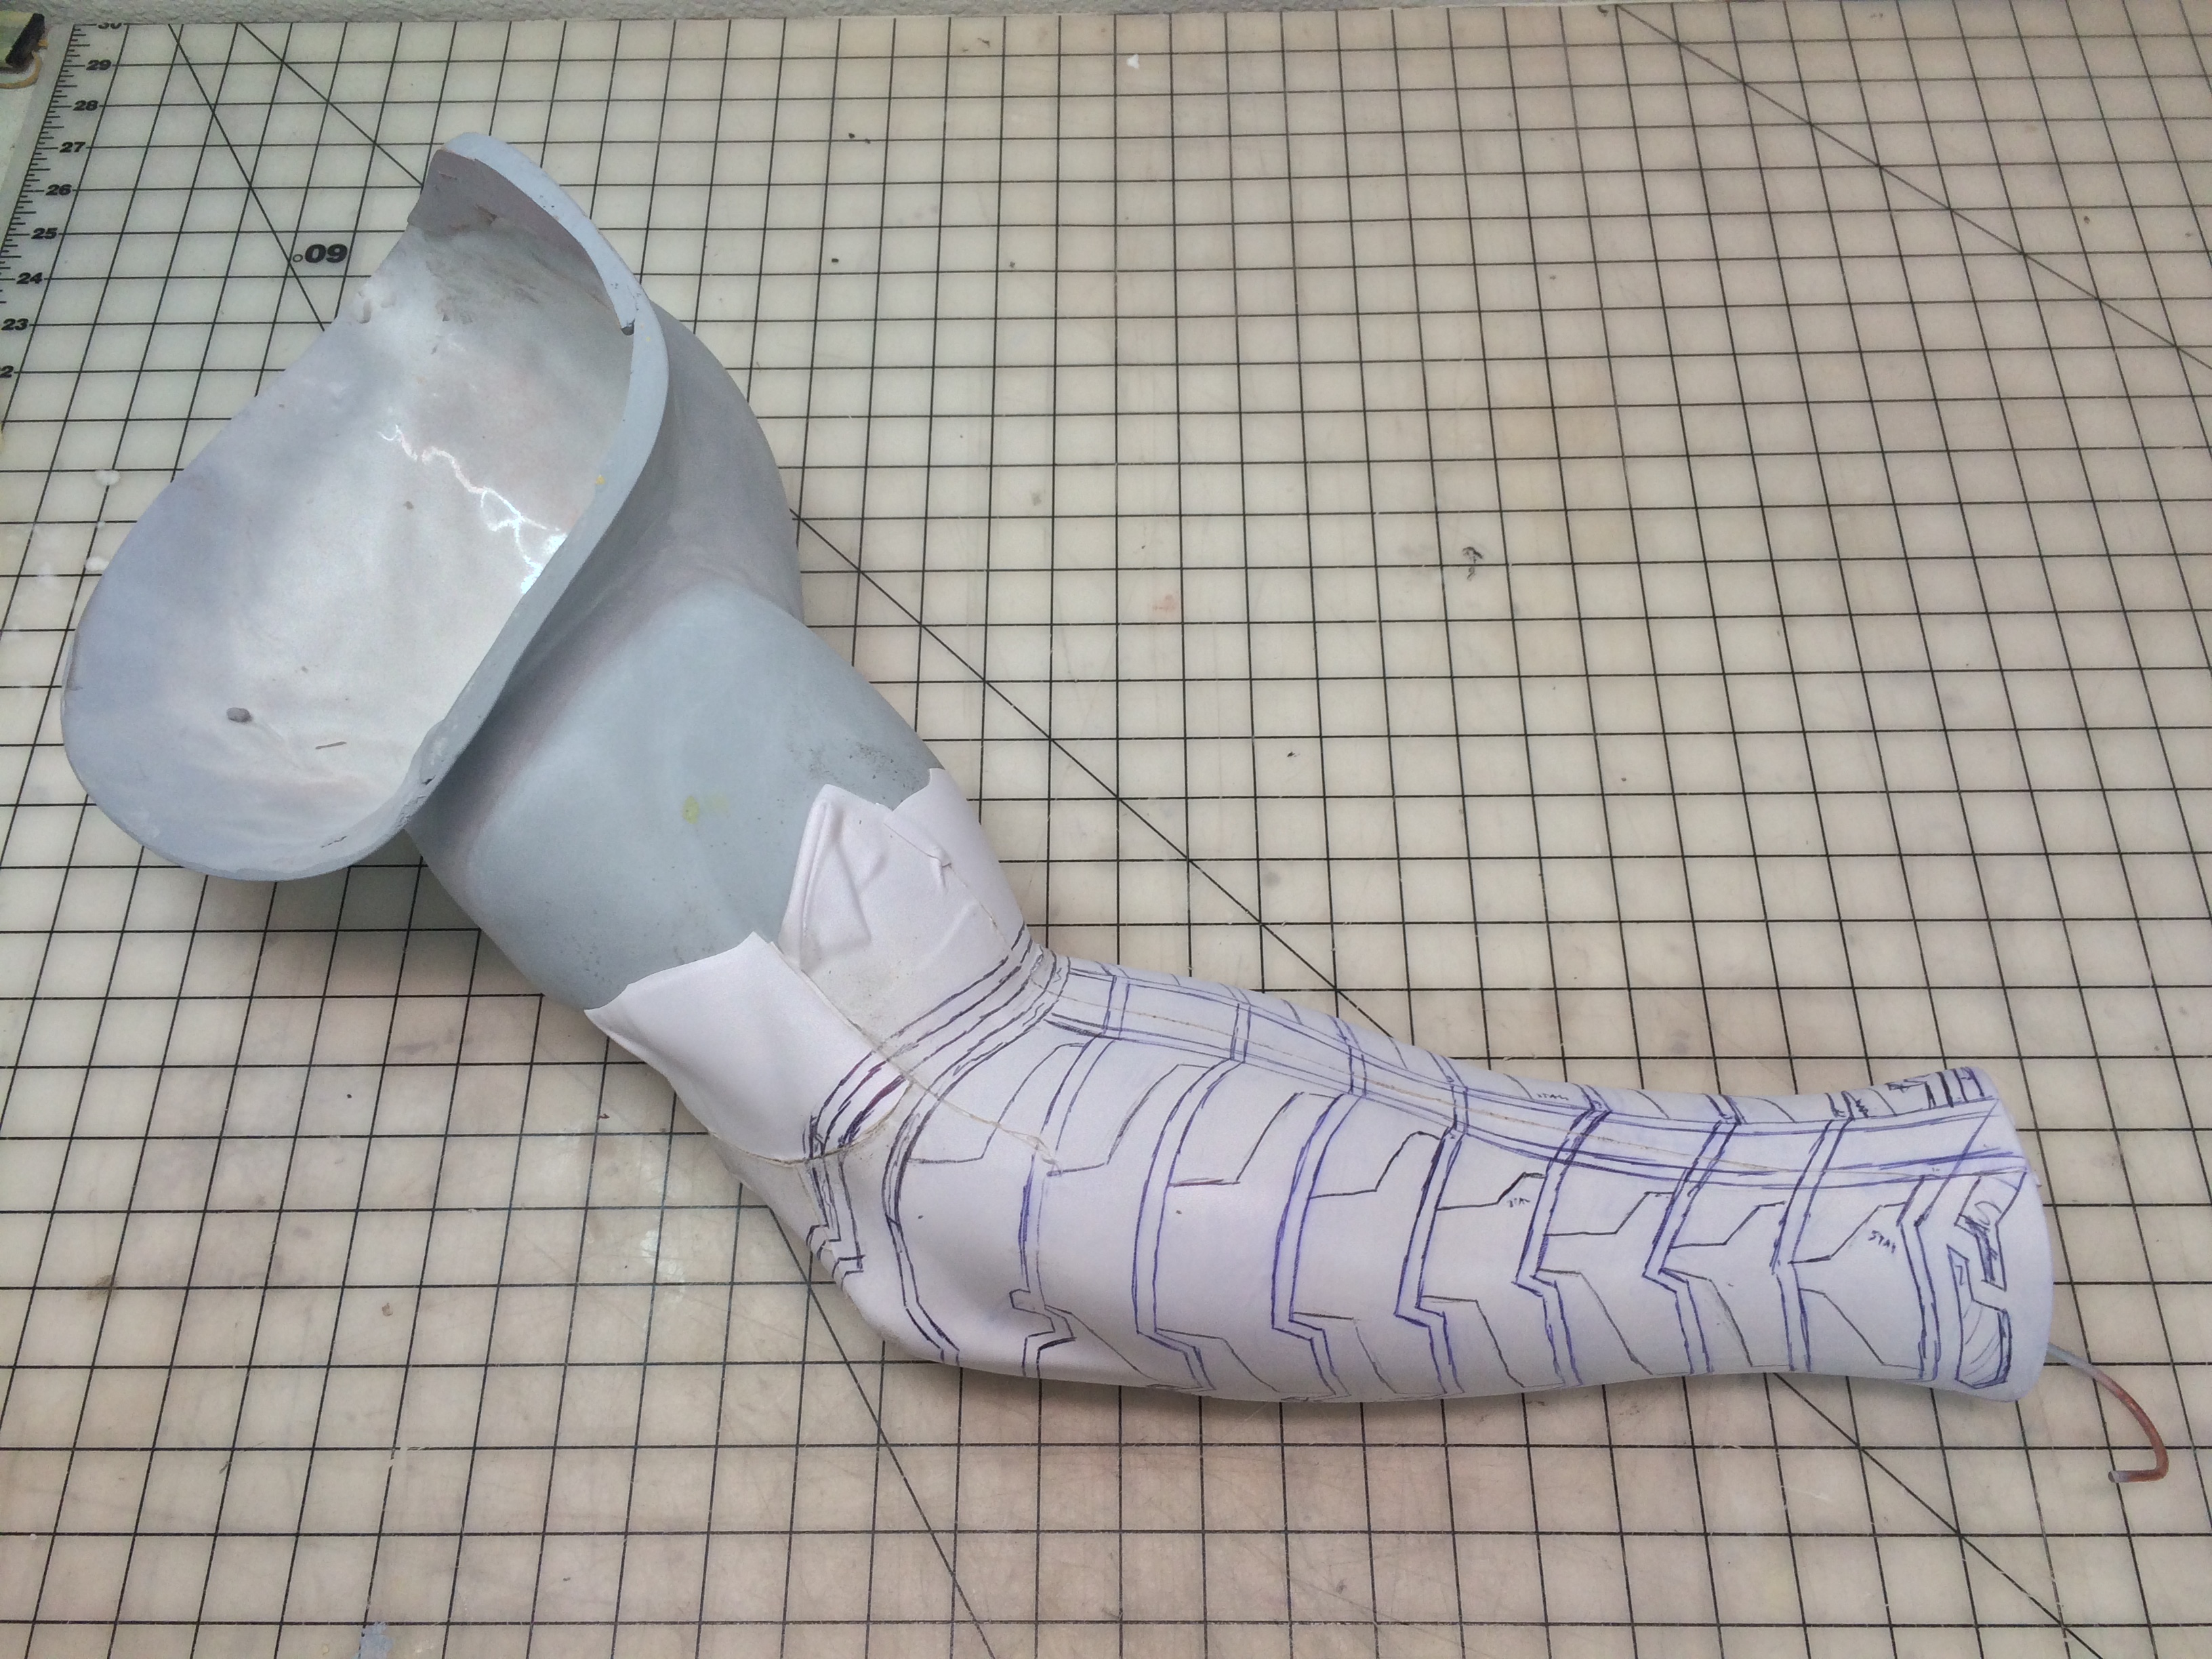
Once everything was patterned out, I used an X-Acto knife to cut away the various layers. This was where I learned that urethane primer sticks to things far better than standard Krylon does – I had several areas where the spandex lifted both layers of primer right off the arm when I removed it. Which cased me more headache later when I had to make those areas glossy smooth. Again.
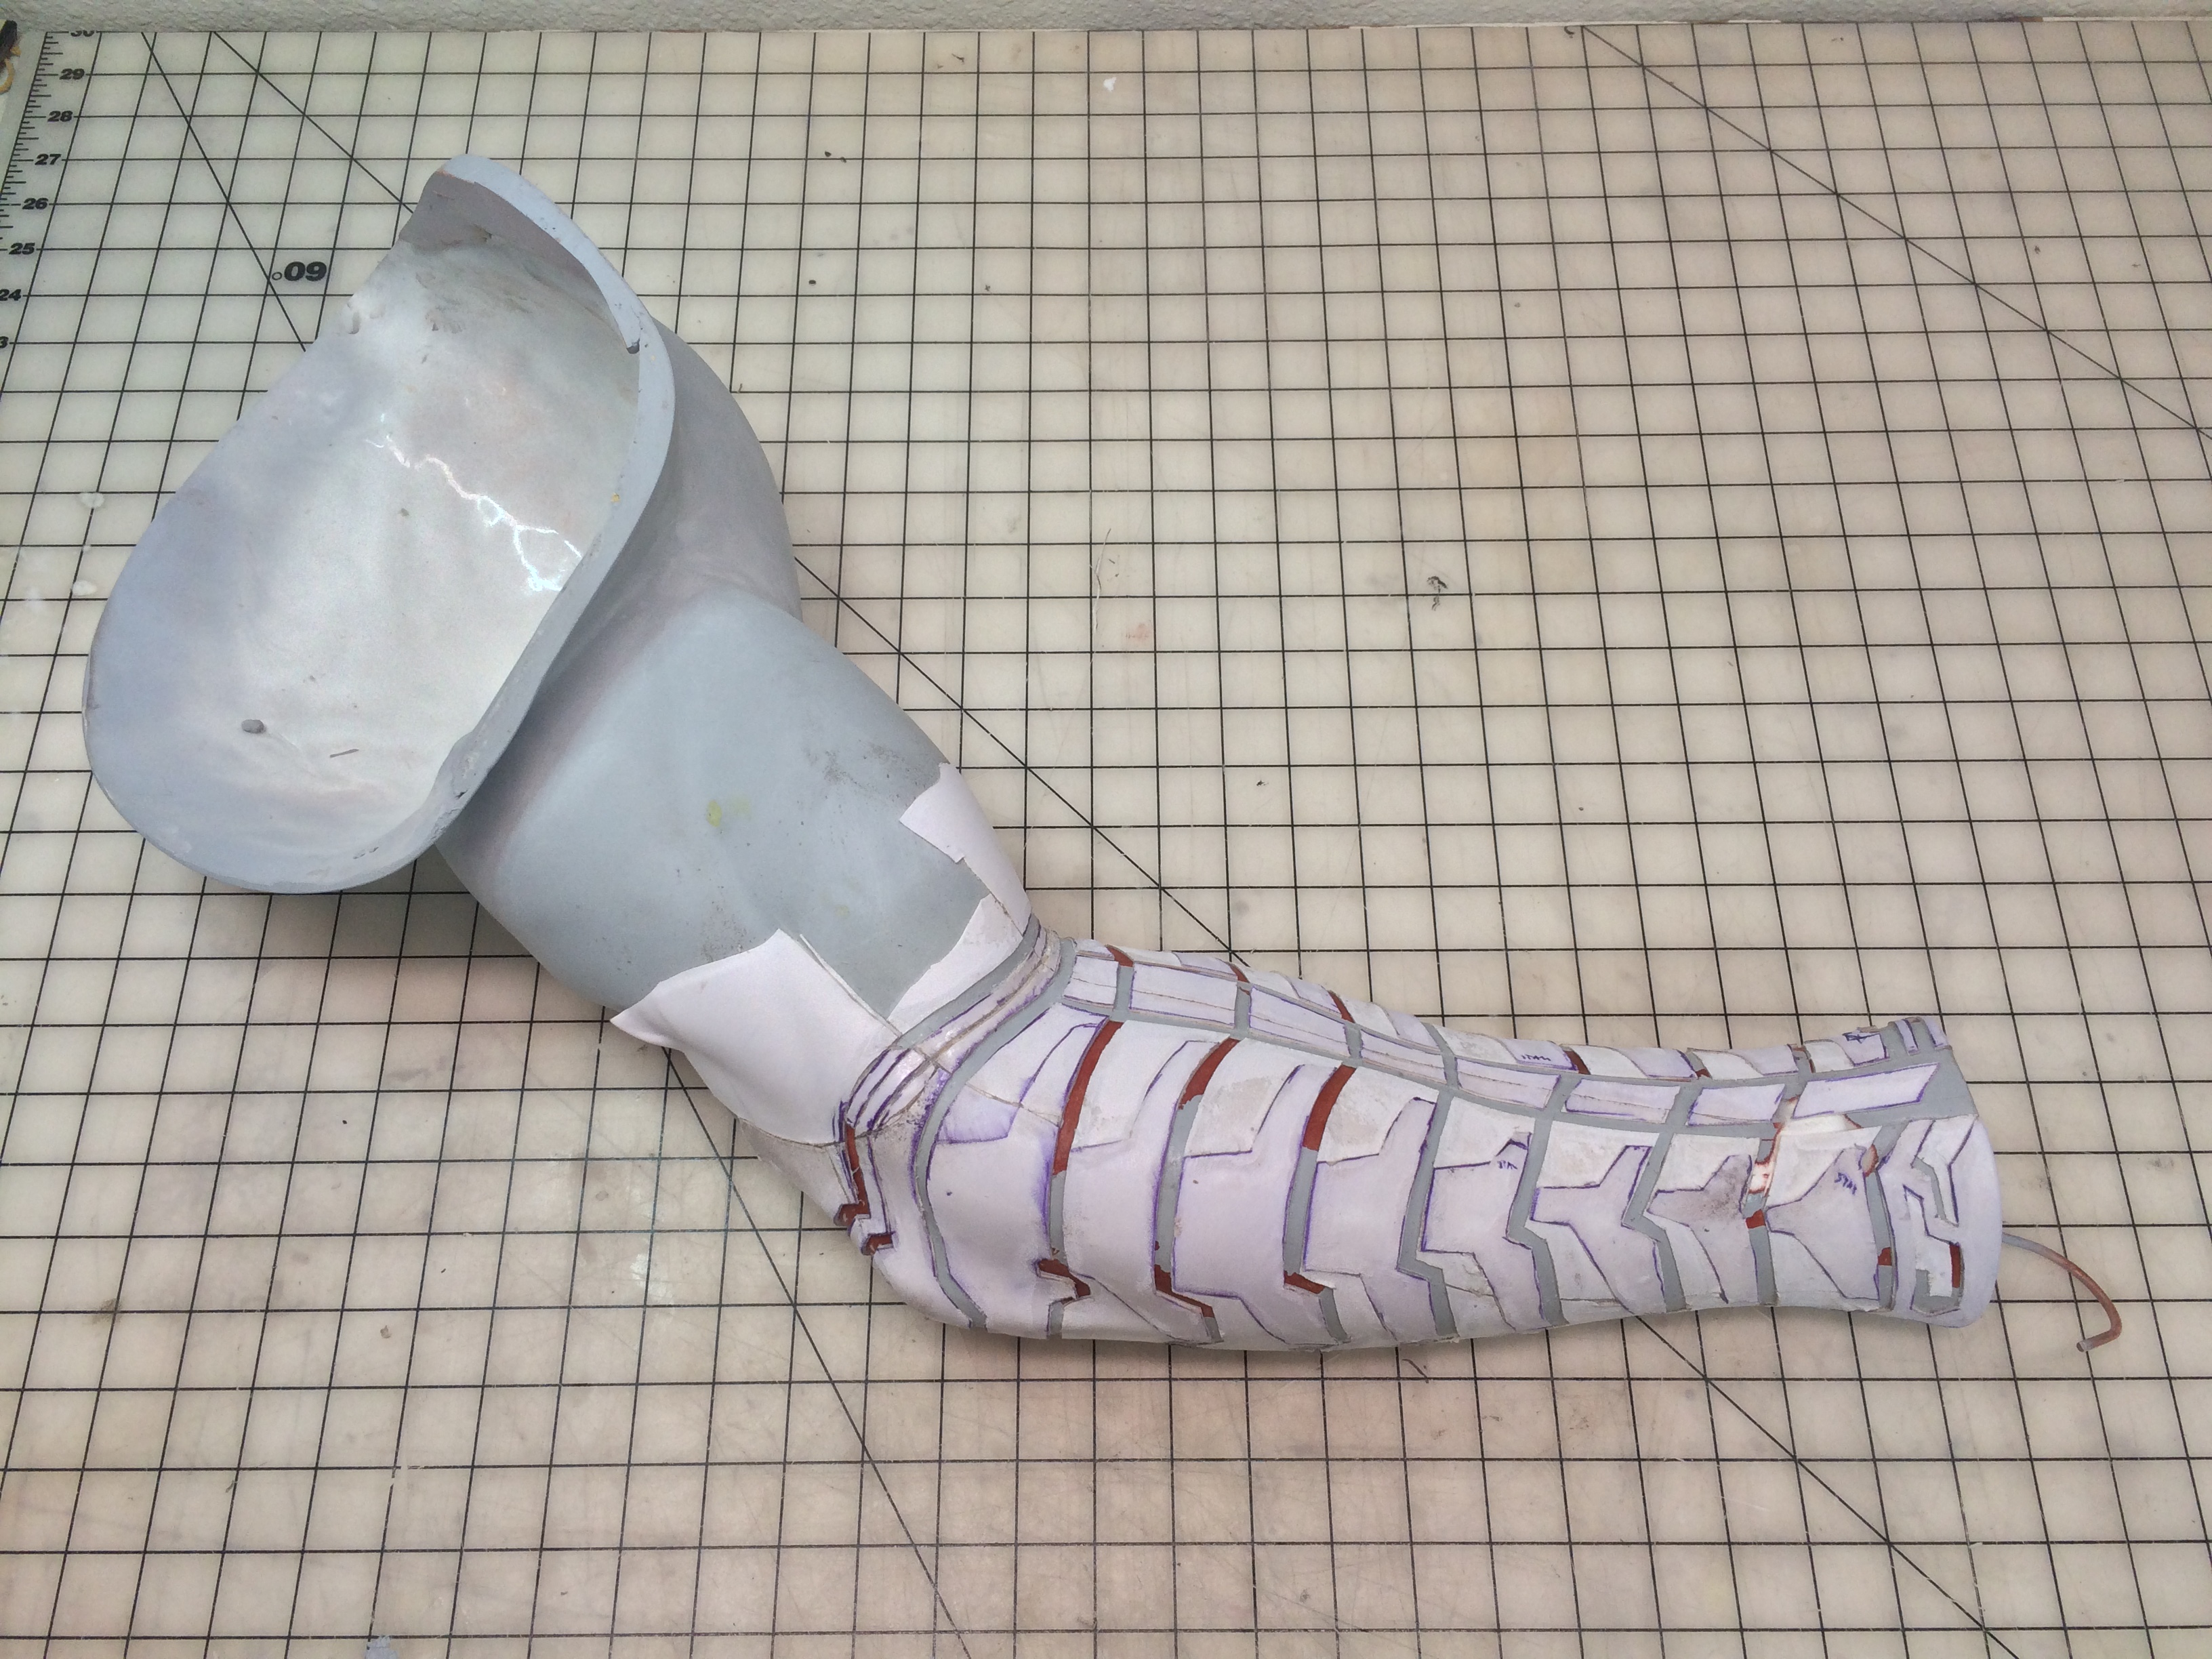
The edges of the fabric were still somewhat “fuzzy”, so I spread thin cyanoacrilate (superglue) along all the edges since CA will react with spandex and make it hard. (CA comes in thin, medium, and thick viscosity – sometimes called fast, regular, and slow – which is really handy). Then I primed the forearm again with more of my favorite Krylon Ruddy Brown and trimmed, sanded, and cleaned up as much of the fabric edges as possible, using the primer mainly to look for consistency and smoothness.
Then I sprayed the entire arm with a few more passes of urethane primer (standard, not high-build, though even that is several times thicker than rattle-can primer). Sprayed on “wet” it will actually dry glossy, with an egg-shell like texture. This primer was sanded until smooth, which took several days.
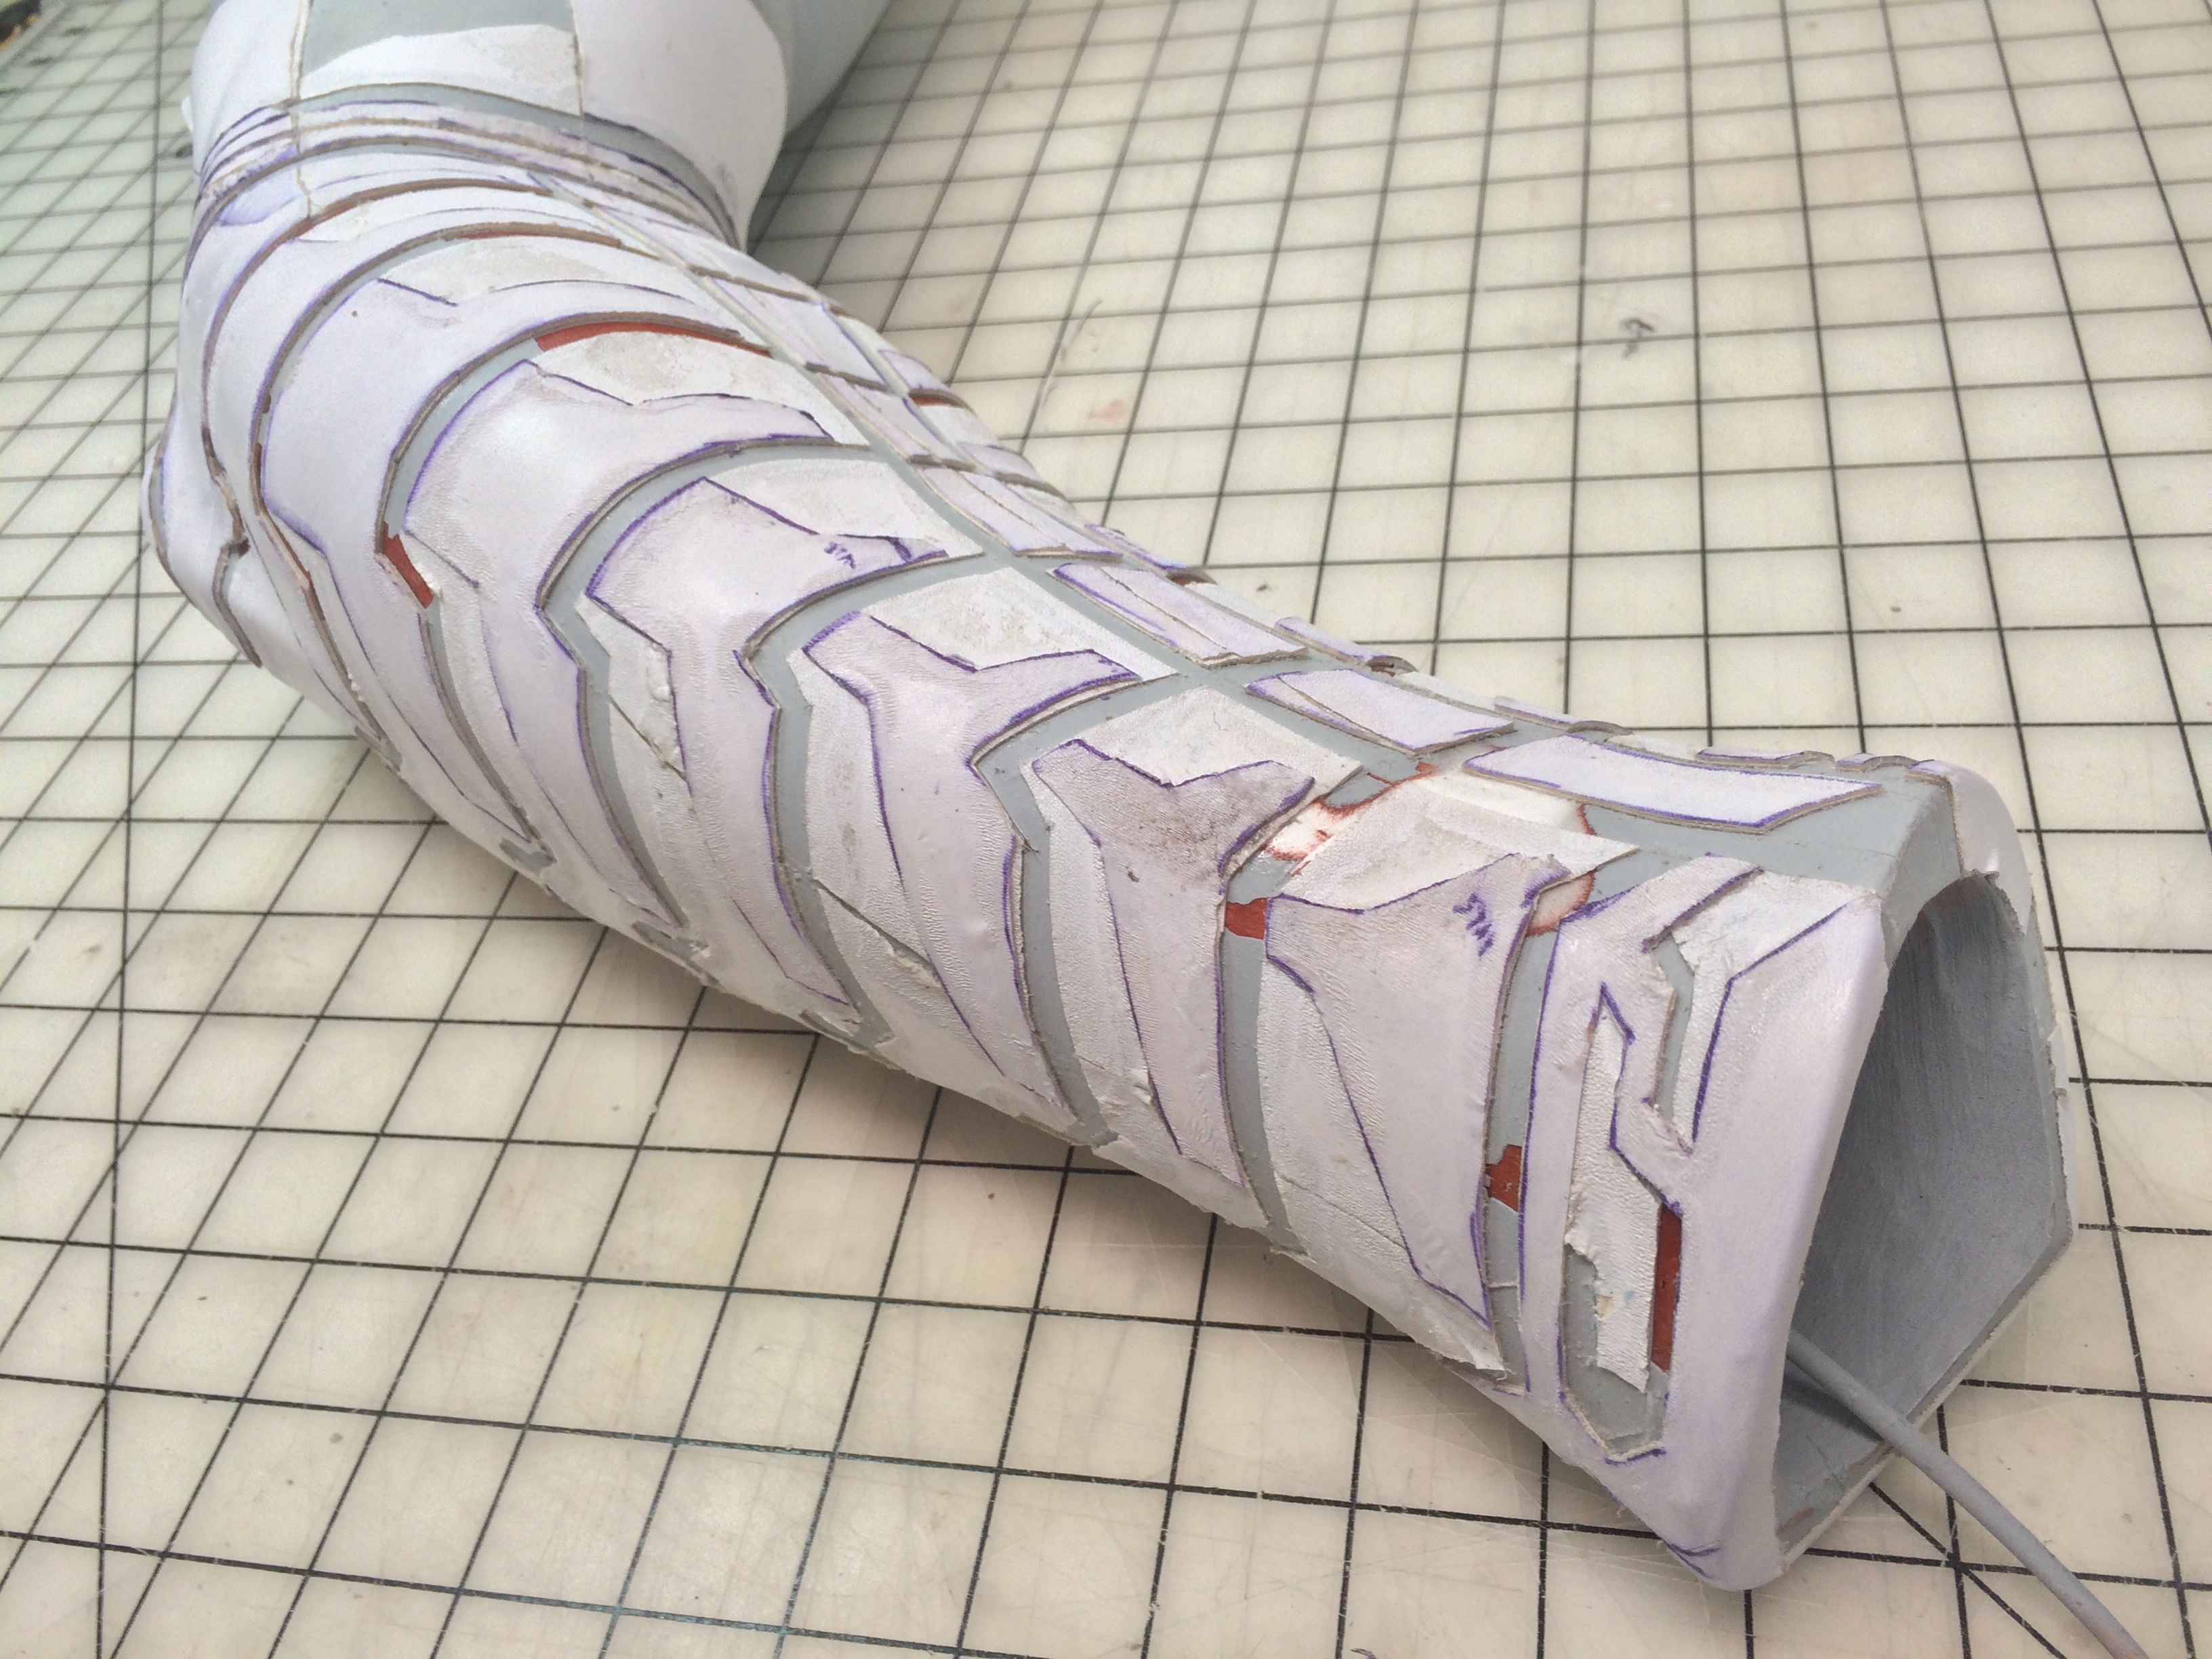
I was less than a week away from the client’s deadline at this point, so my amazing girlfriend Miss Kit Quinn stepped in and spent many sleepless nights with me, sanding tiny, tiny details. Somewhere during this time I passed 250 hours of work on my own, and simply stopped counting (which is why I don’t know the exact total, but I estimate over 300). I also fell in love with the “sanding sticks” a local hobby shop carries – they’re small foam and plastic sticks roughly 1/8″ wide that come in various grits, from 80 to 220. They were indispensable in cleaning up all the recessed accent lines.
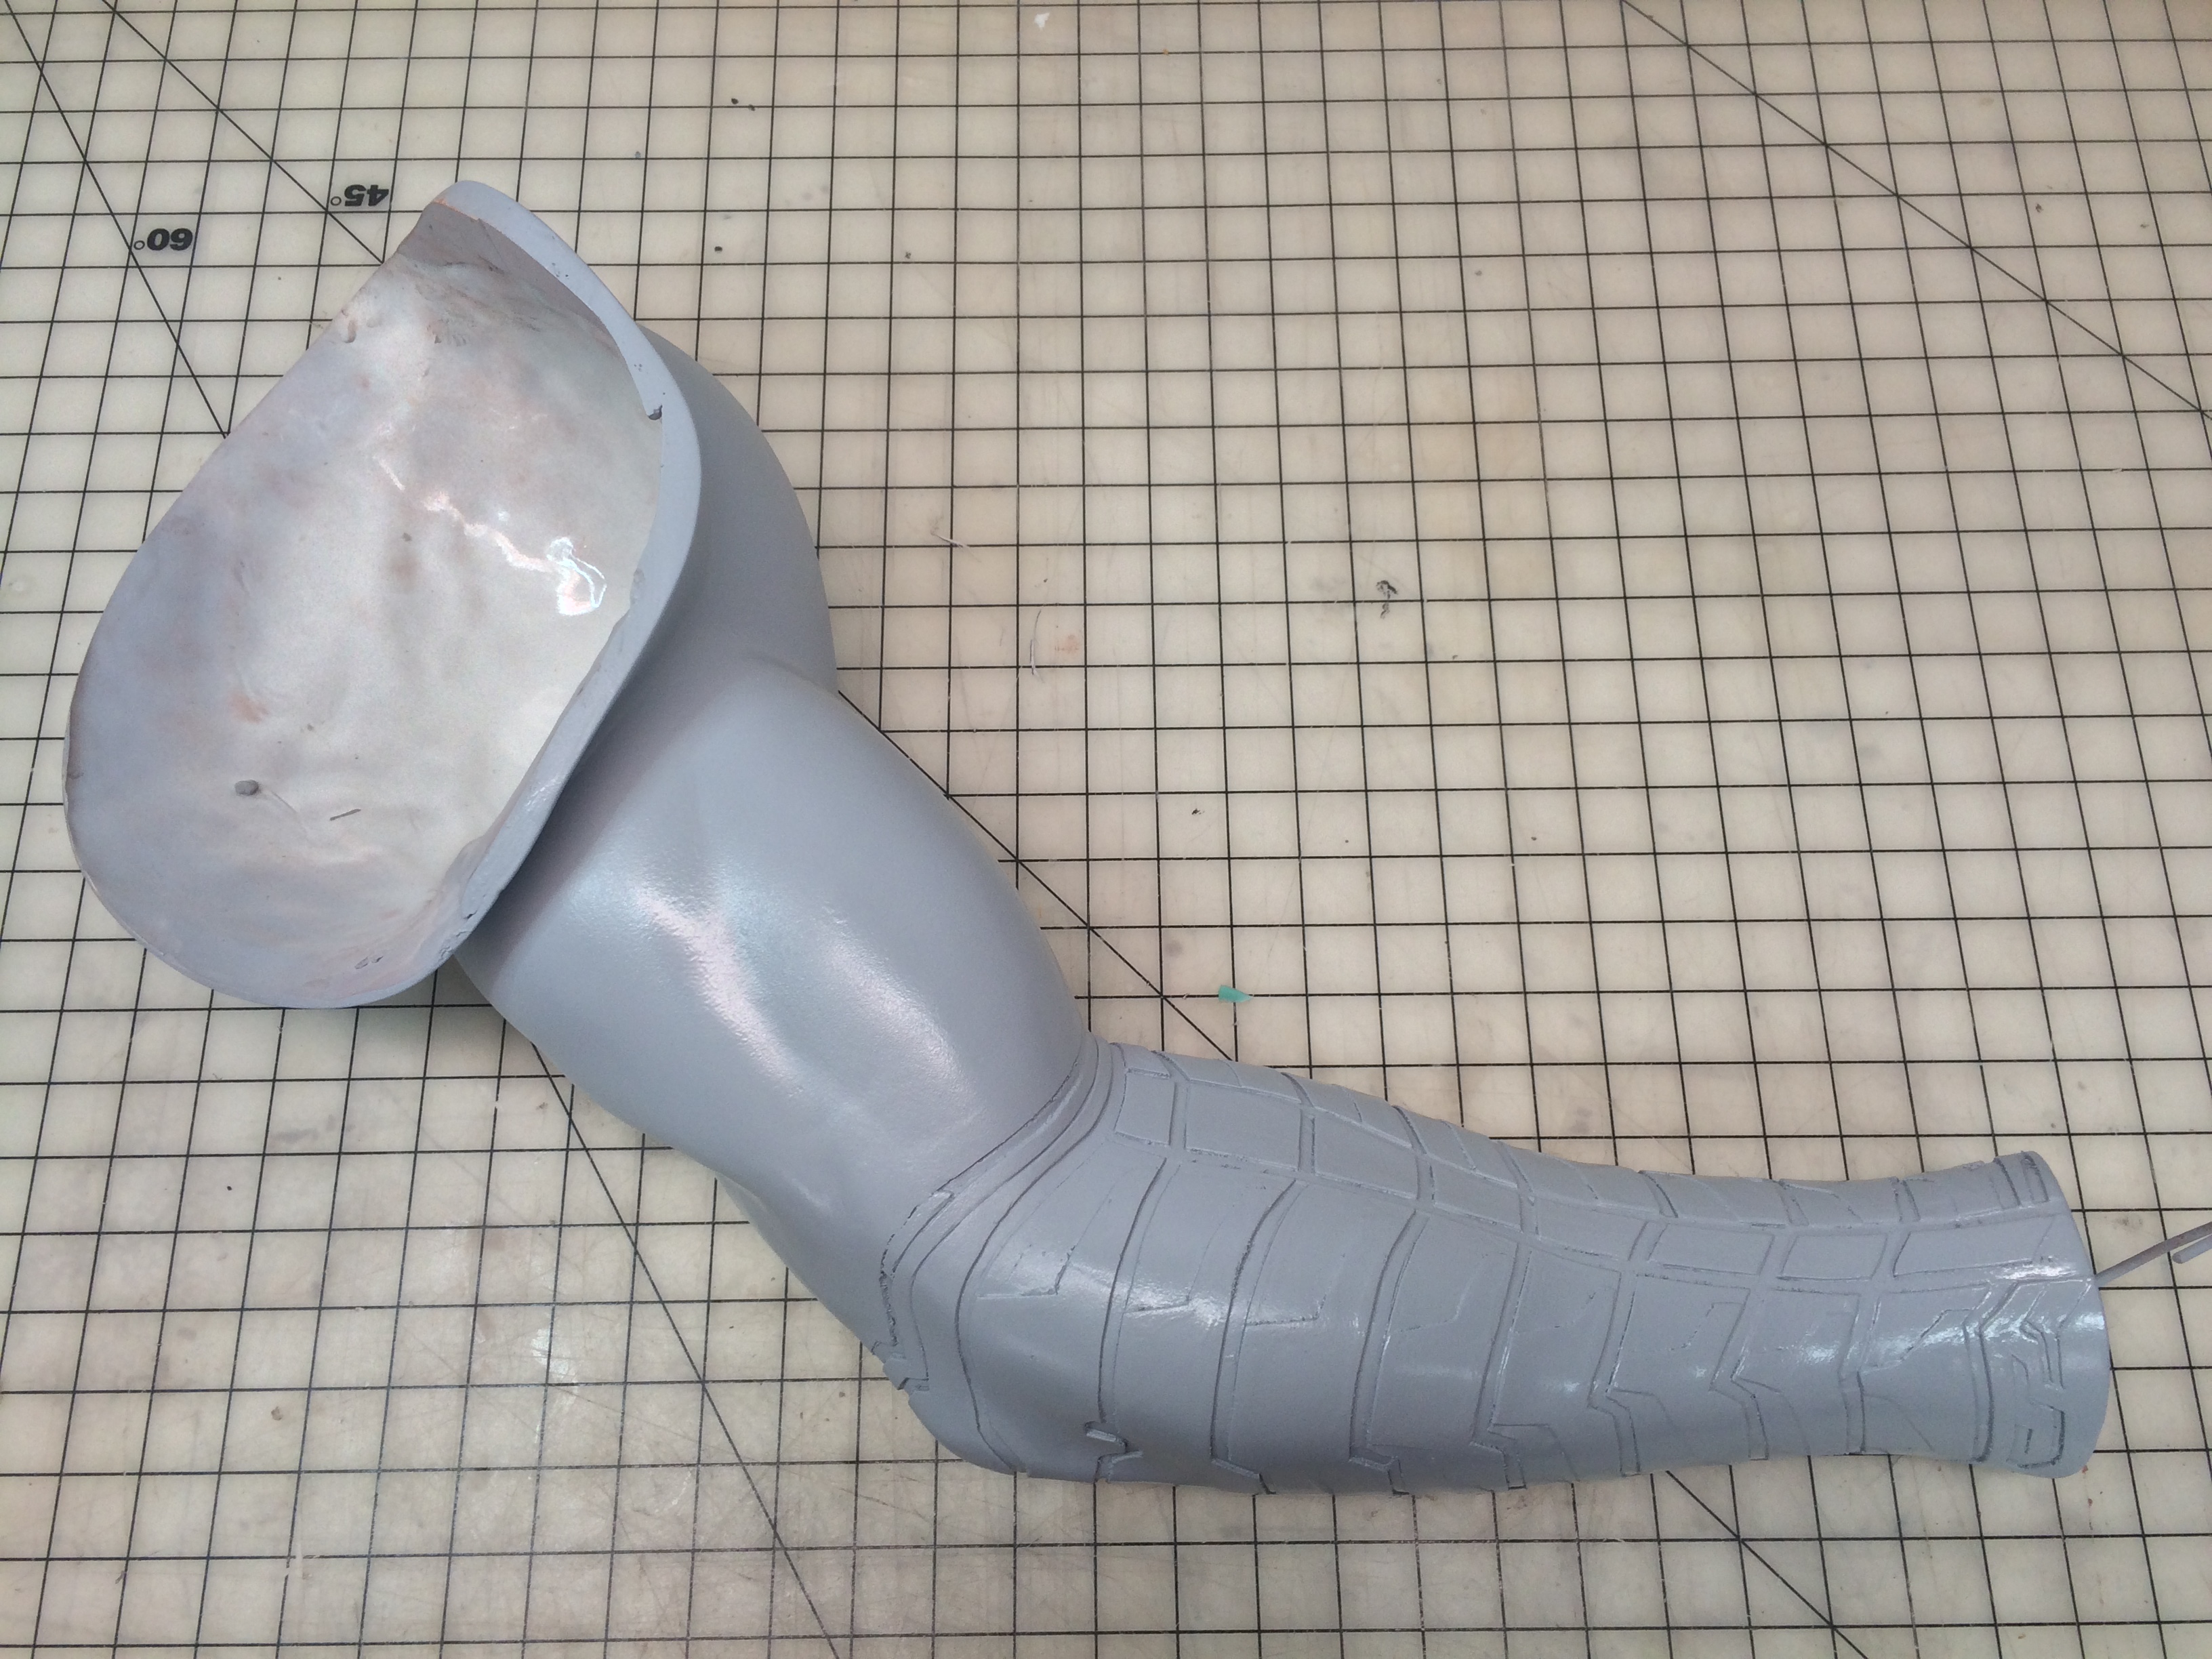
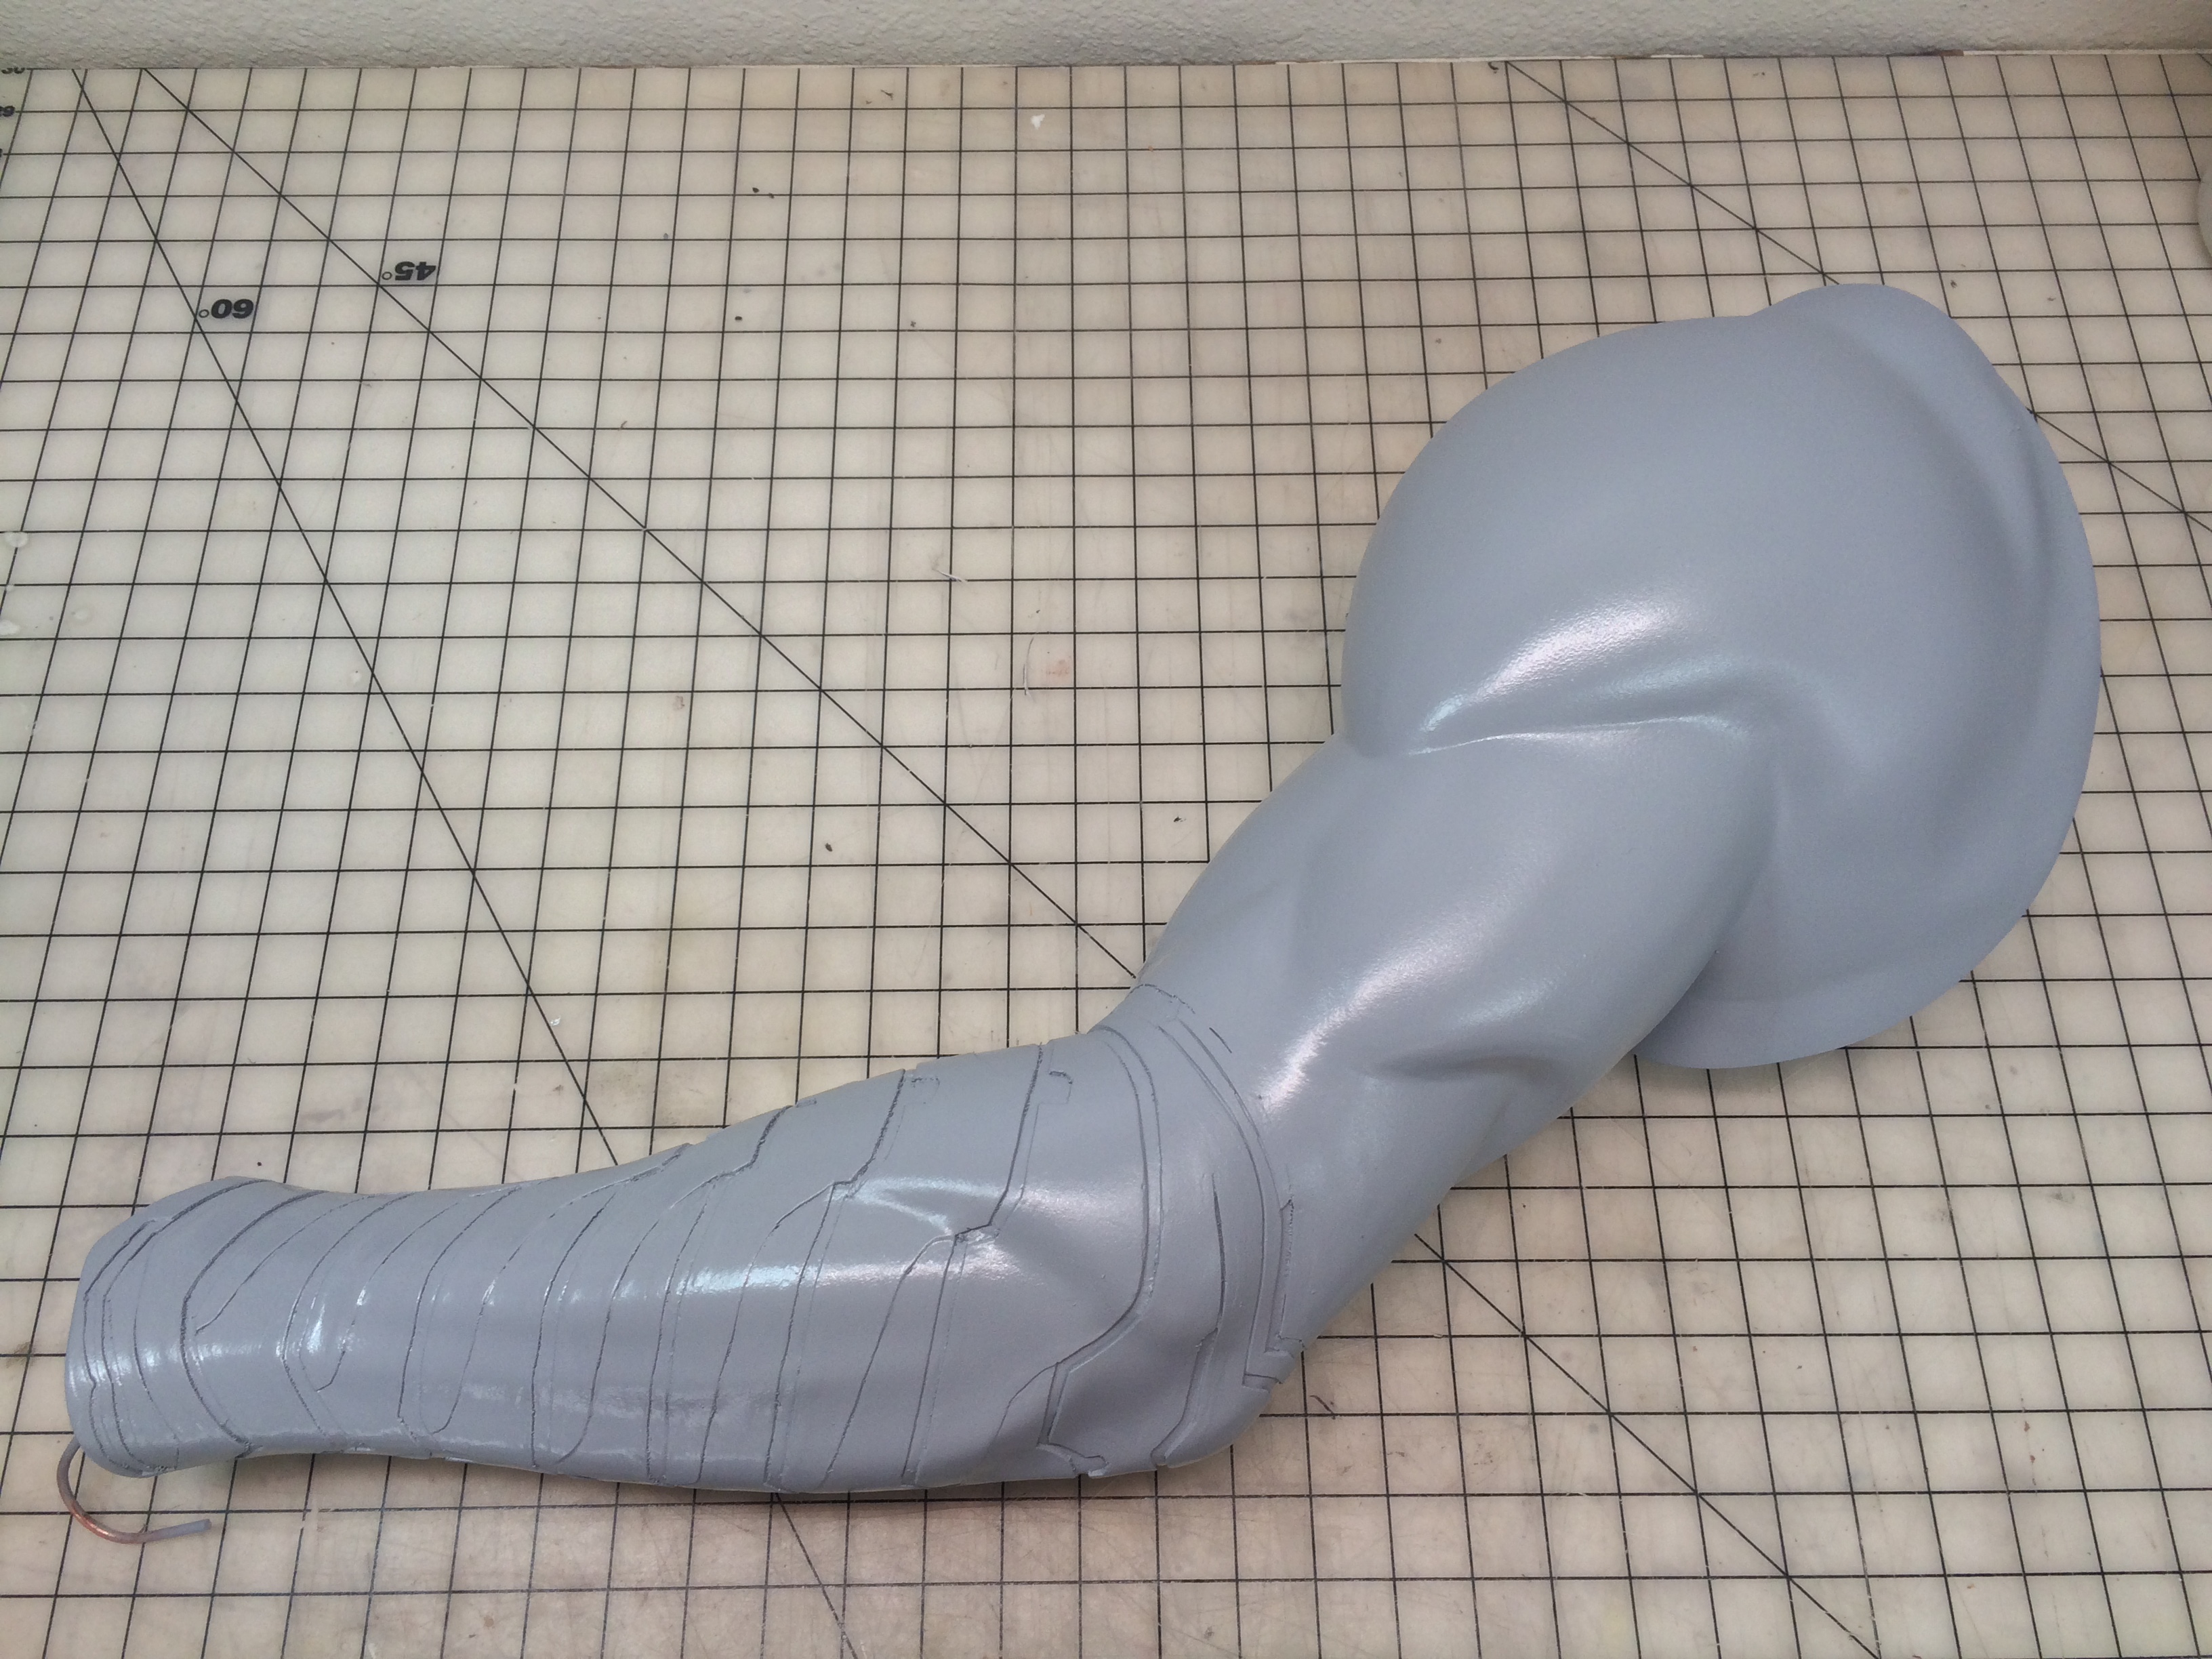
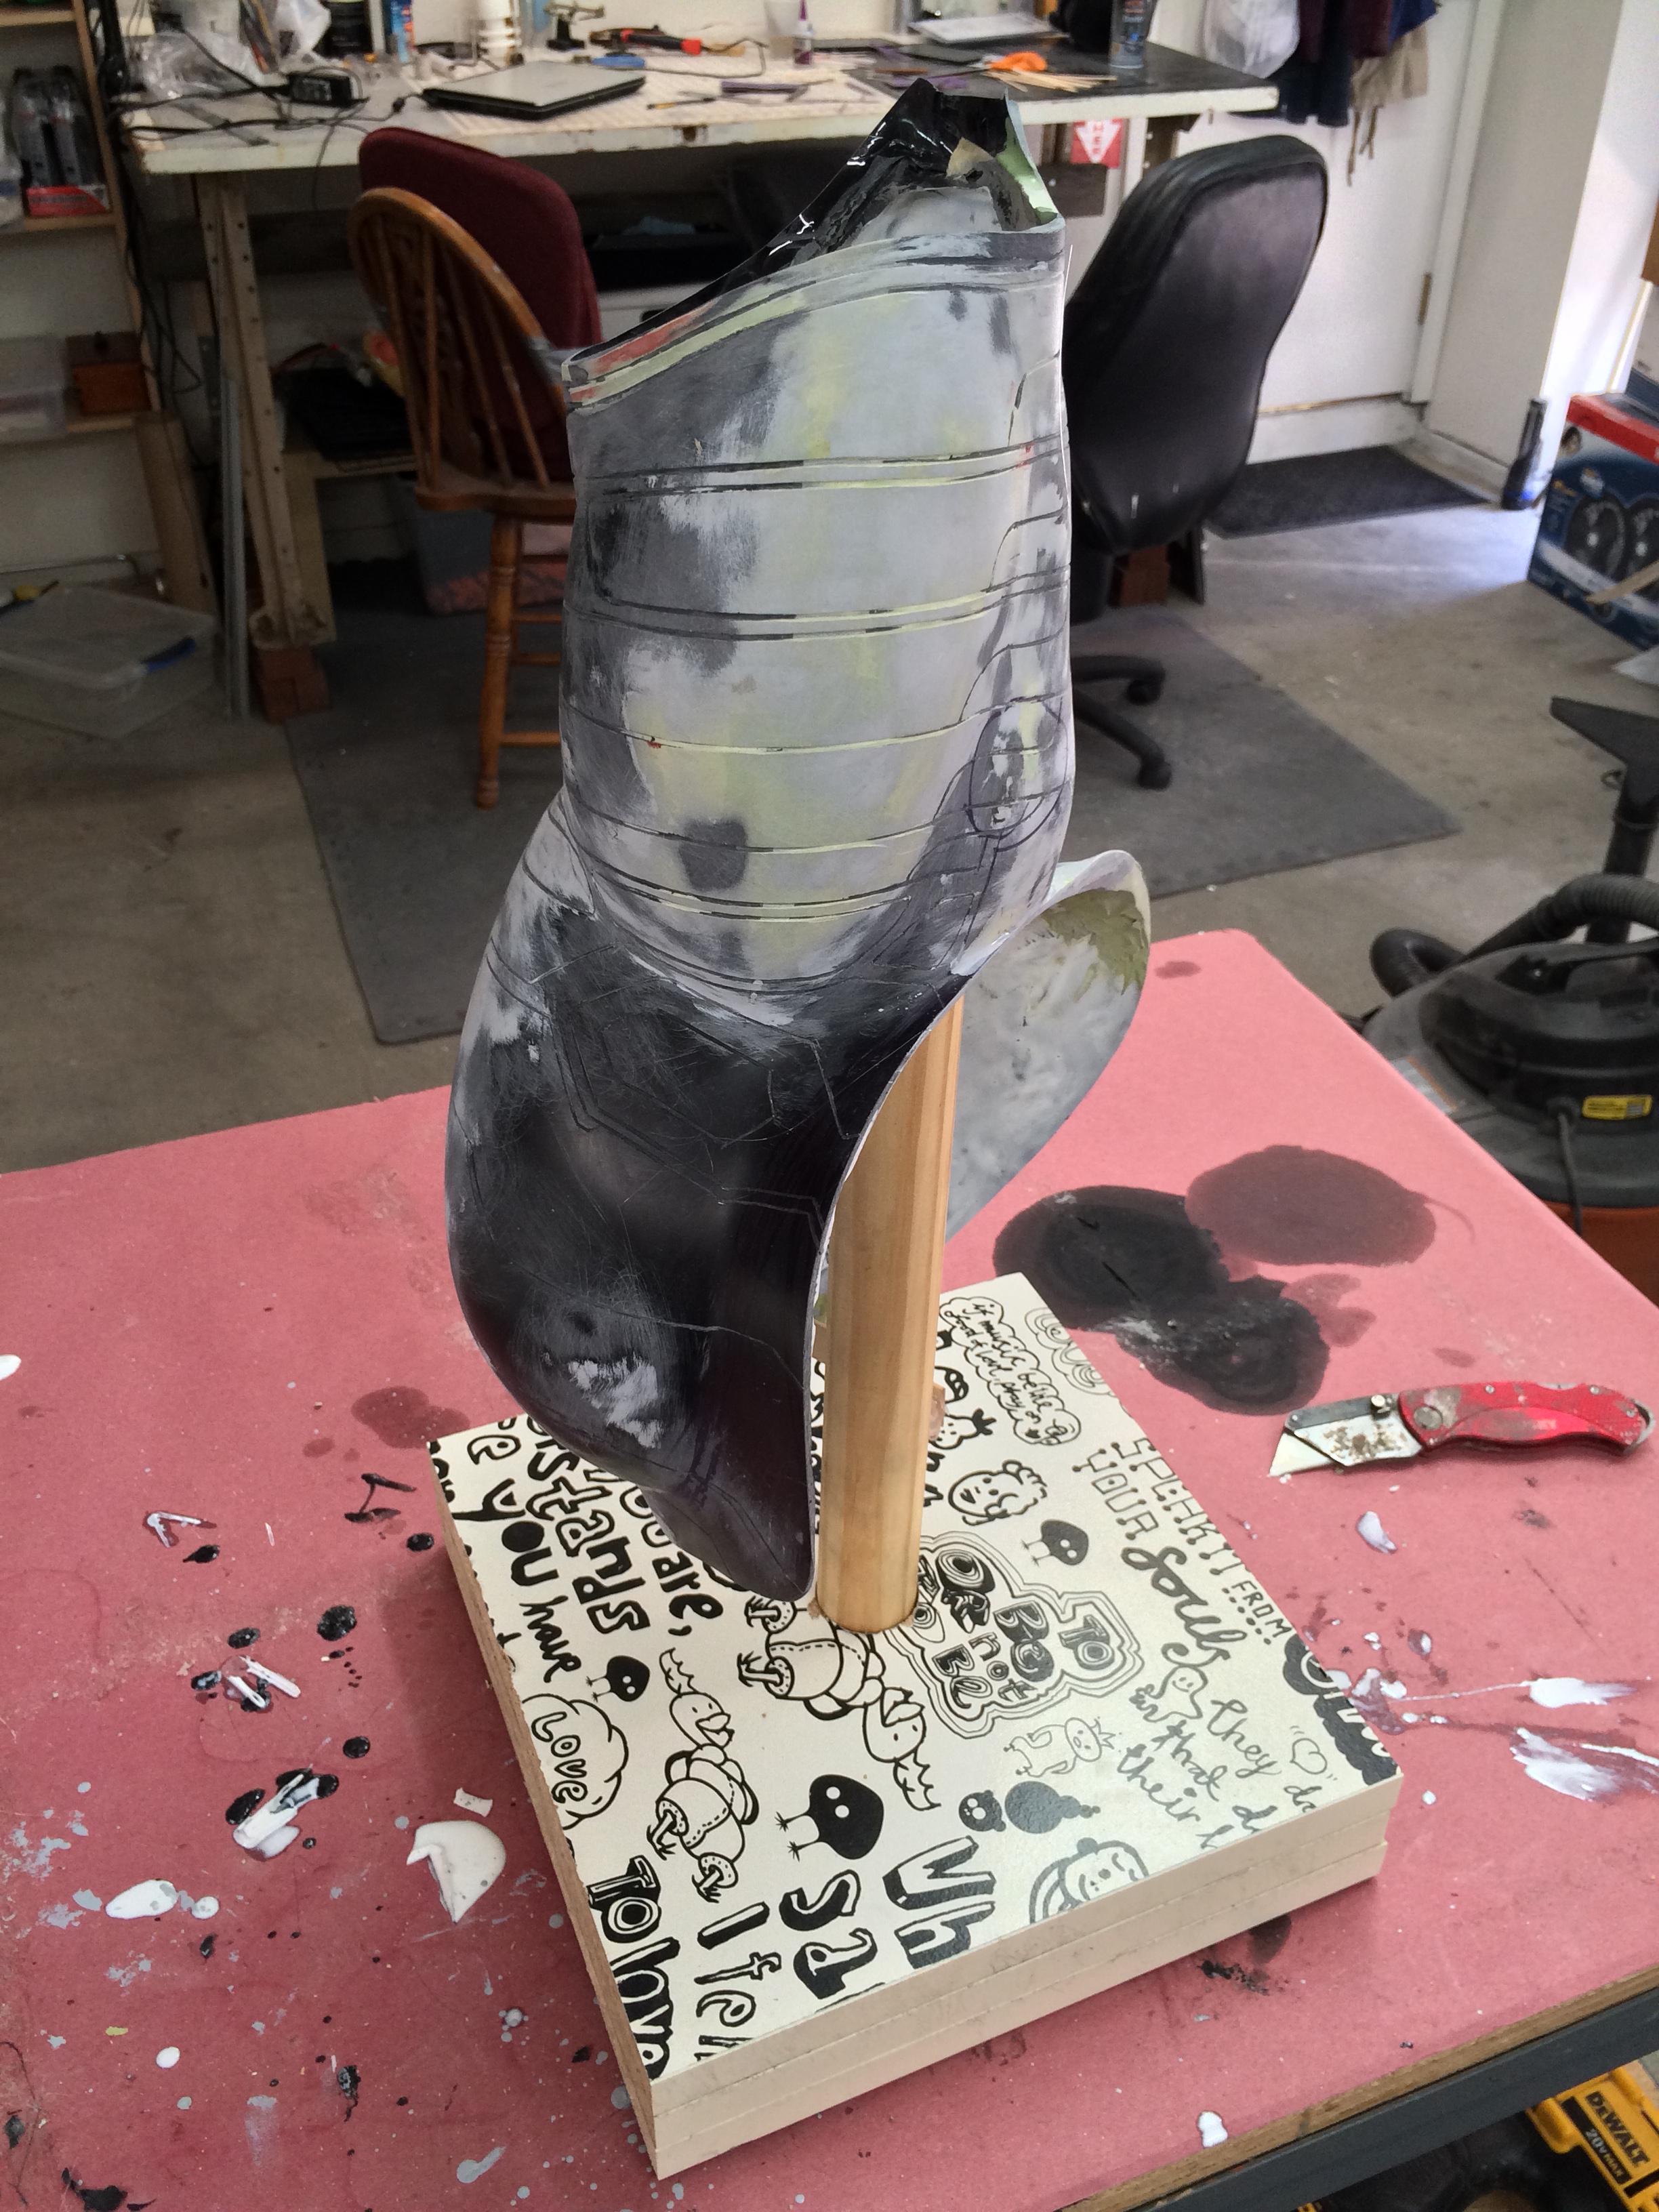
When the forearm was done, the accent lines for the biceps / shoulder region were drawn in. Because I had so much primer build up, I was able to carve the accent lines for the shoulder directly into the paint. I first traced the lines with an X-Acto, which gave me a guide-line to follow, and then went back over those lines using a combination of a triangle file, and a small, broken hack-saw blade (you never know what you’ll find a use for). It was tedious, and made for some interesting blisters, but effective.


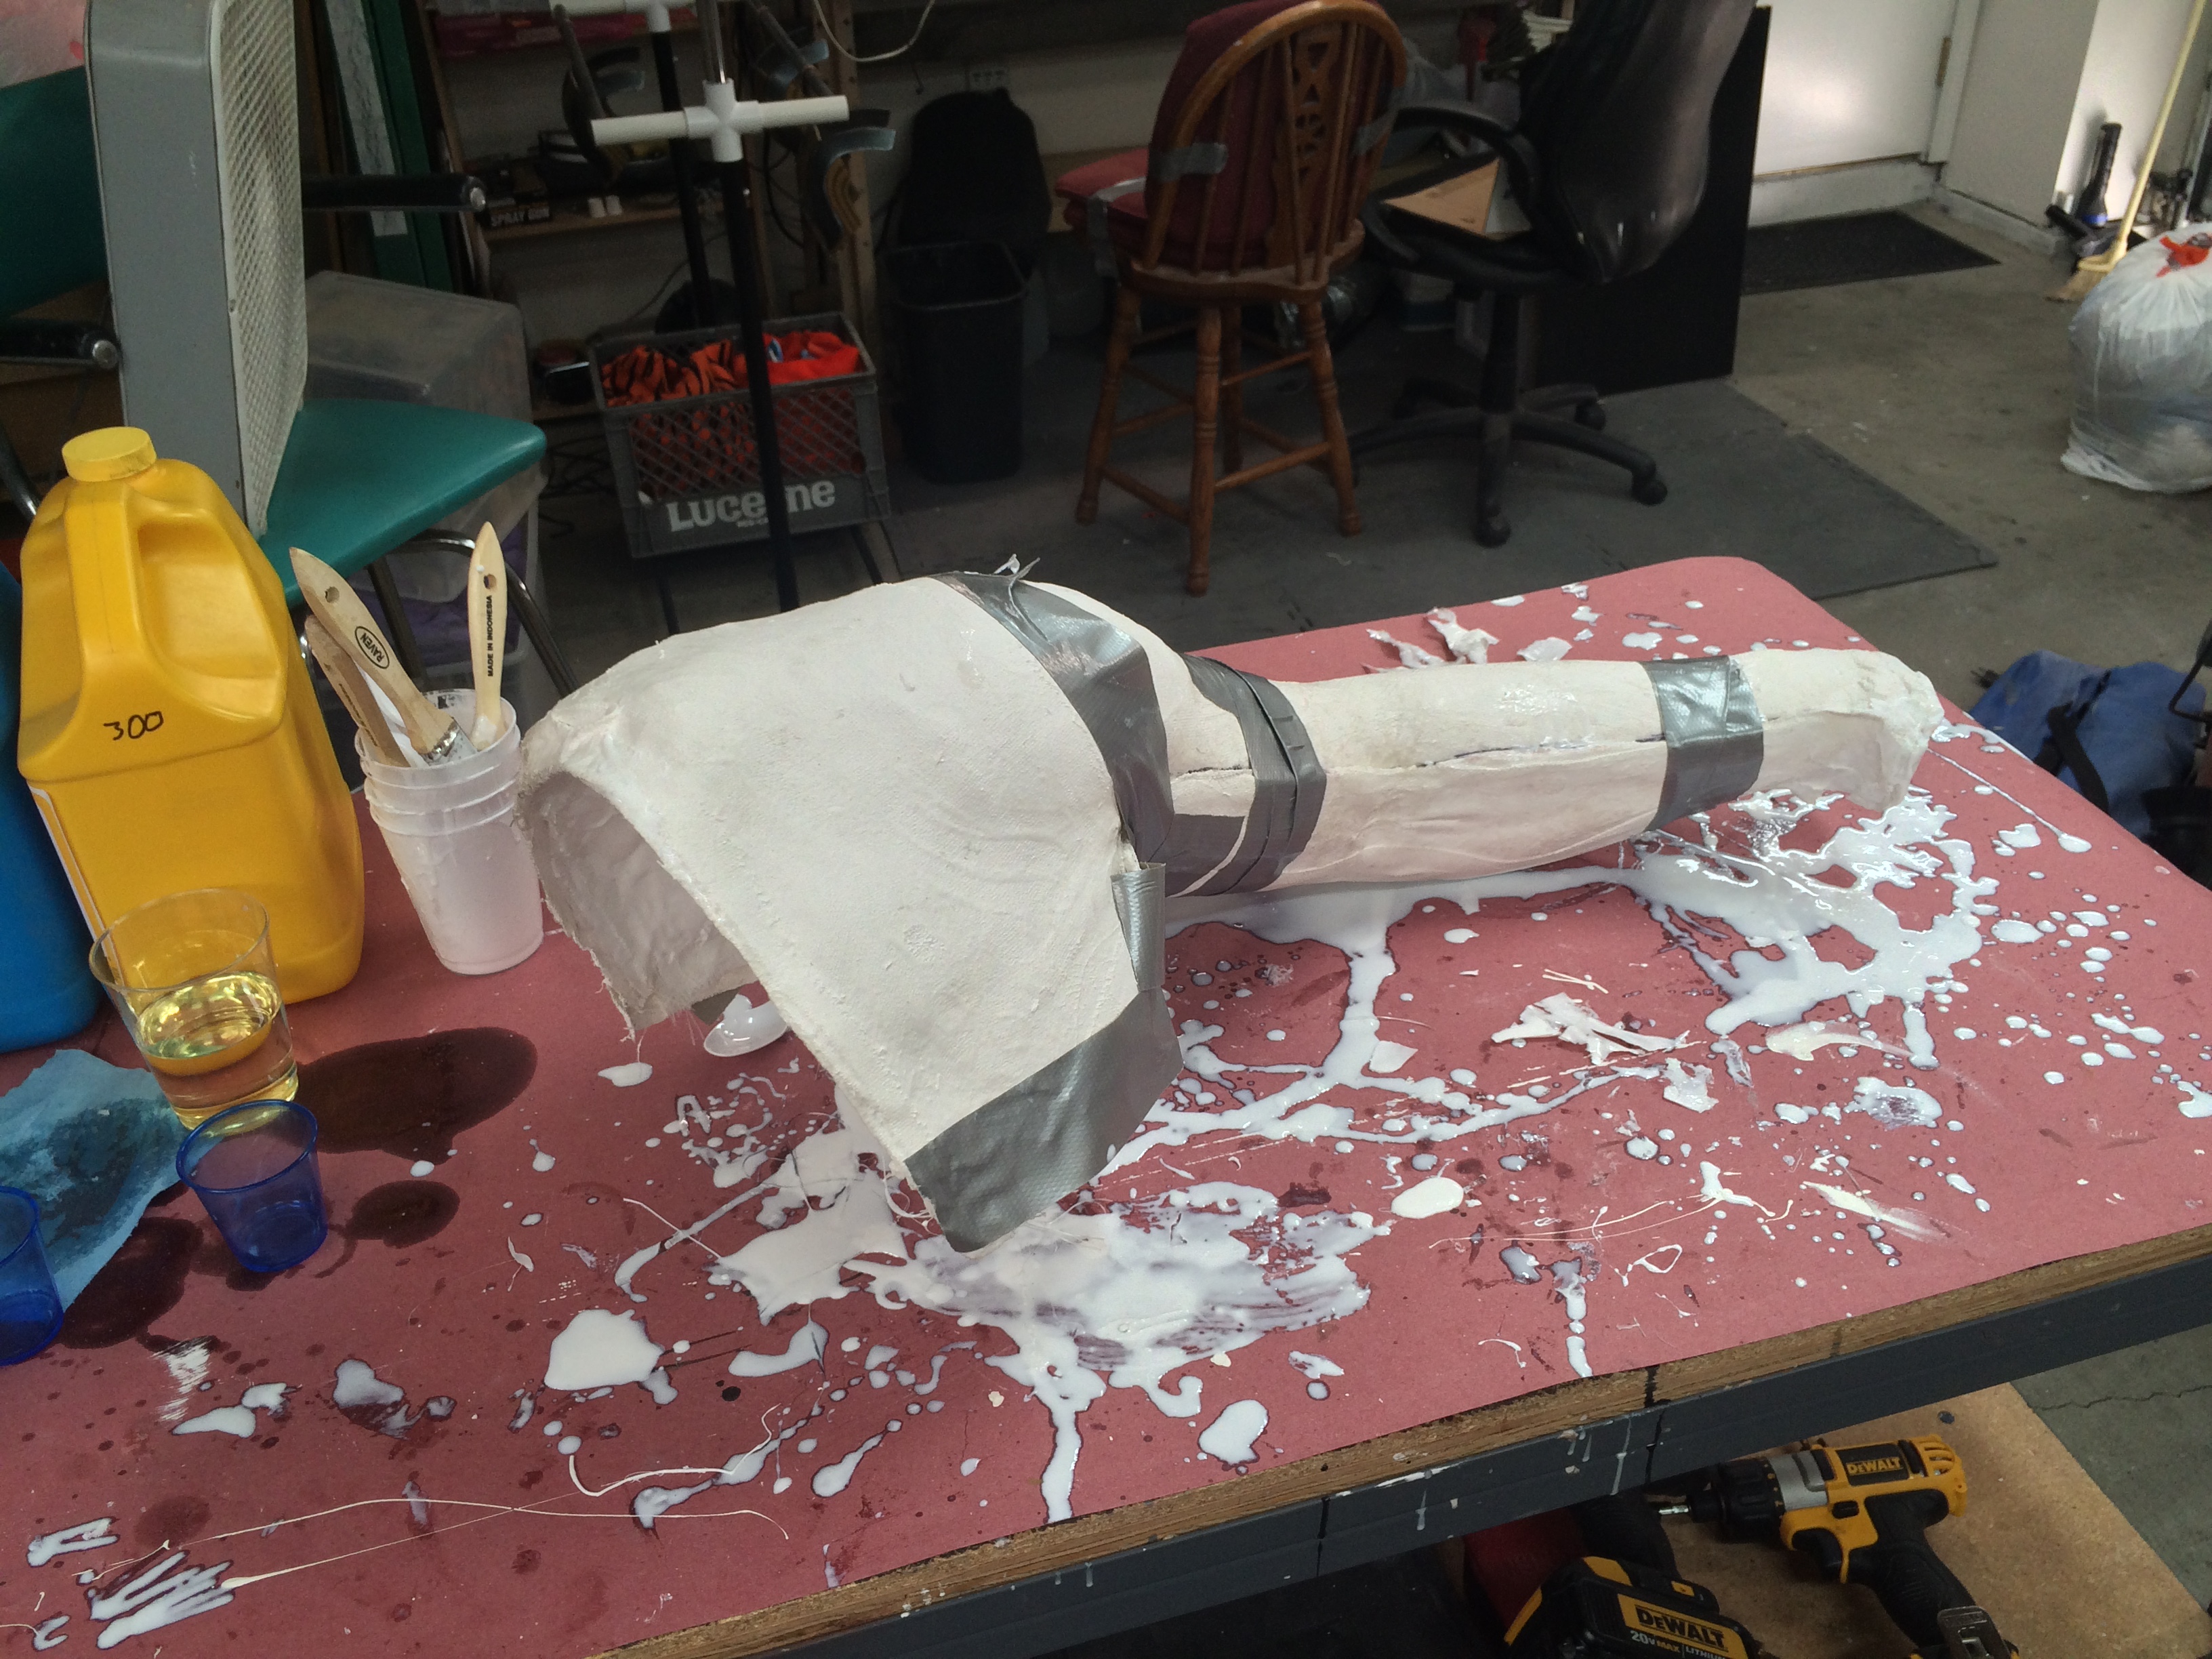
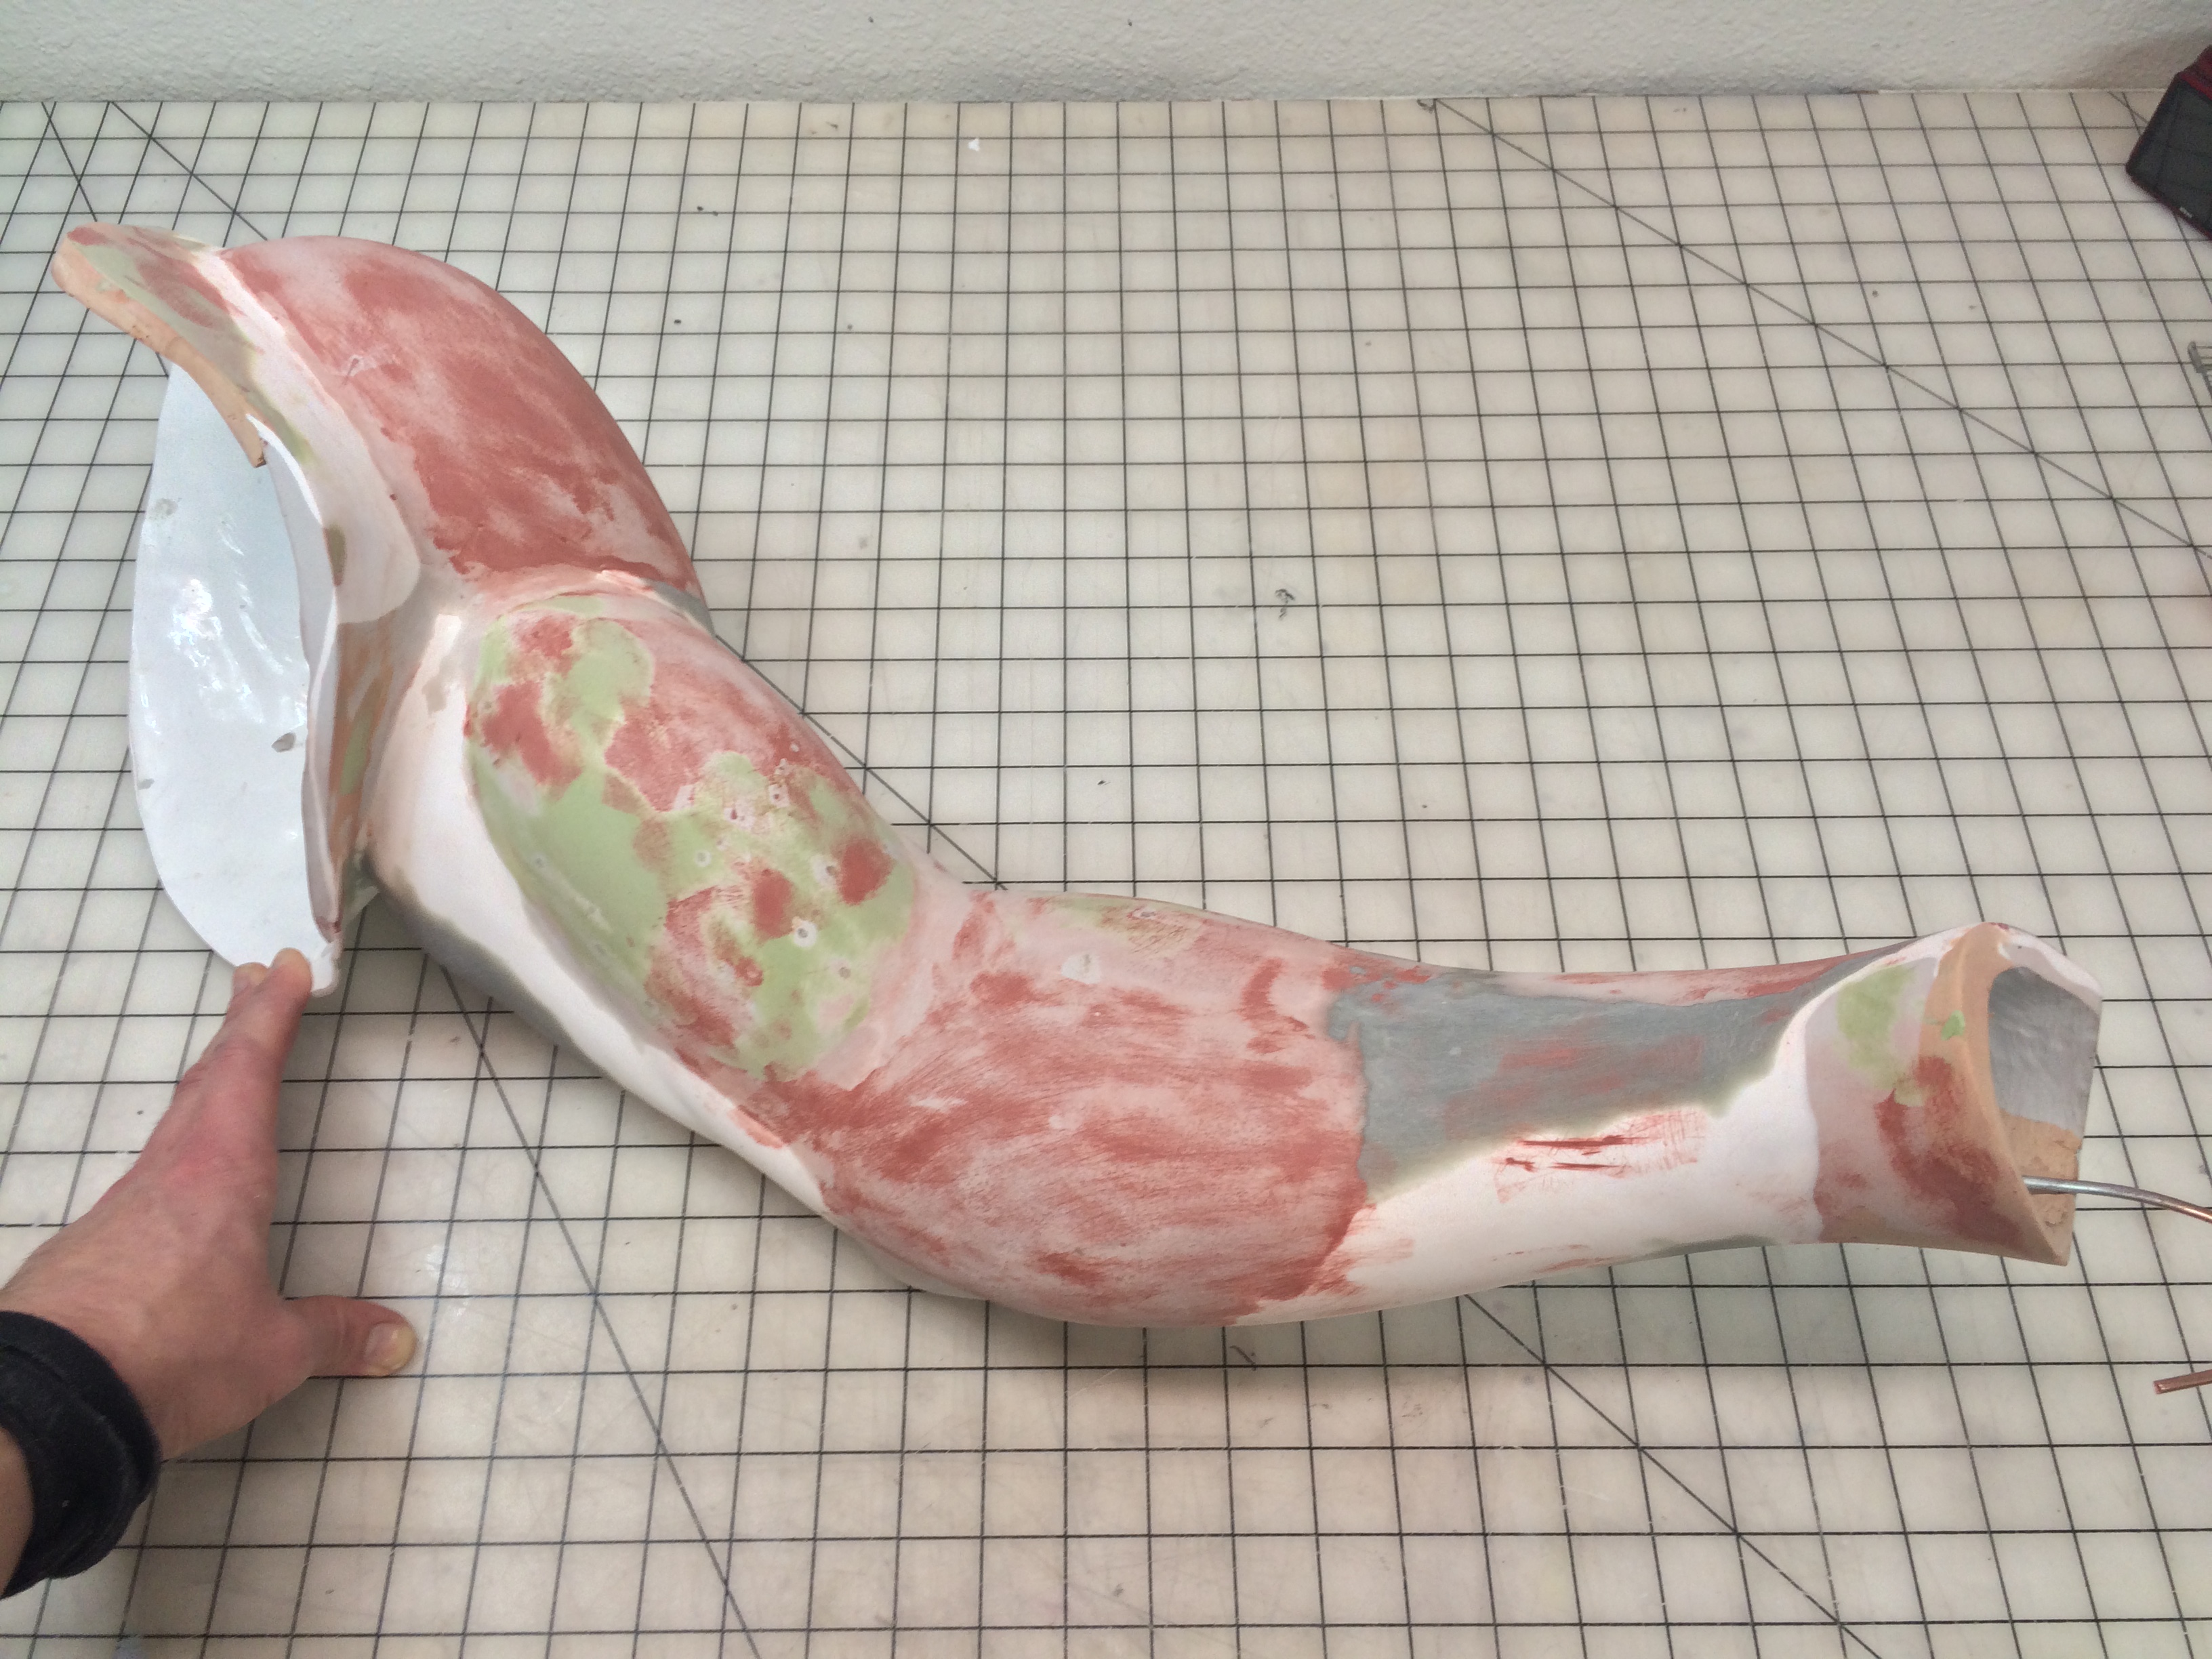
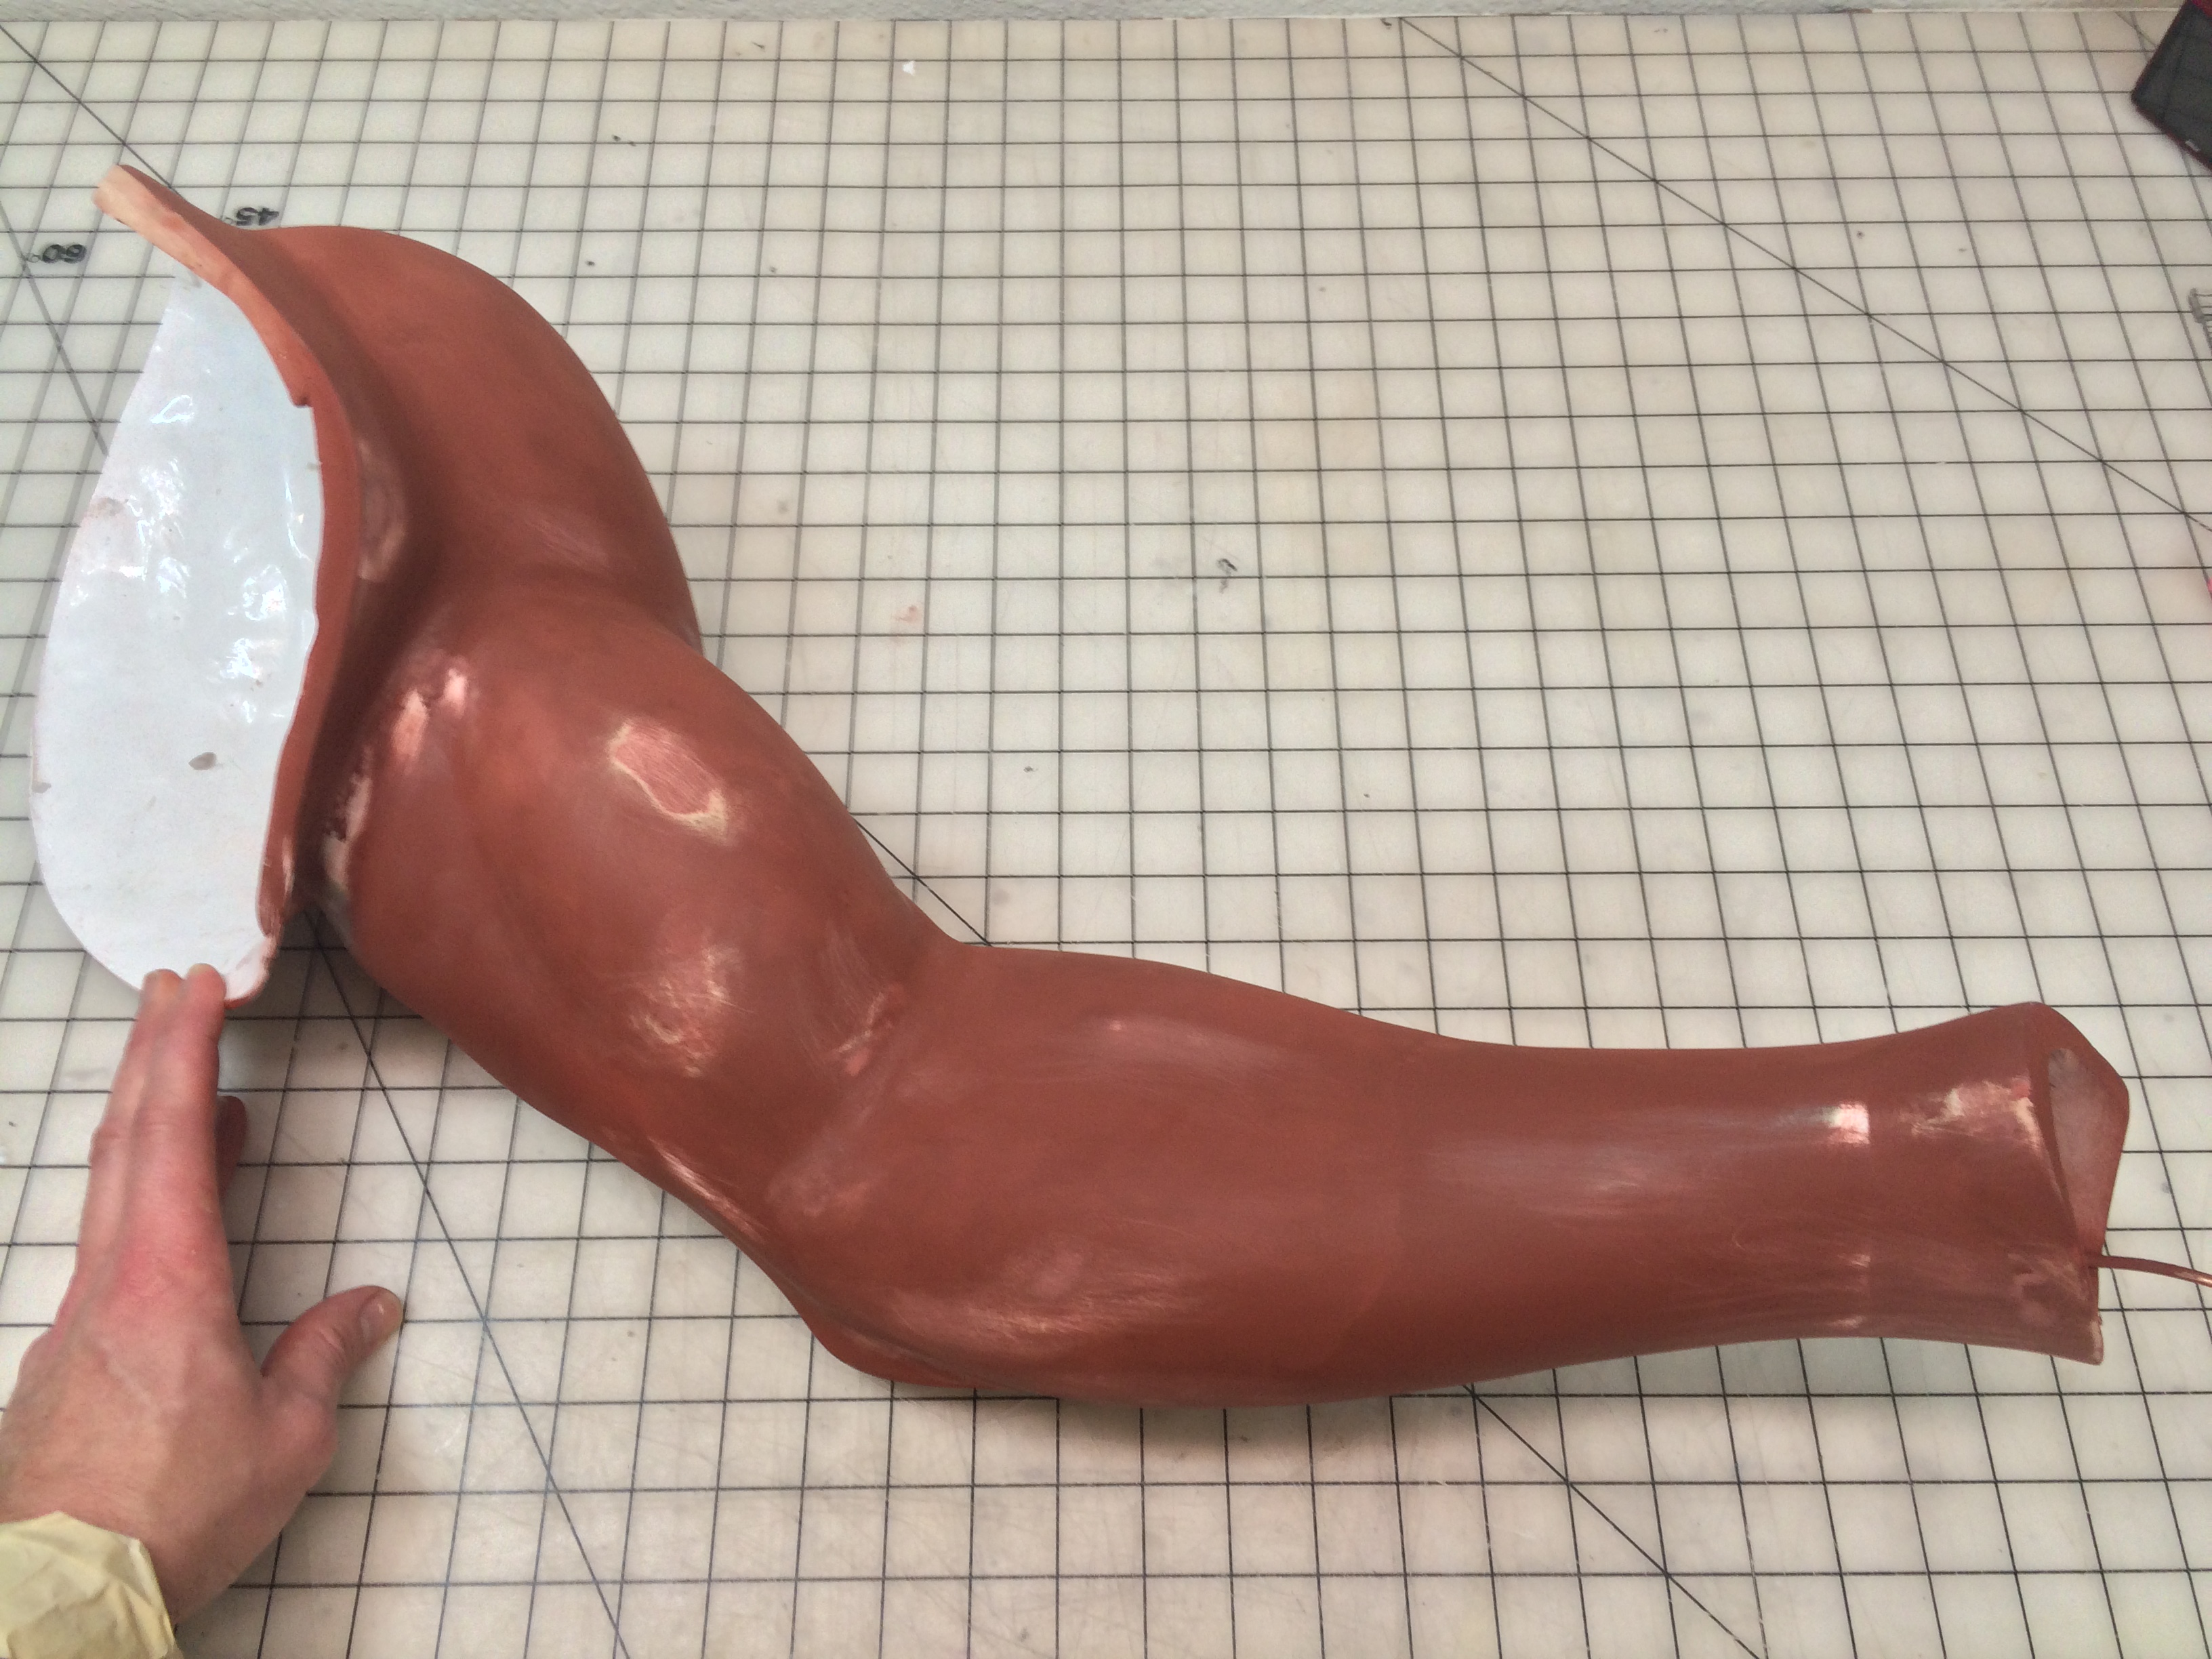
After a couple more passes of Krylon primer and some touch-up with spot putty, the entire arm was wet sanded up to 1000 grit, then cut in half along the elbow. I wanted to mold each half separately, since it would eventually be 2 pieces to be worn, and it made more sense to simply cast it that way (plus, having tried to slush cast the first two versions of the Arm as a single piece, I new I didn’t want to try doing it again!). I made the cut using a full-size hacksaw blade I’d removed from the saw. Since the Arm was hollow, it was easy enough to do, and gave me more delicate control than a Dremel would.

I actually molded both sections of the Arm twice.
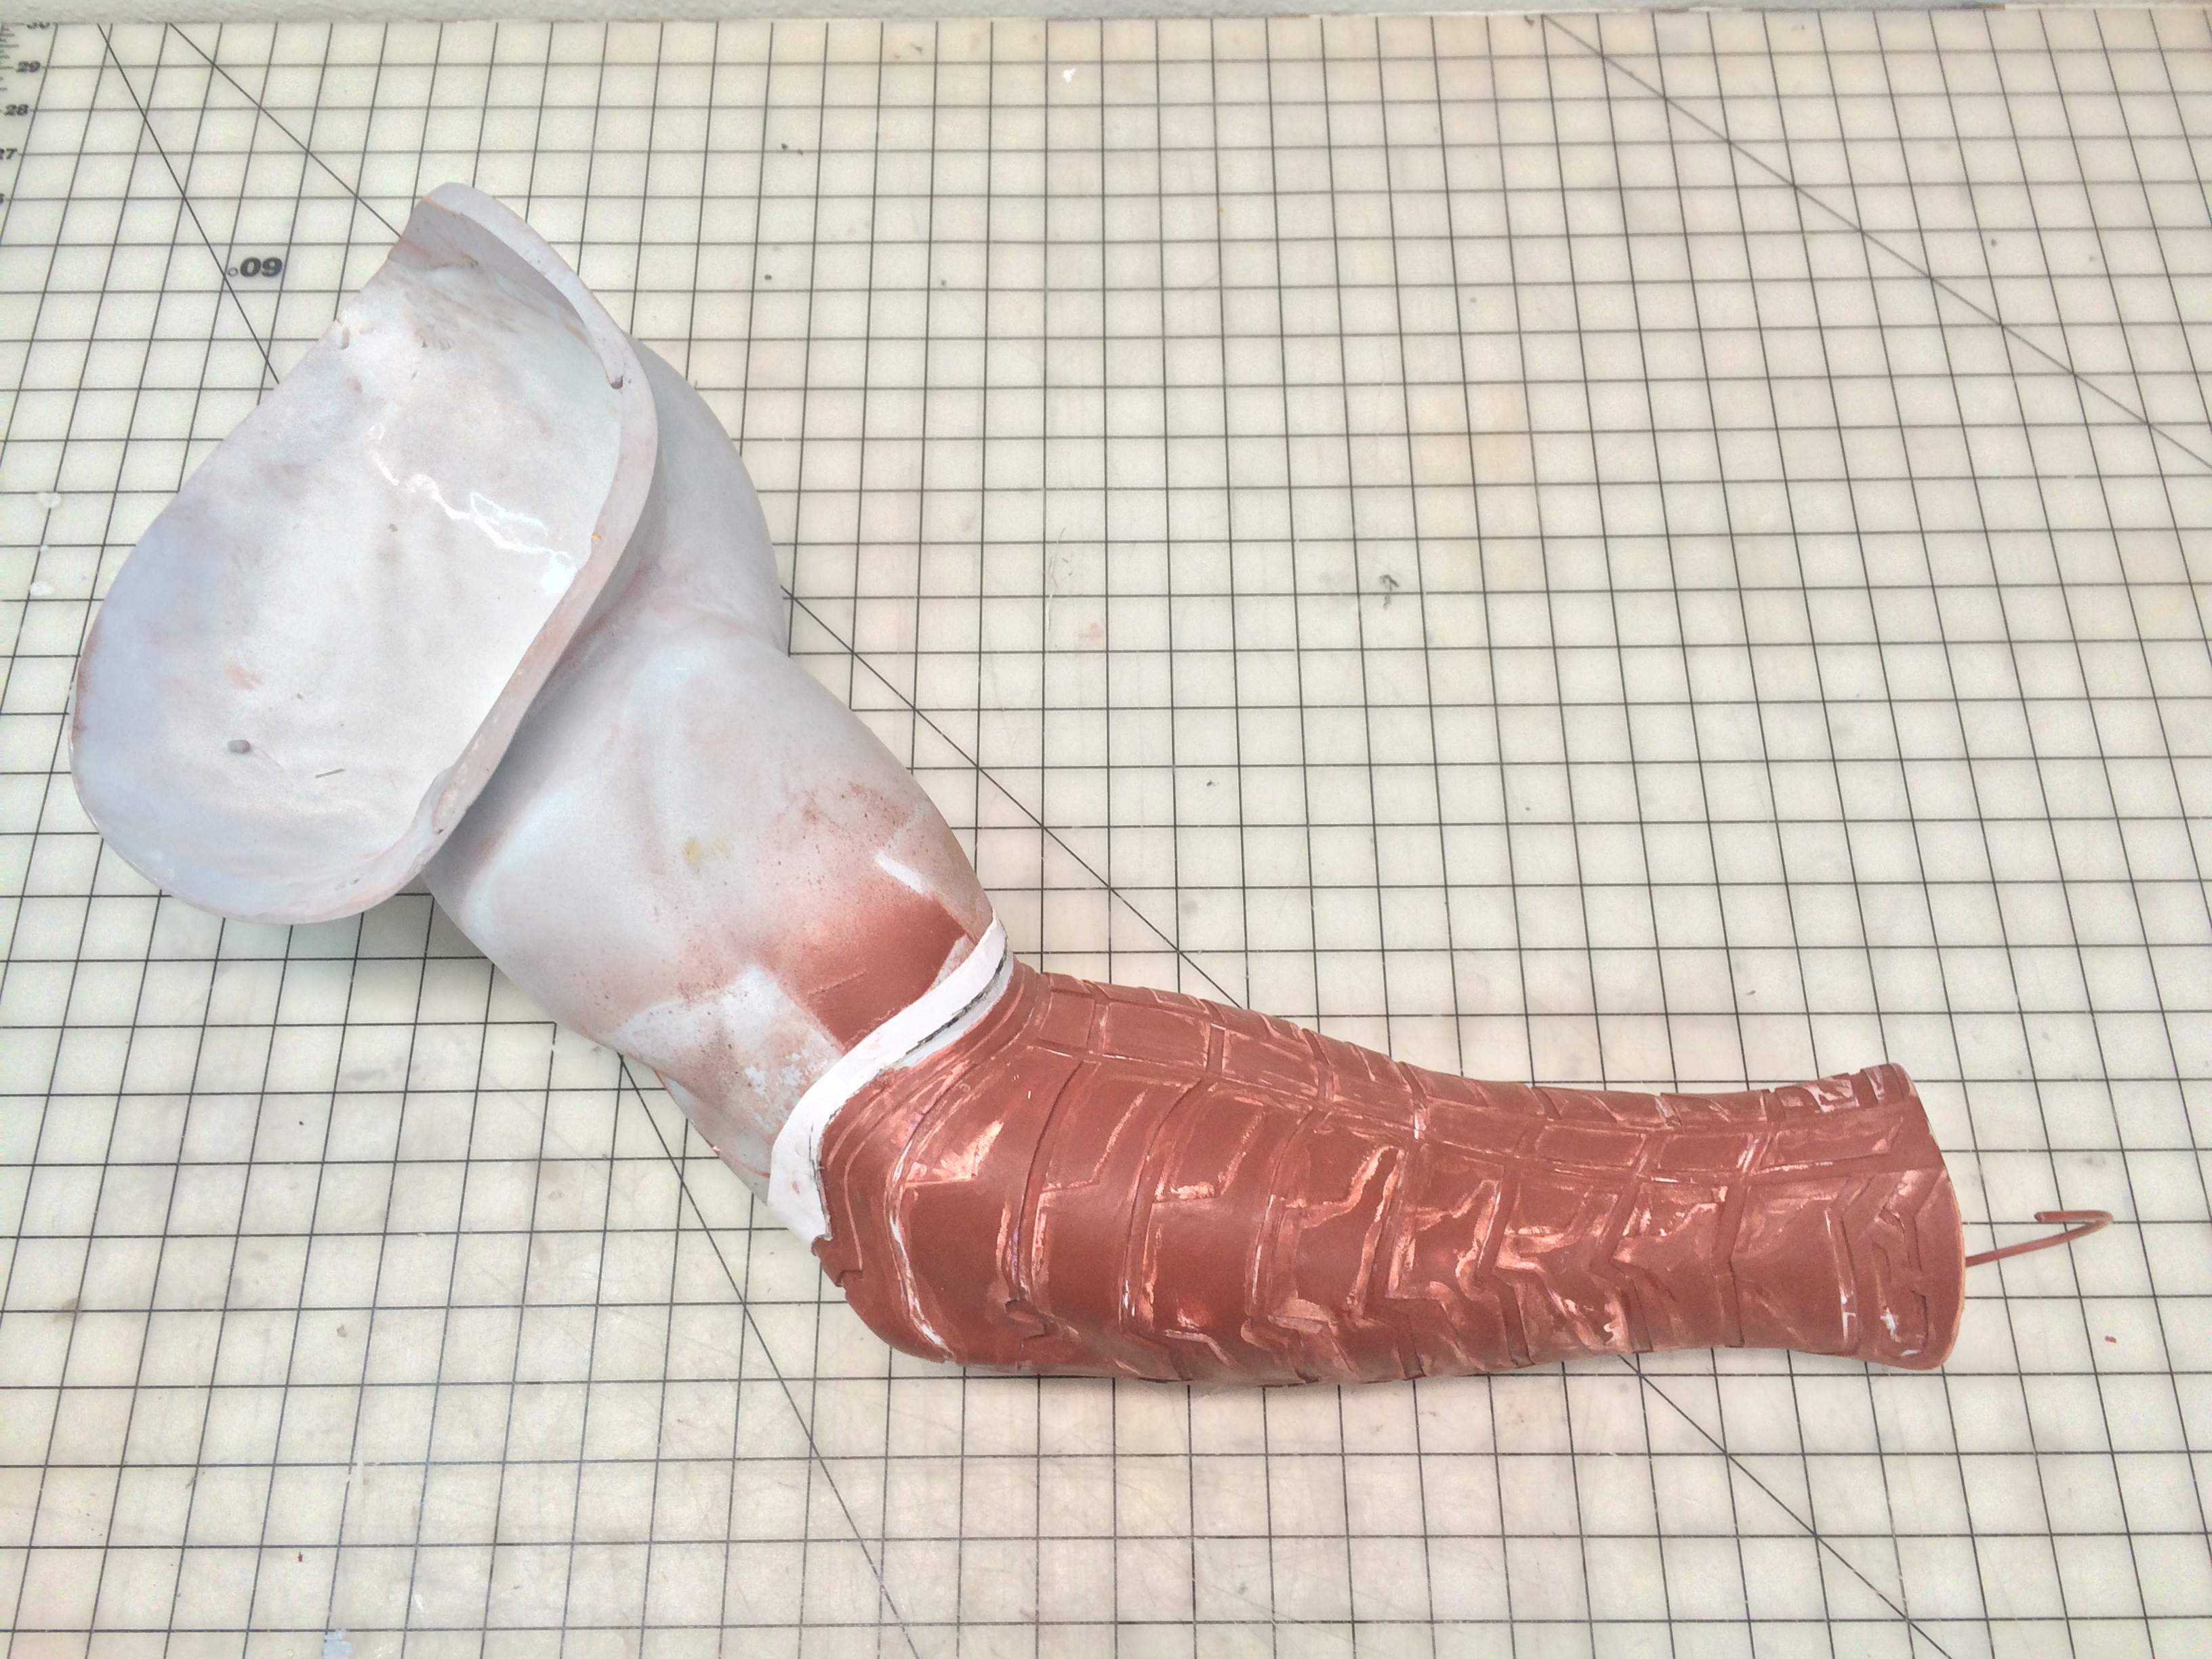
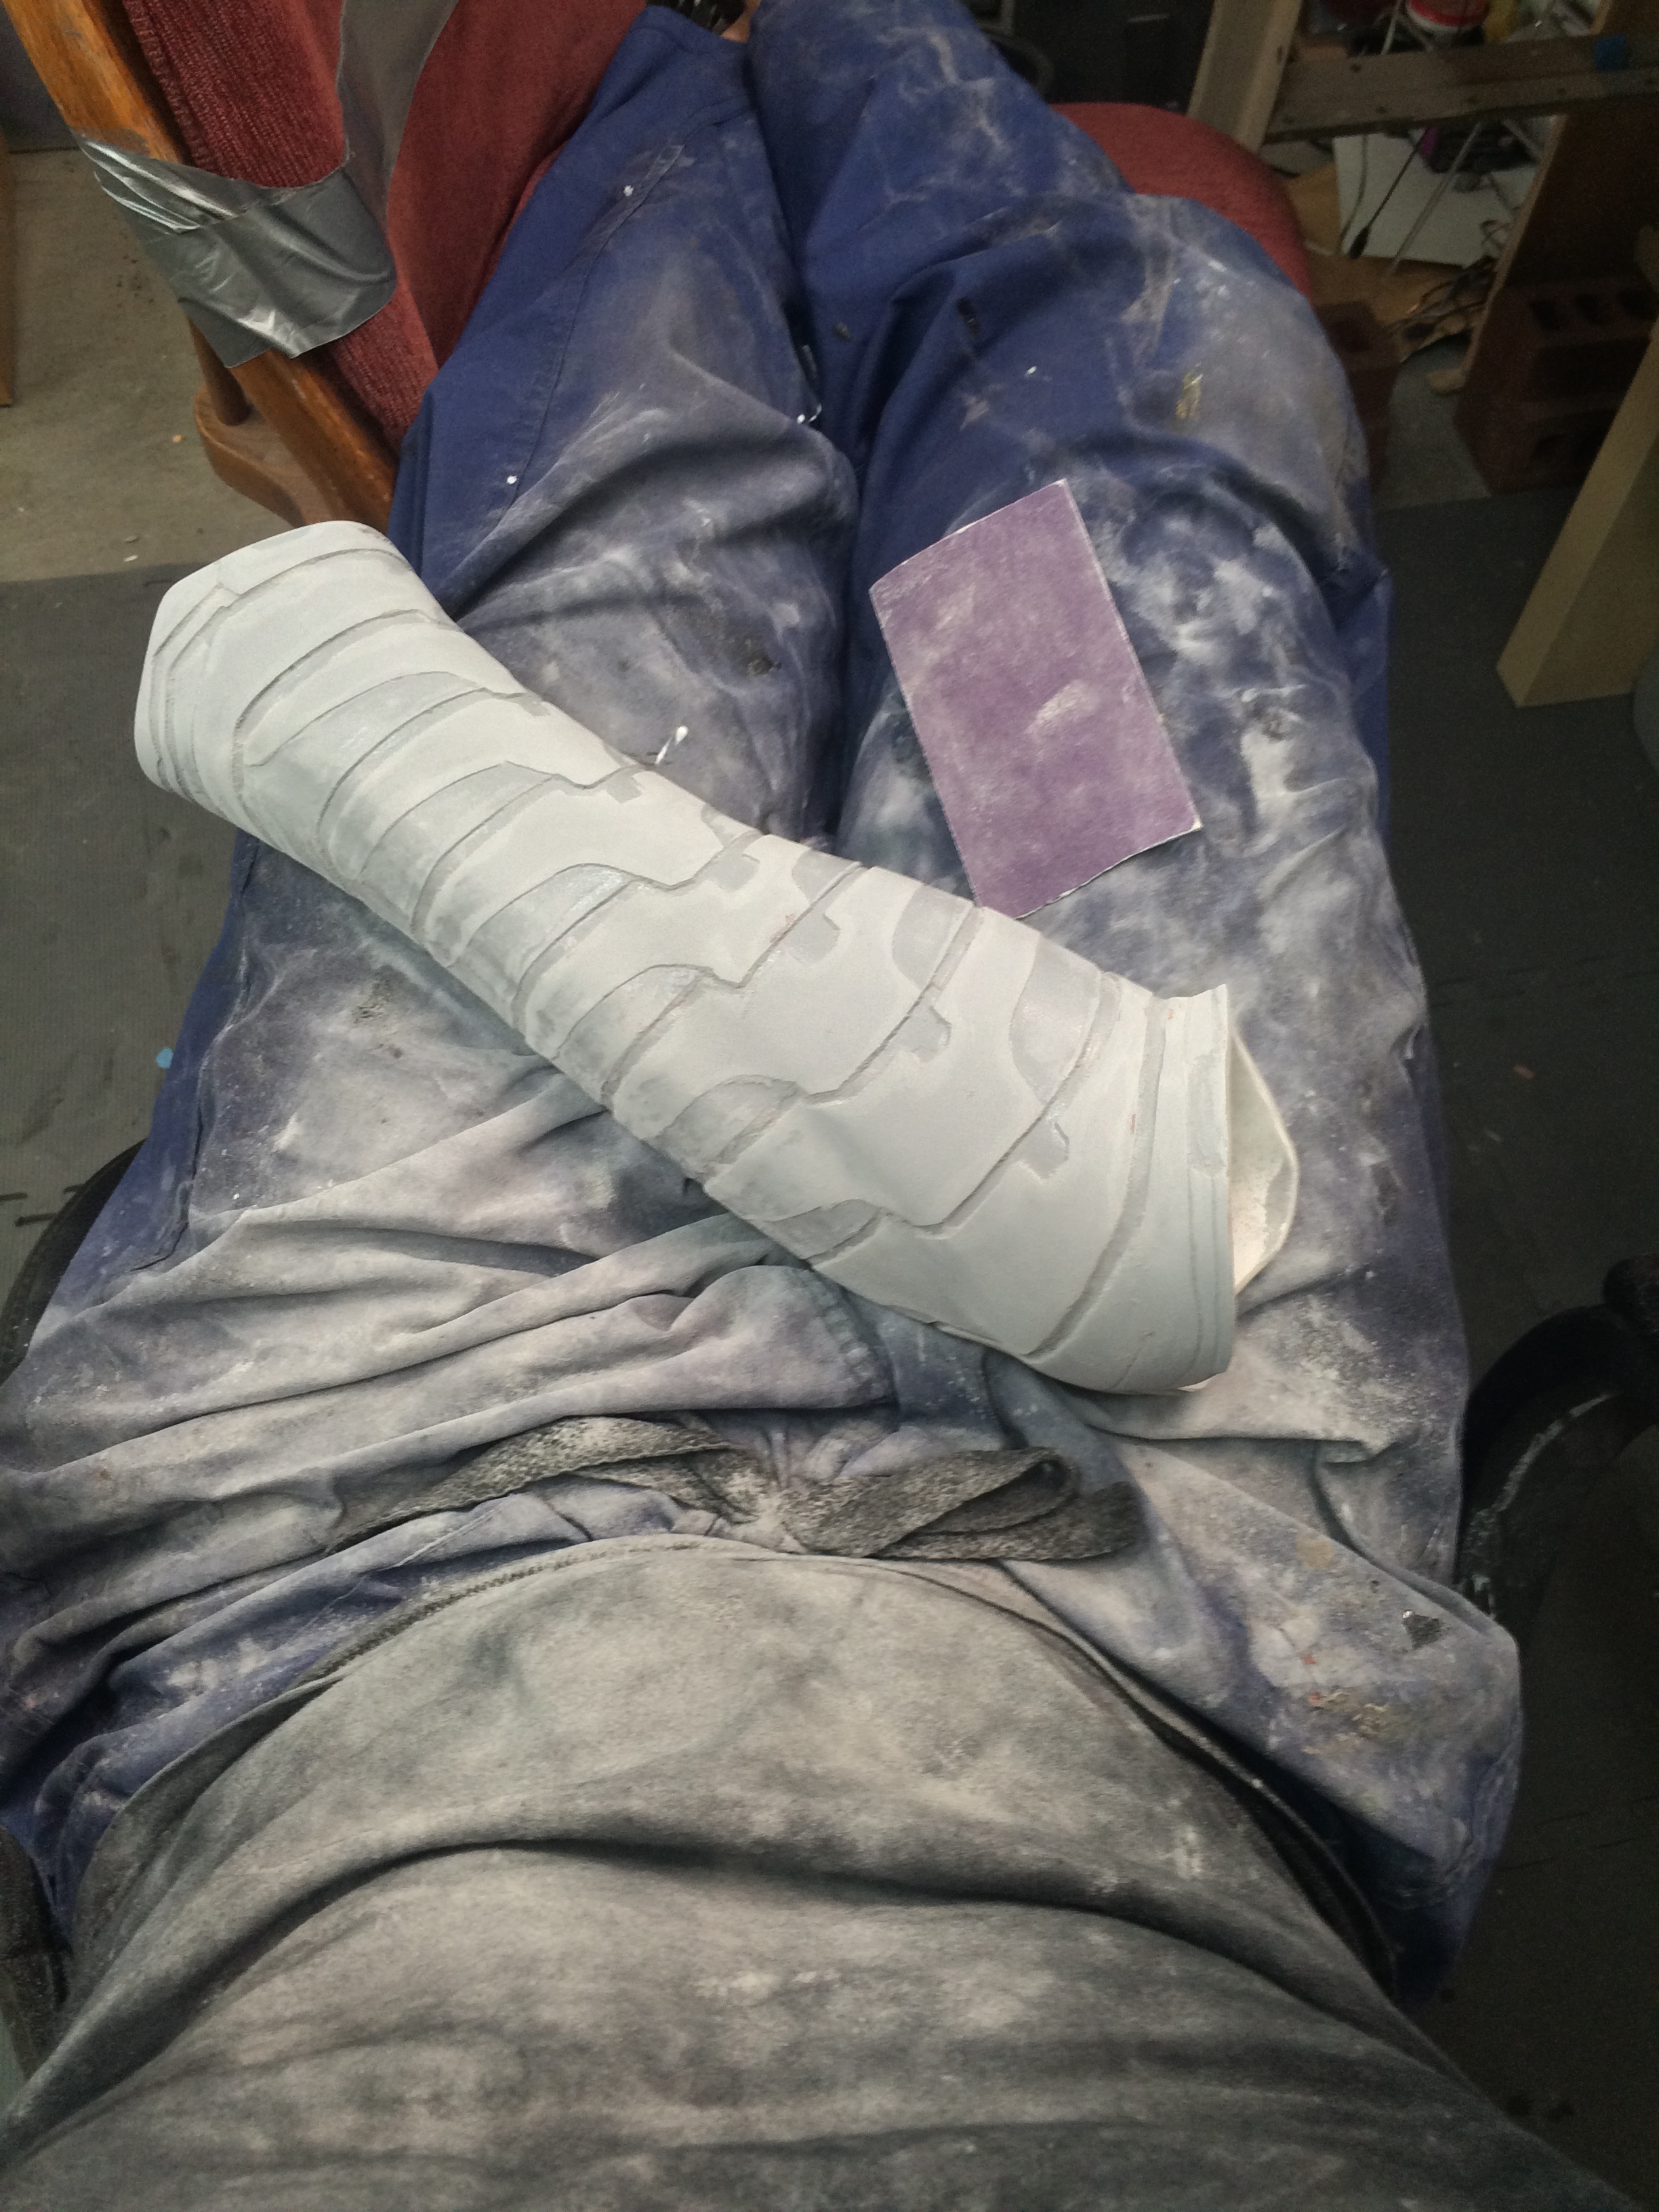
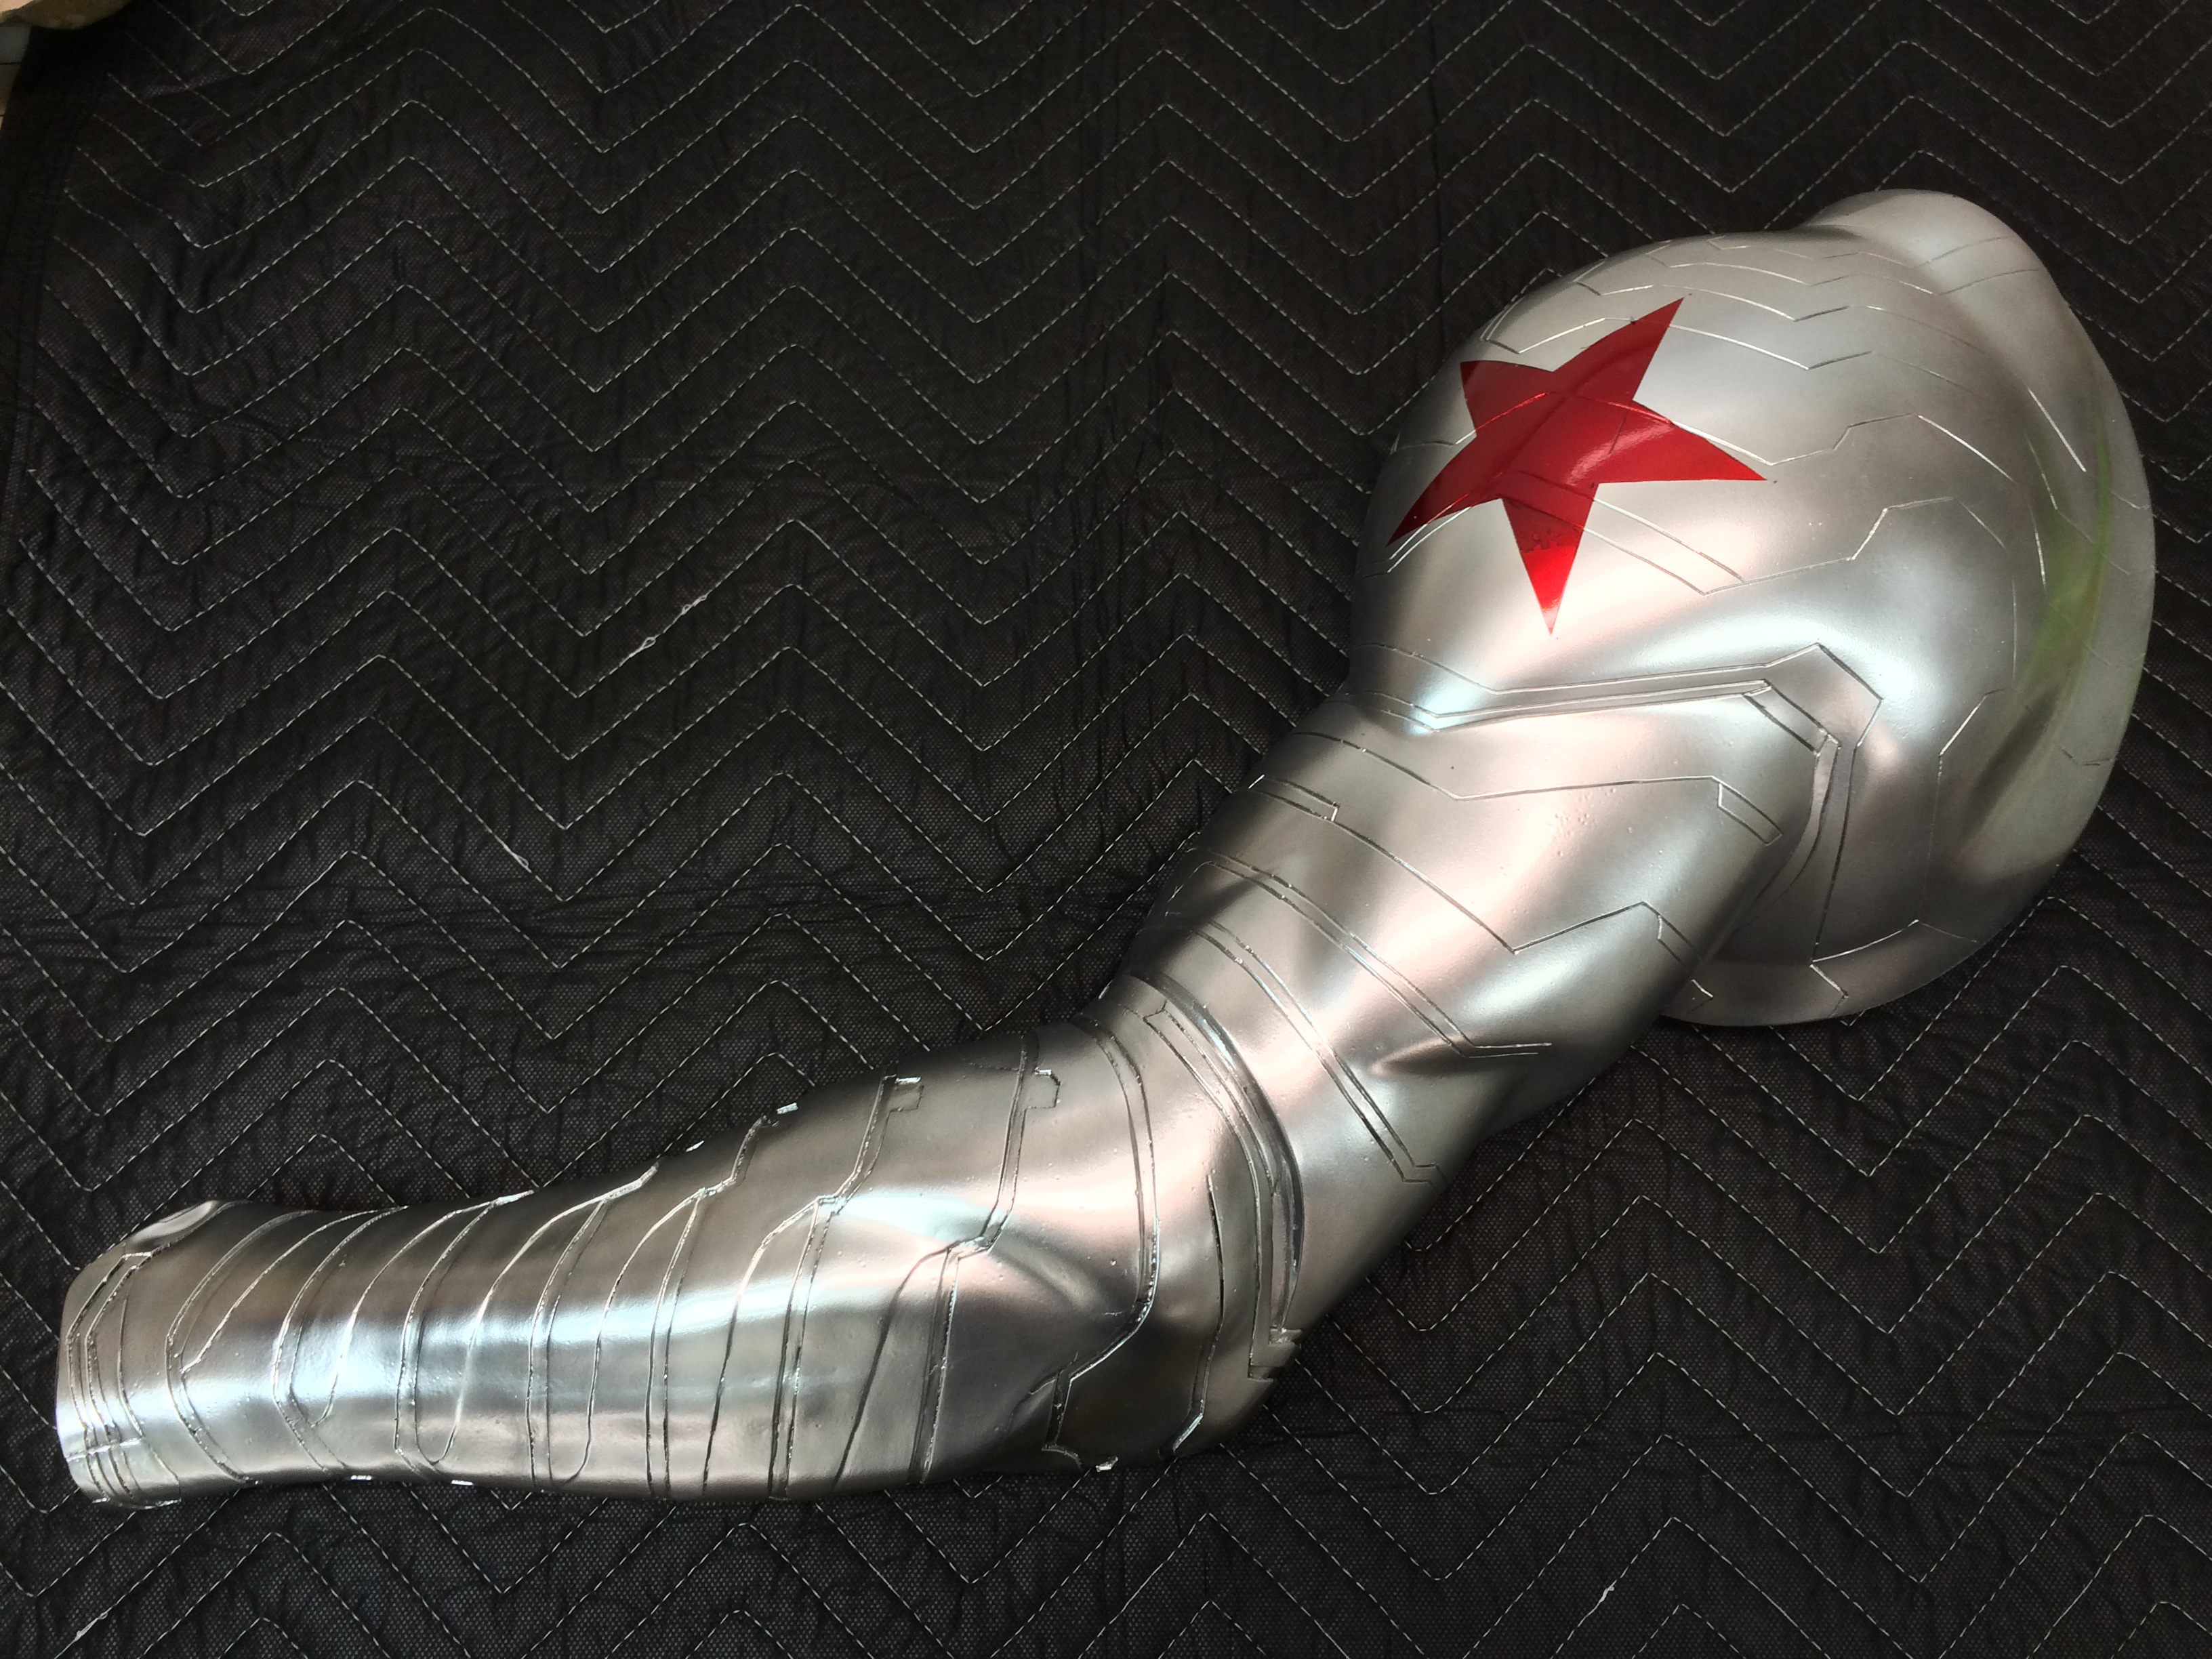
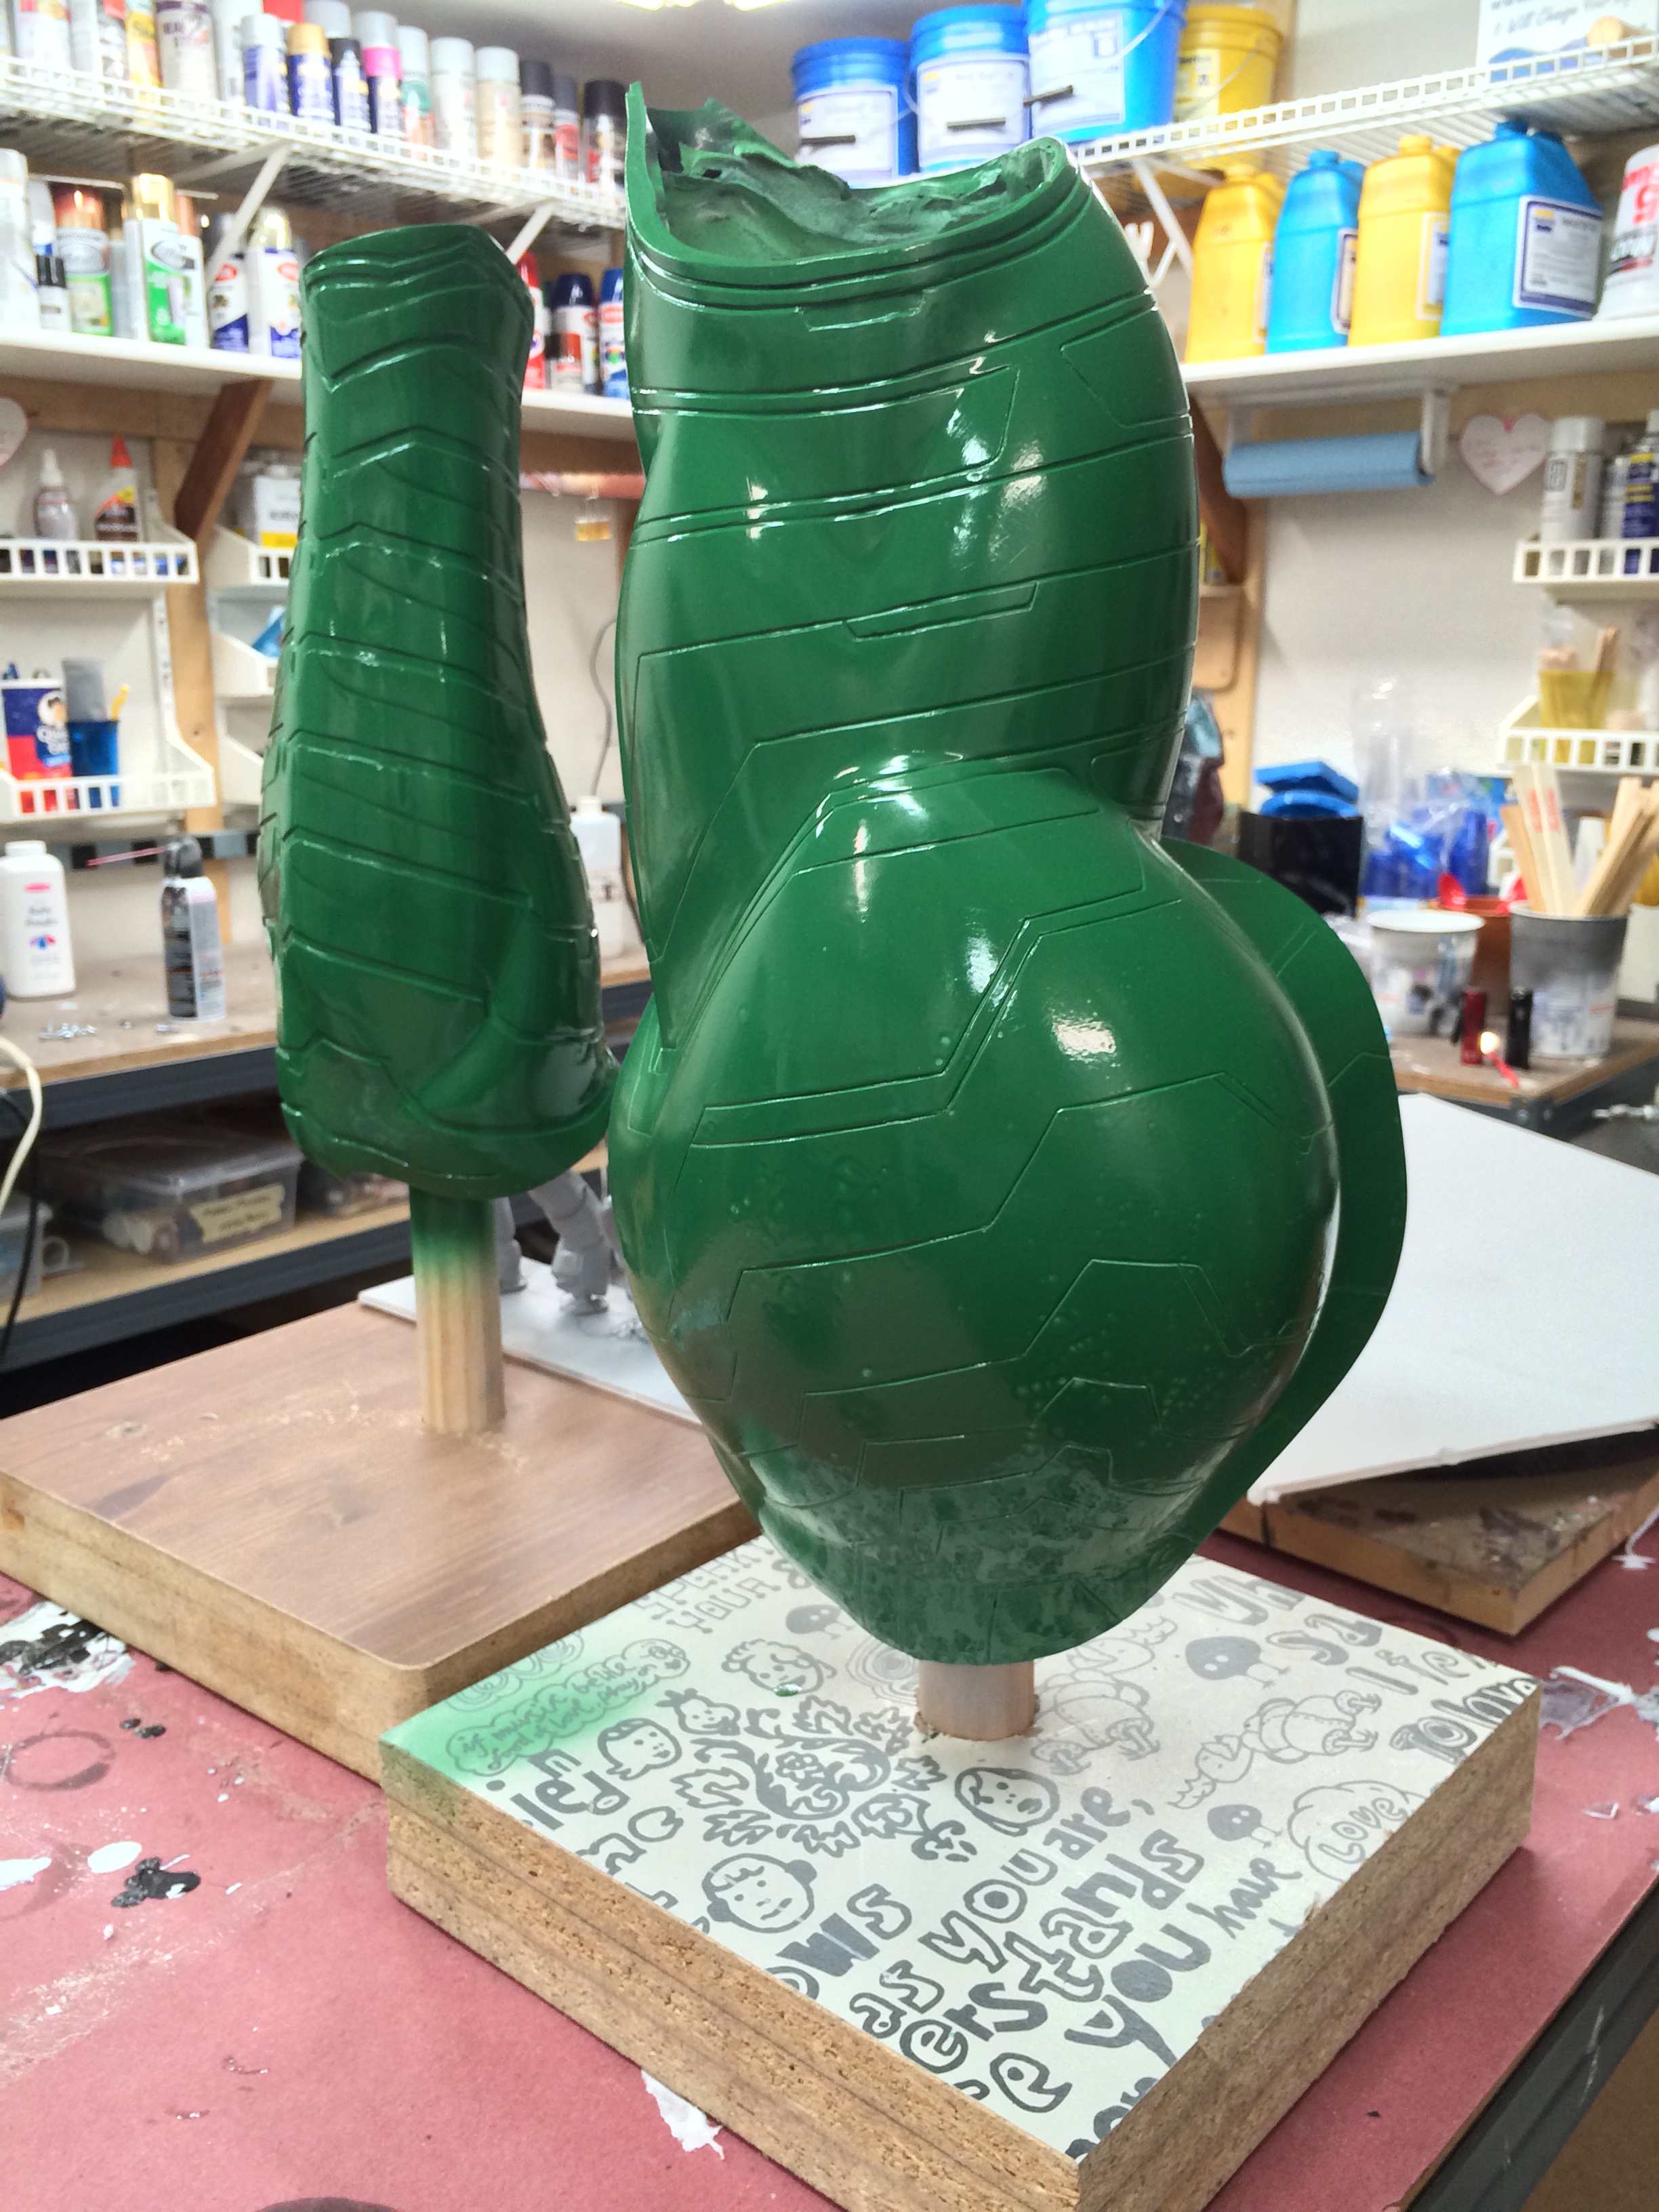
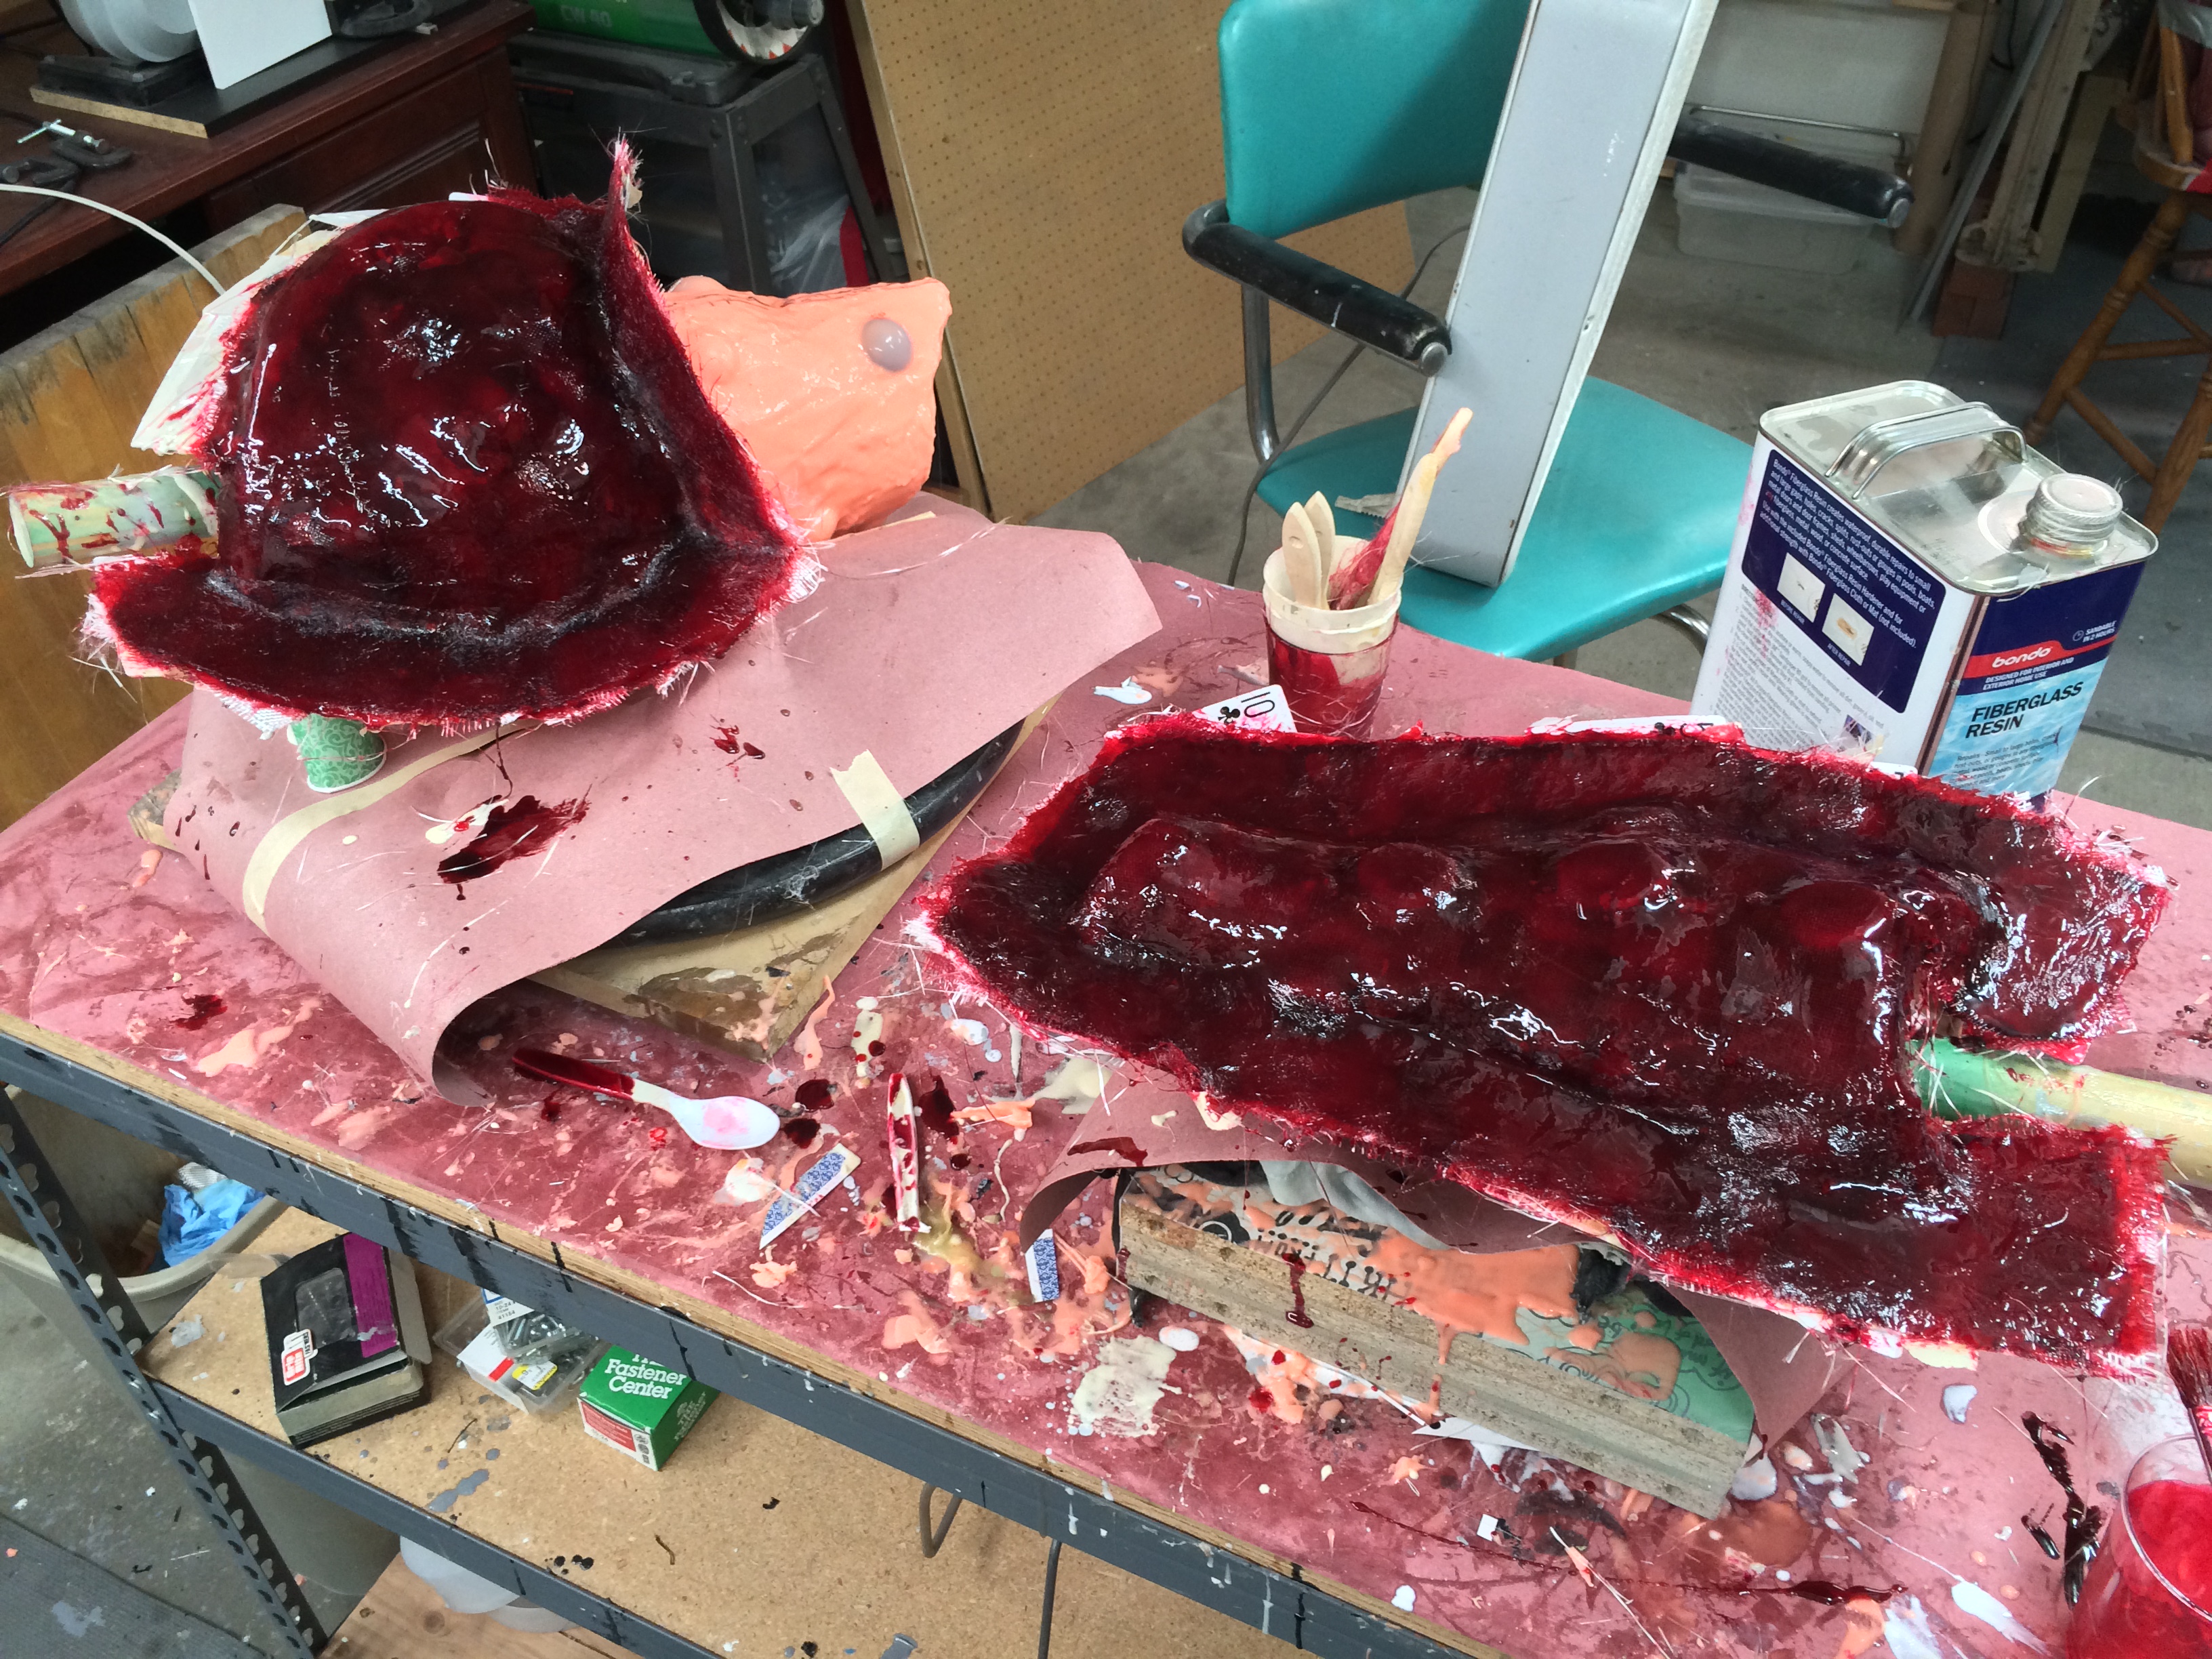
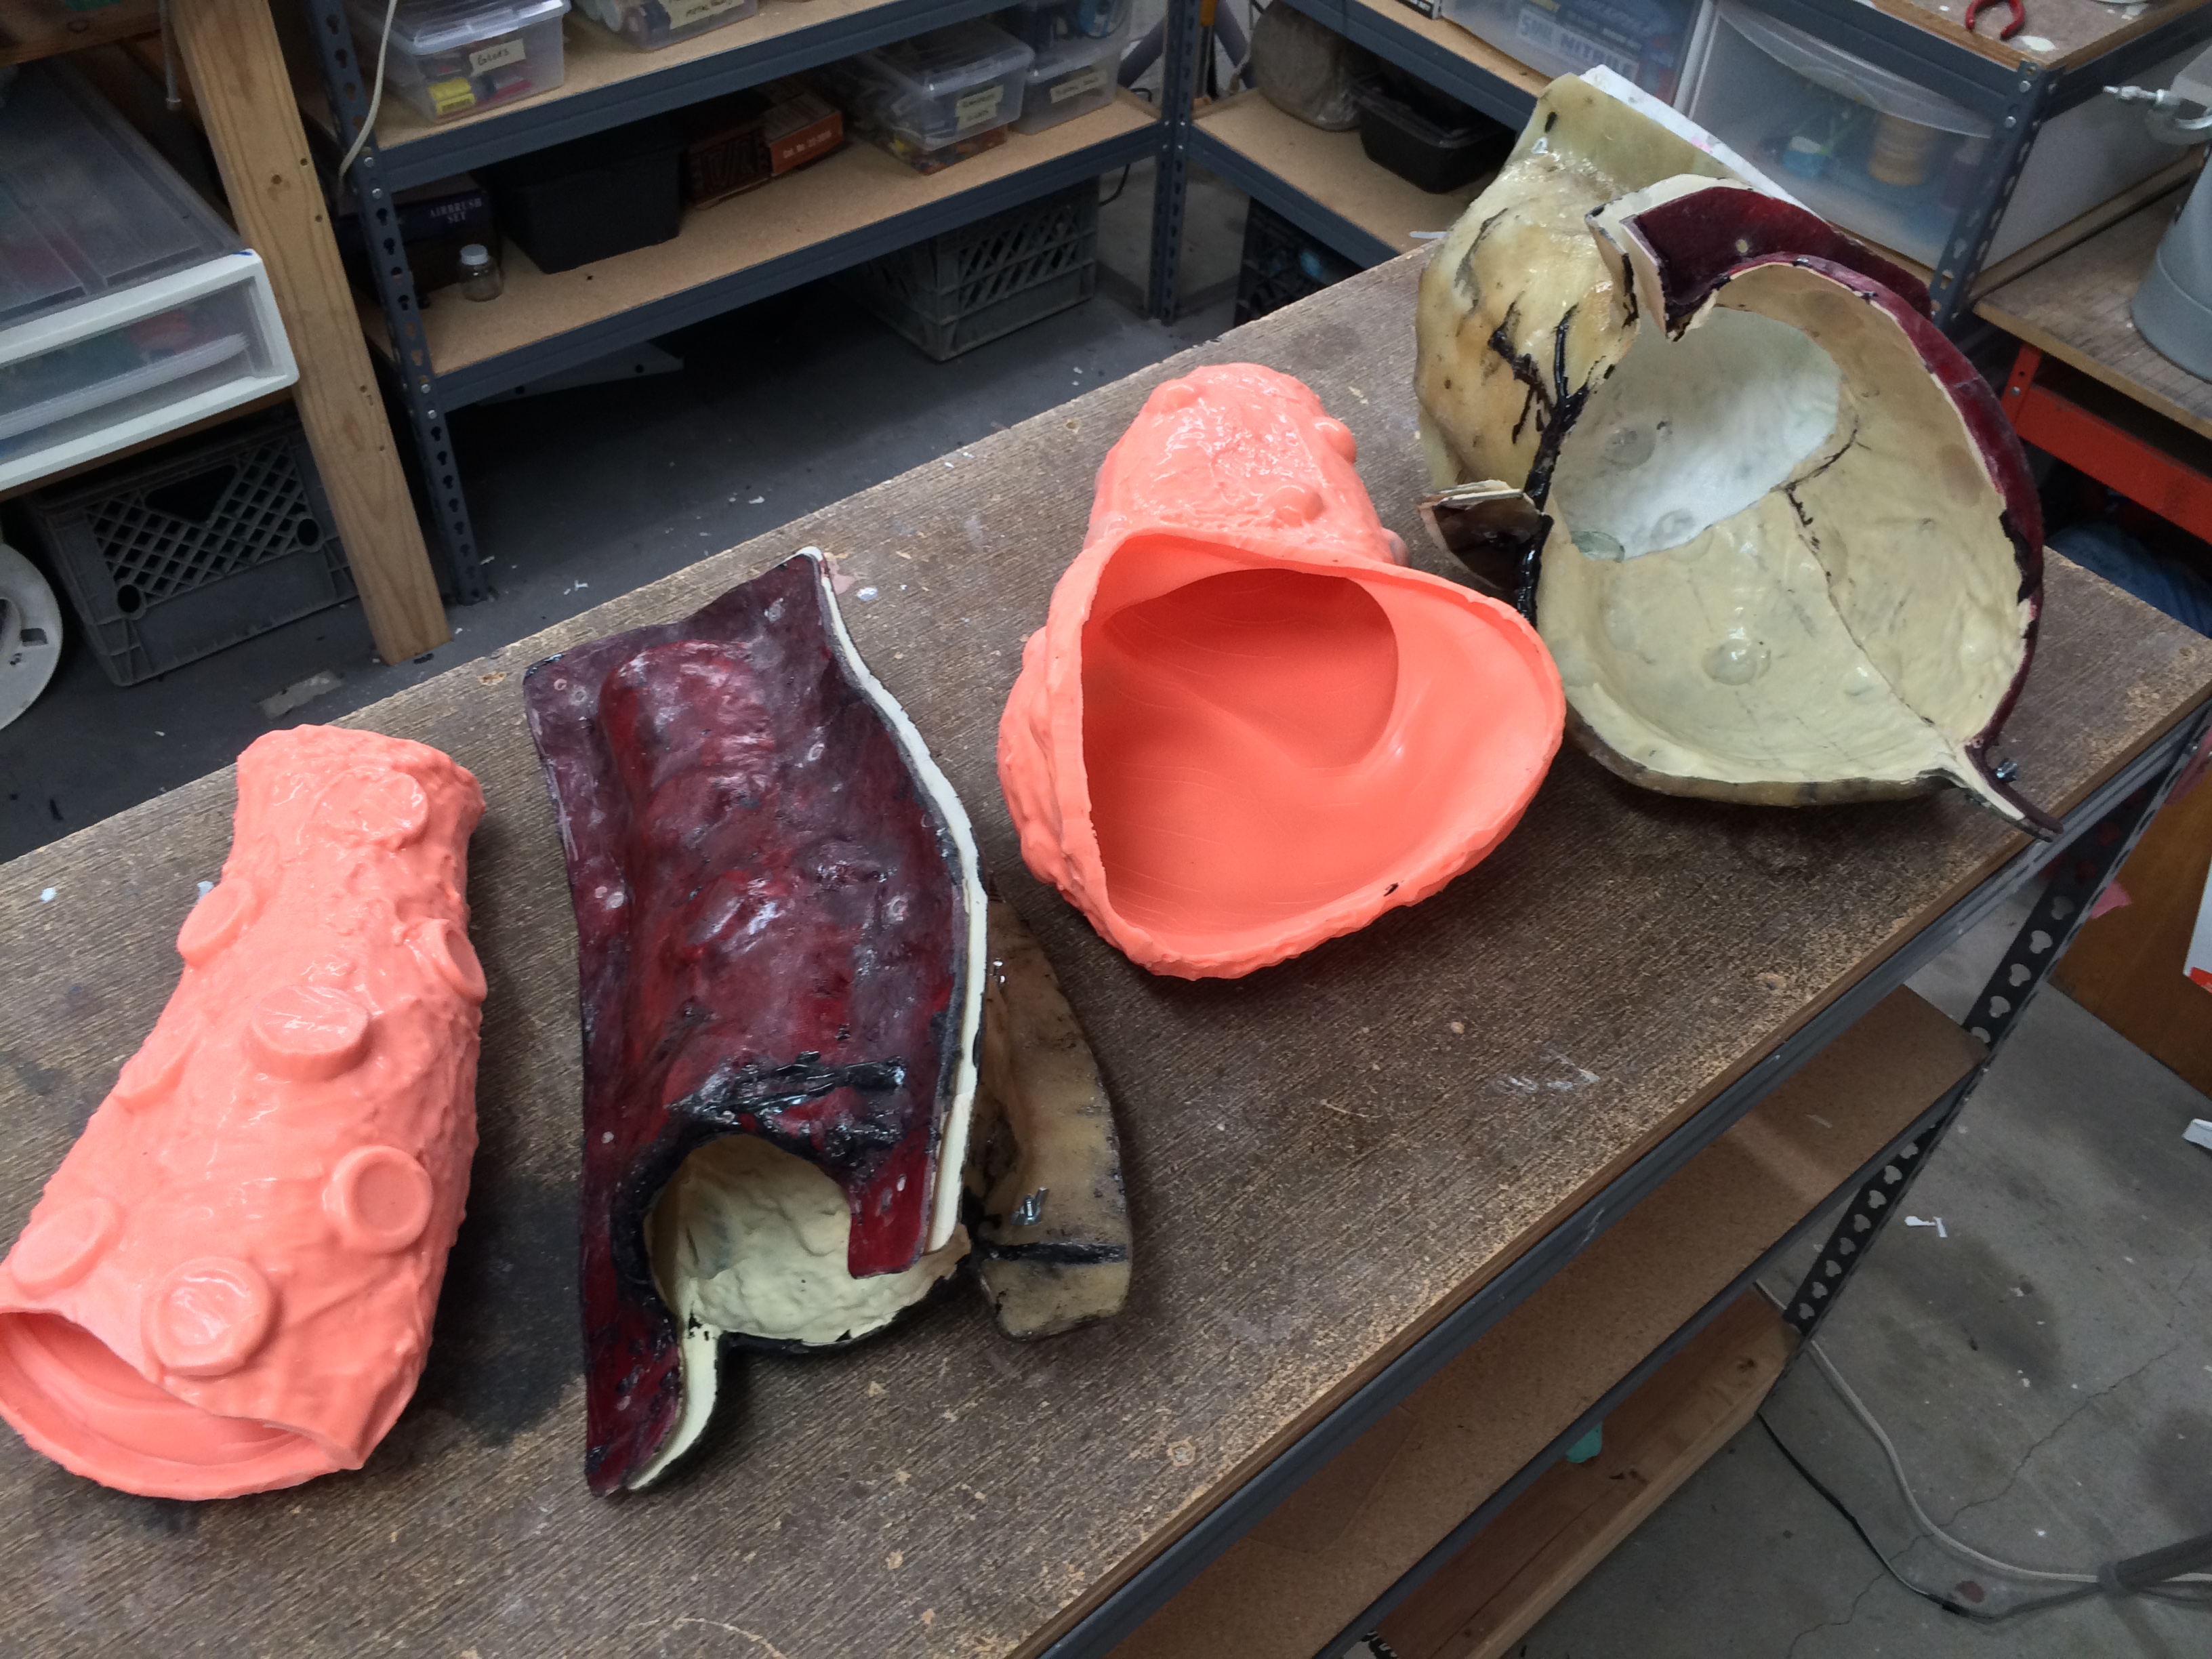
The first attempt, I made a pair of matrix molds – these turned out terrible. They didn’t seat right, locked around the Arm, and were generally a huge pain to deal with. I was able to get 2 successful castings out of them after 5 or 6 attempts. Both were cast in Smooth-On ONYX resin. One of those castings was trimmed, sanded, primed, base coated gloss black, and finished with Alclad “chrome” paint. This was the first Arm I presented to the Client.
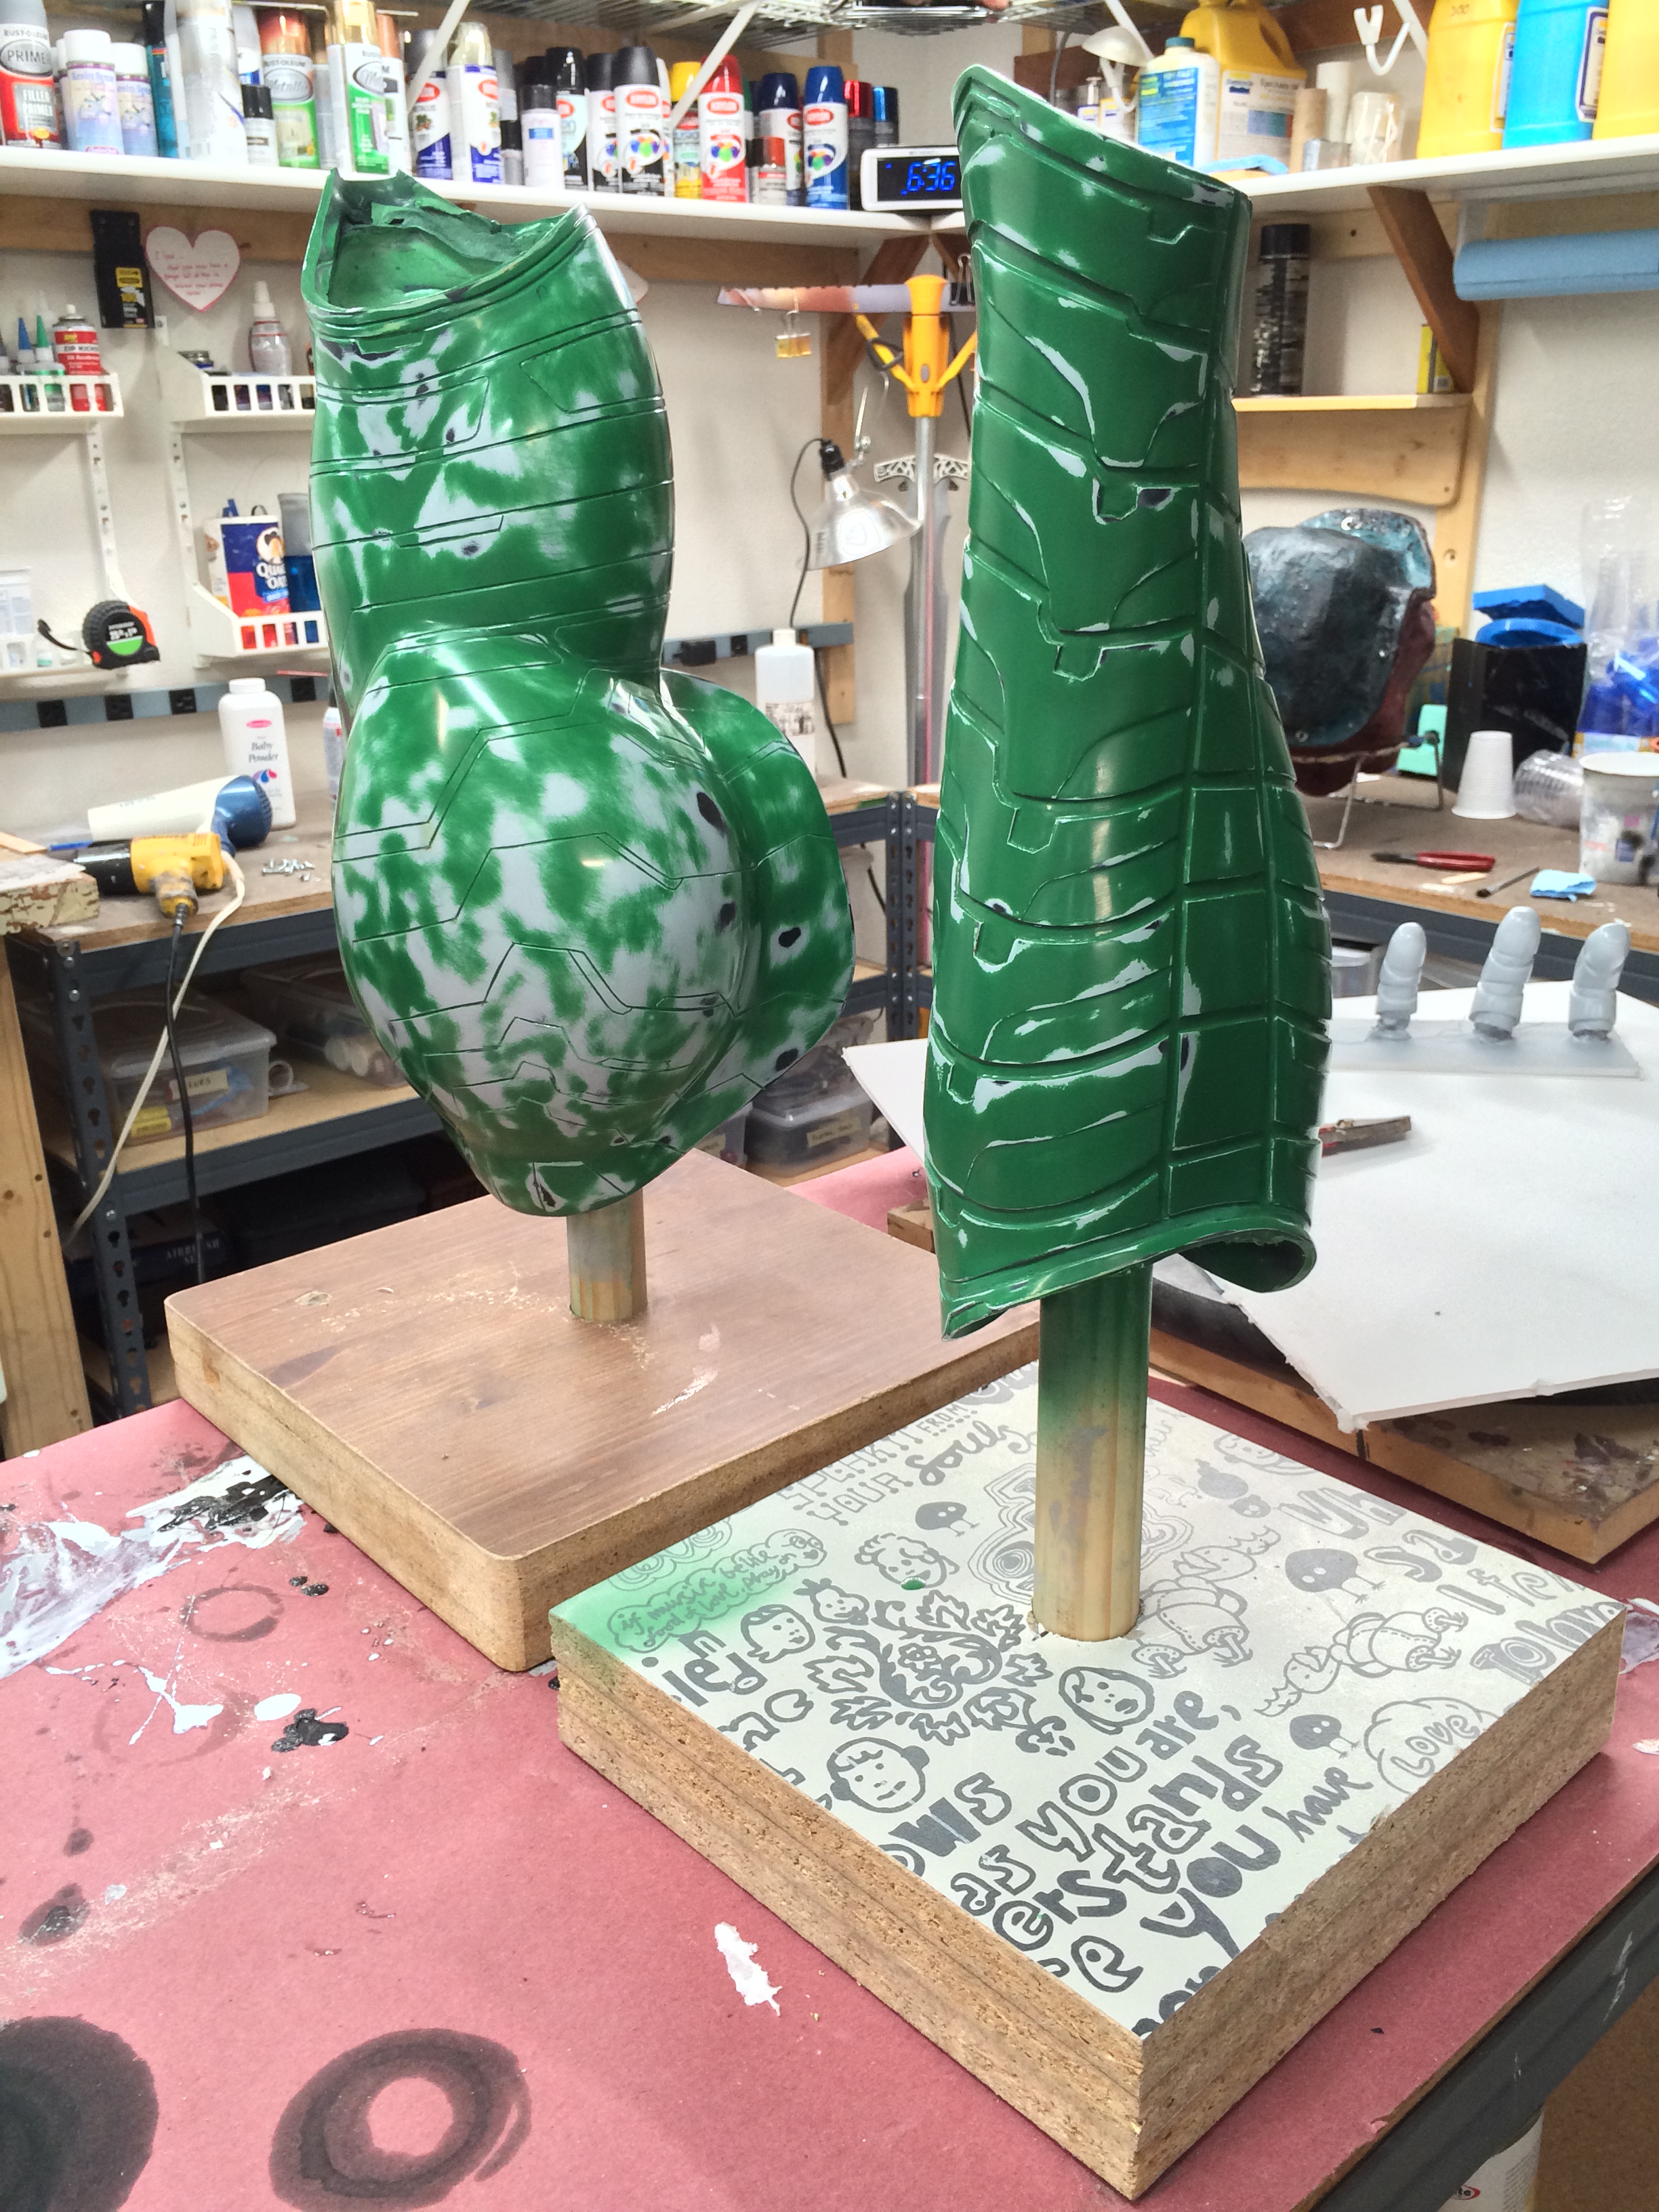
However, the intent had always been to have the Arm chrome-plated. So after the convention, I spoke to my client, got some feedback about size, shape, and fit, and modified a casting from the first mold to meet the new specs (this was the second casting mentioned earlier). I added more room in the elbow, and made the entire forearm larger, but cutting, the heat-forming / stretching the cast, and inserting layers of sintra and styrene plastic to fill the gap.
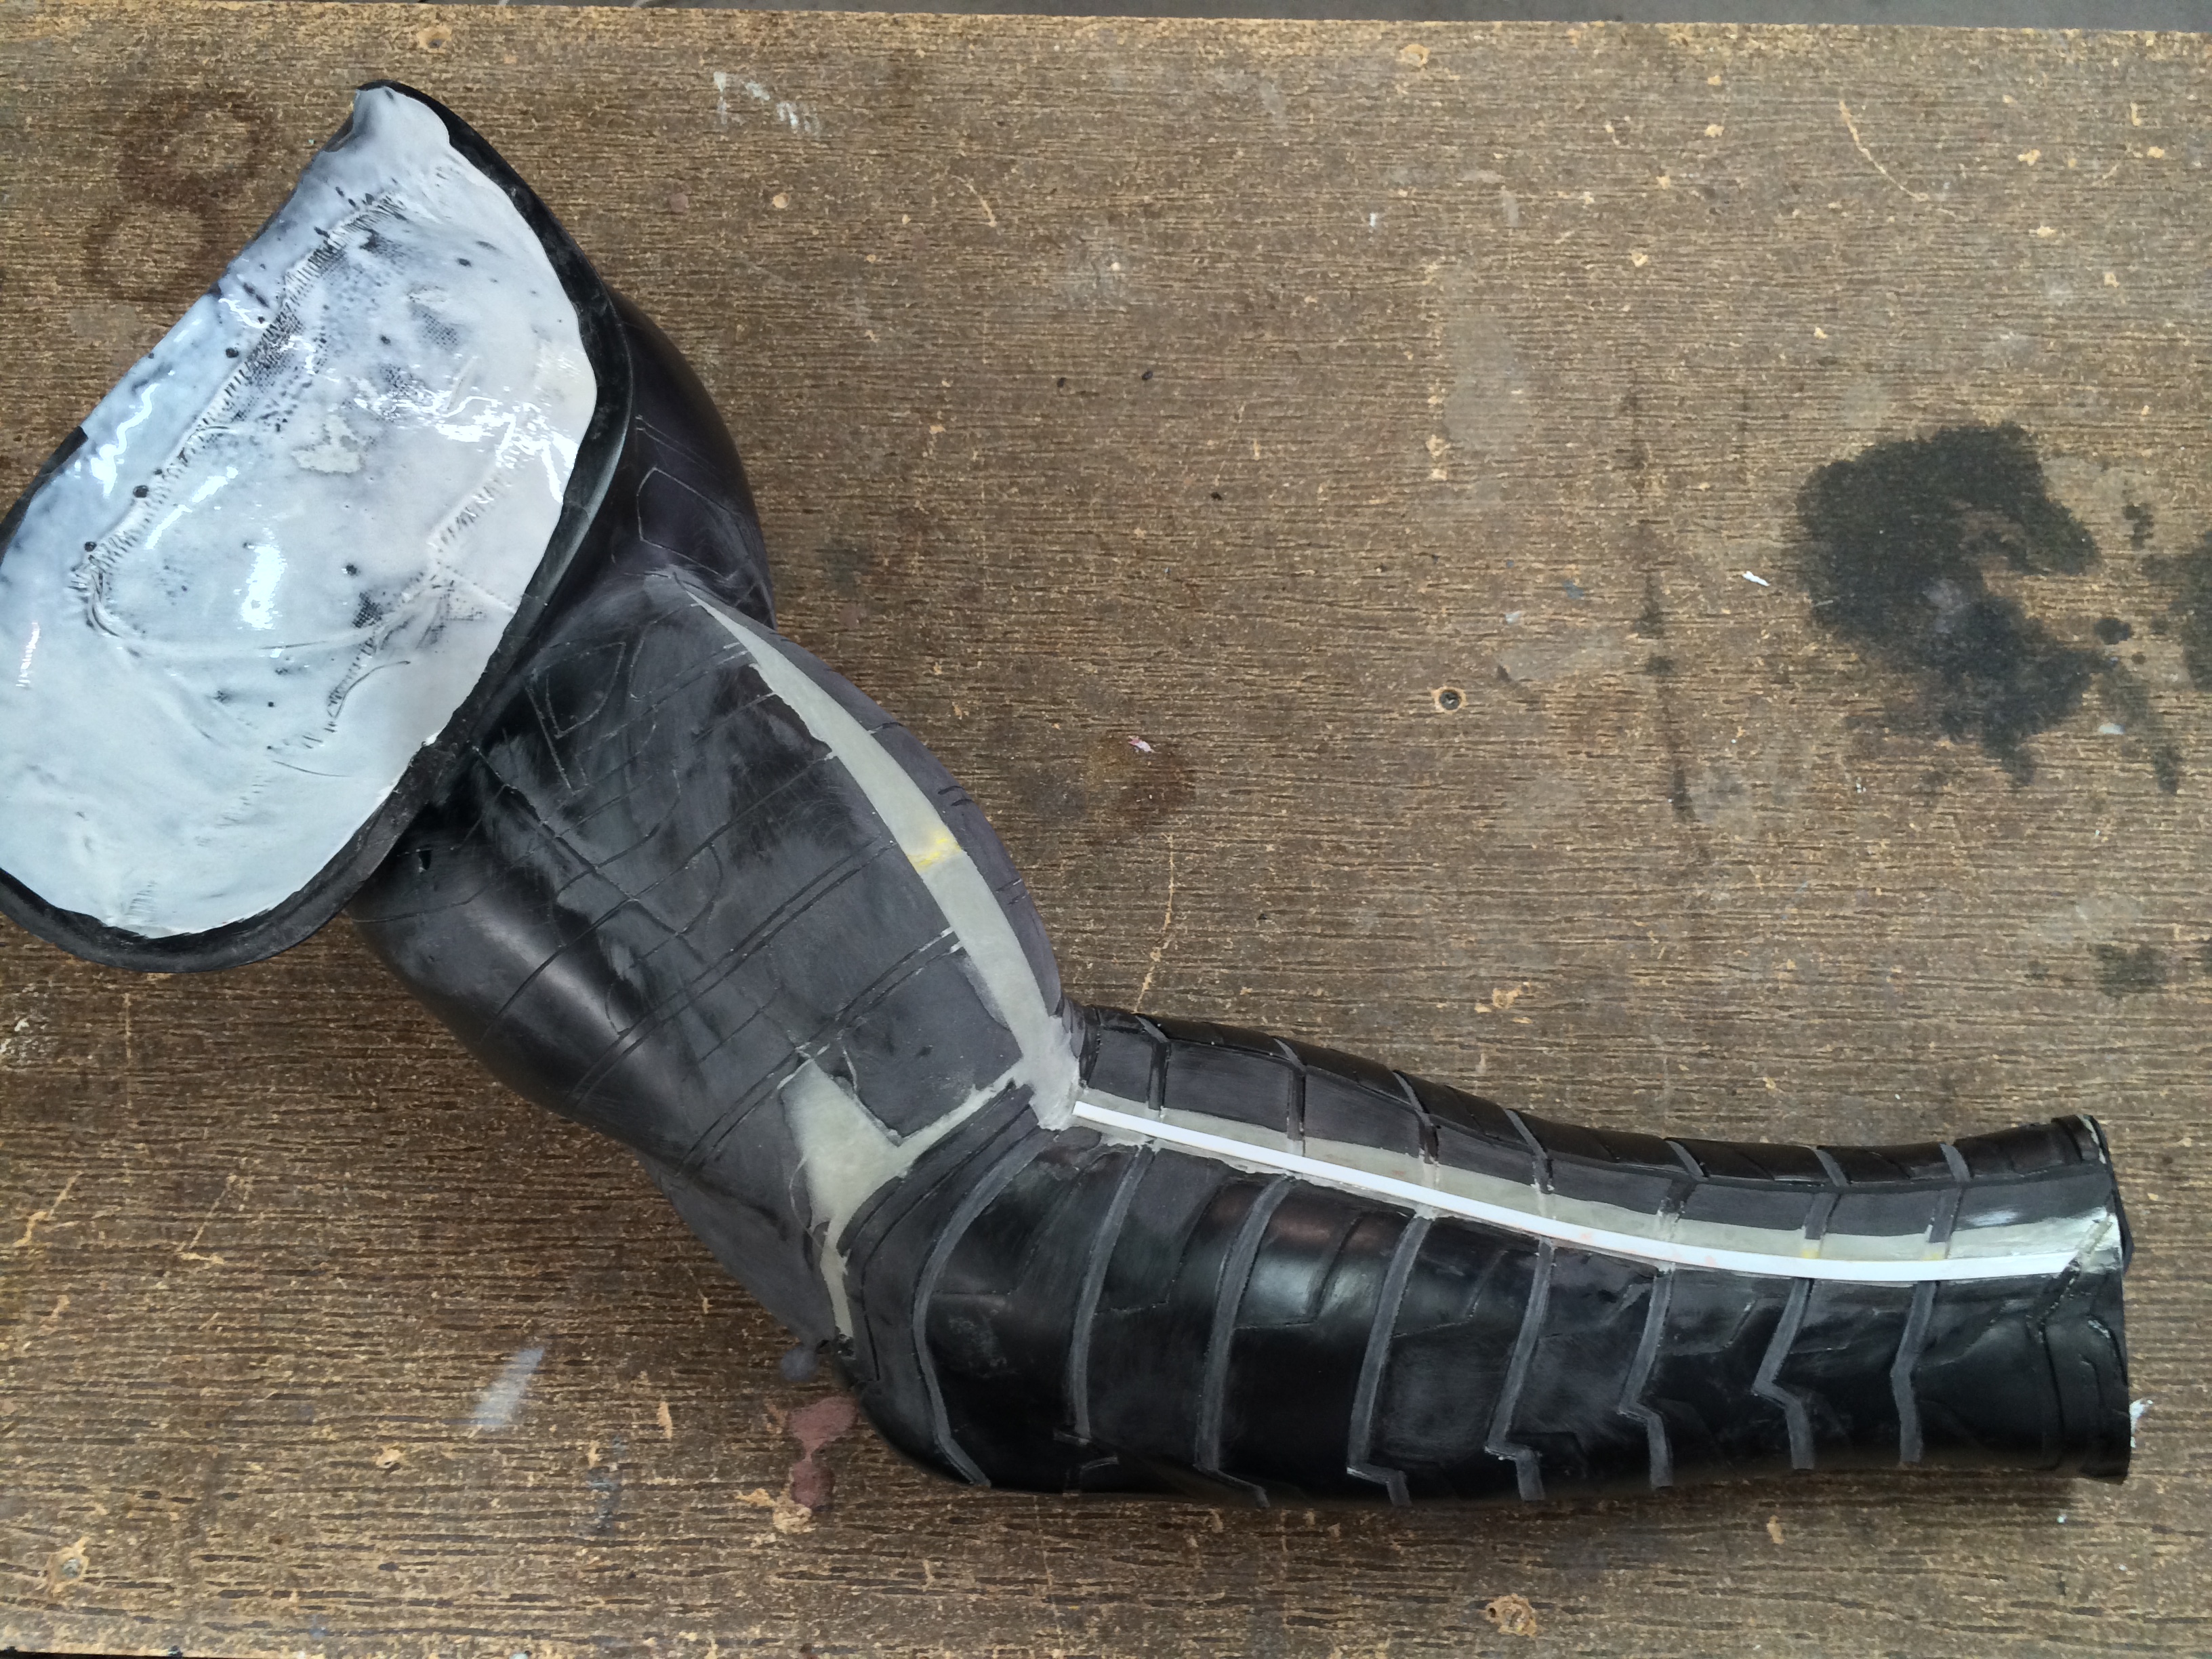
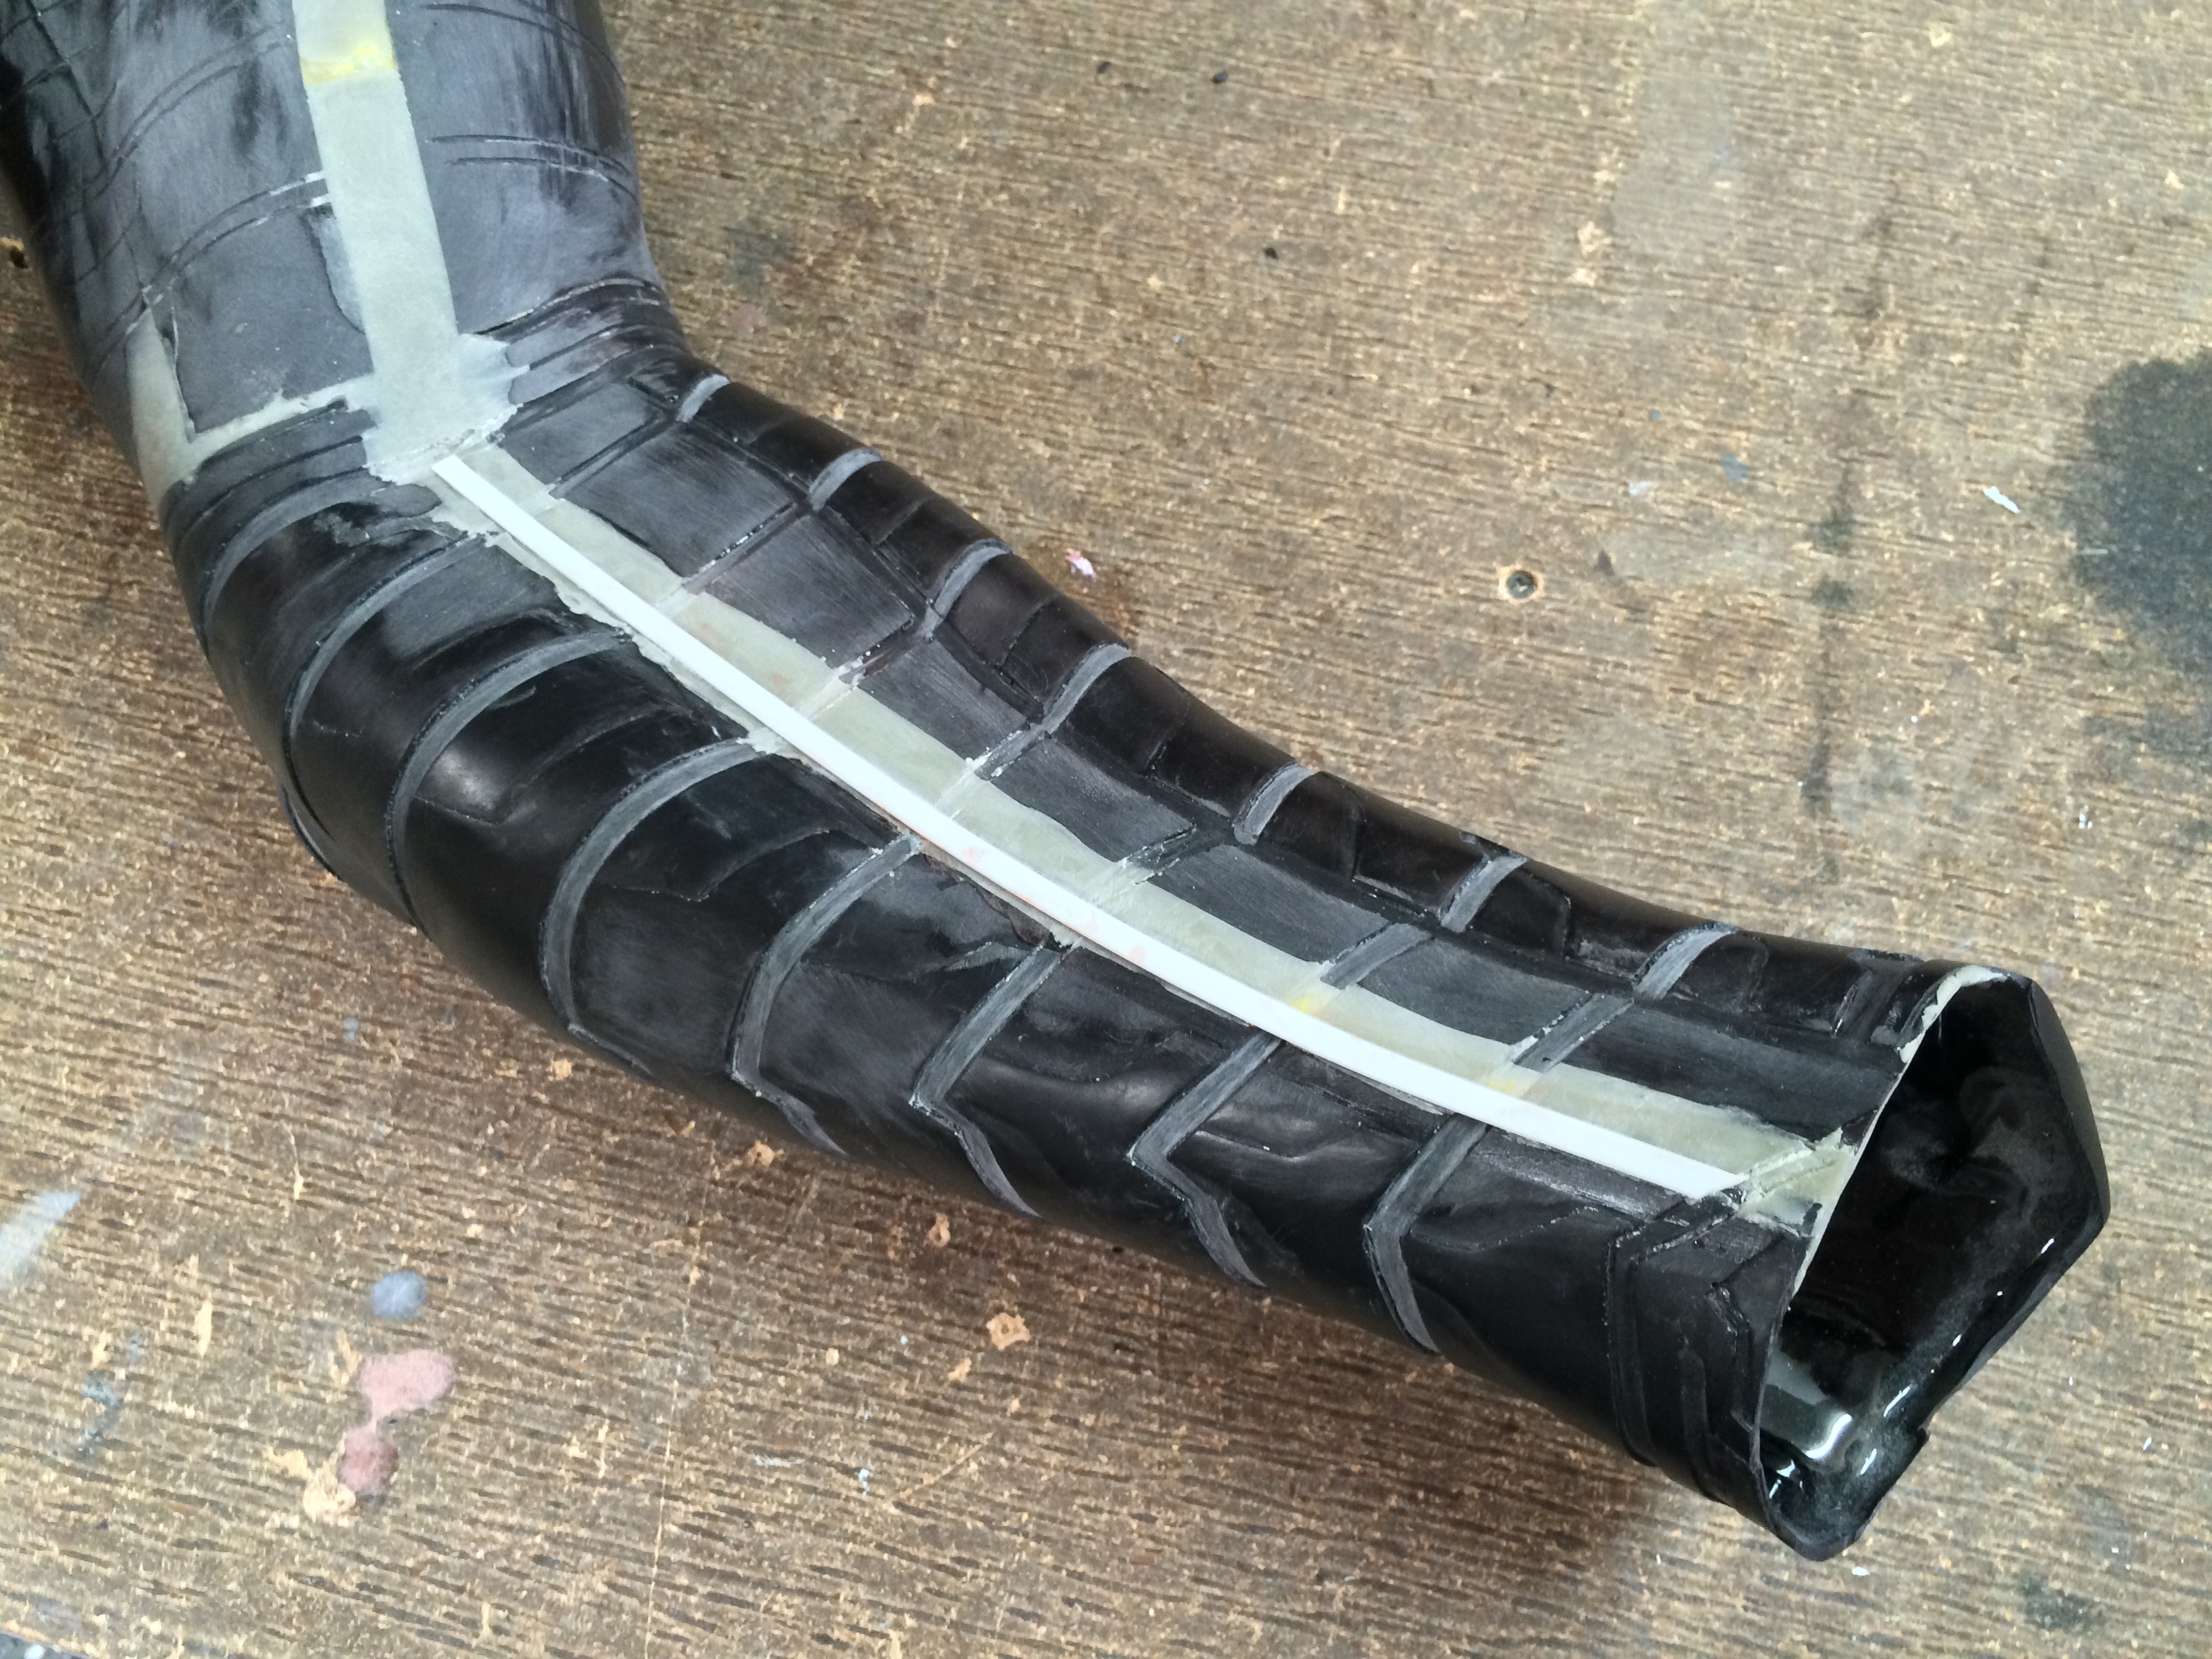
Then it was on to more cleanup. With a hard, resin casting to work with, I decided to completely eliminate all traces of the fabric edges that had still managed to creep into the first version. After more primer, more sanding, more help from Kit, and many more sleepless nights, I finally painted both sections of the arm in glossy paint, wet sanded them to 2000 grit, polished them with rubbing compound, and finally buffed them with wax. I wanted them to come out of the mold glossy and ready for chrome.

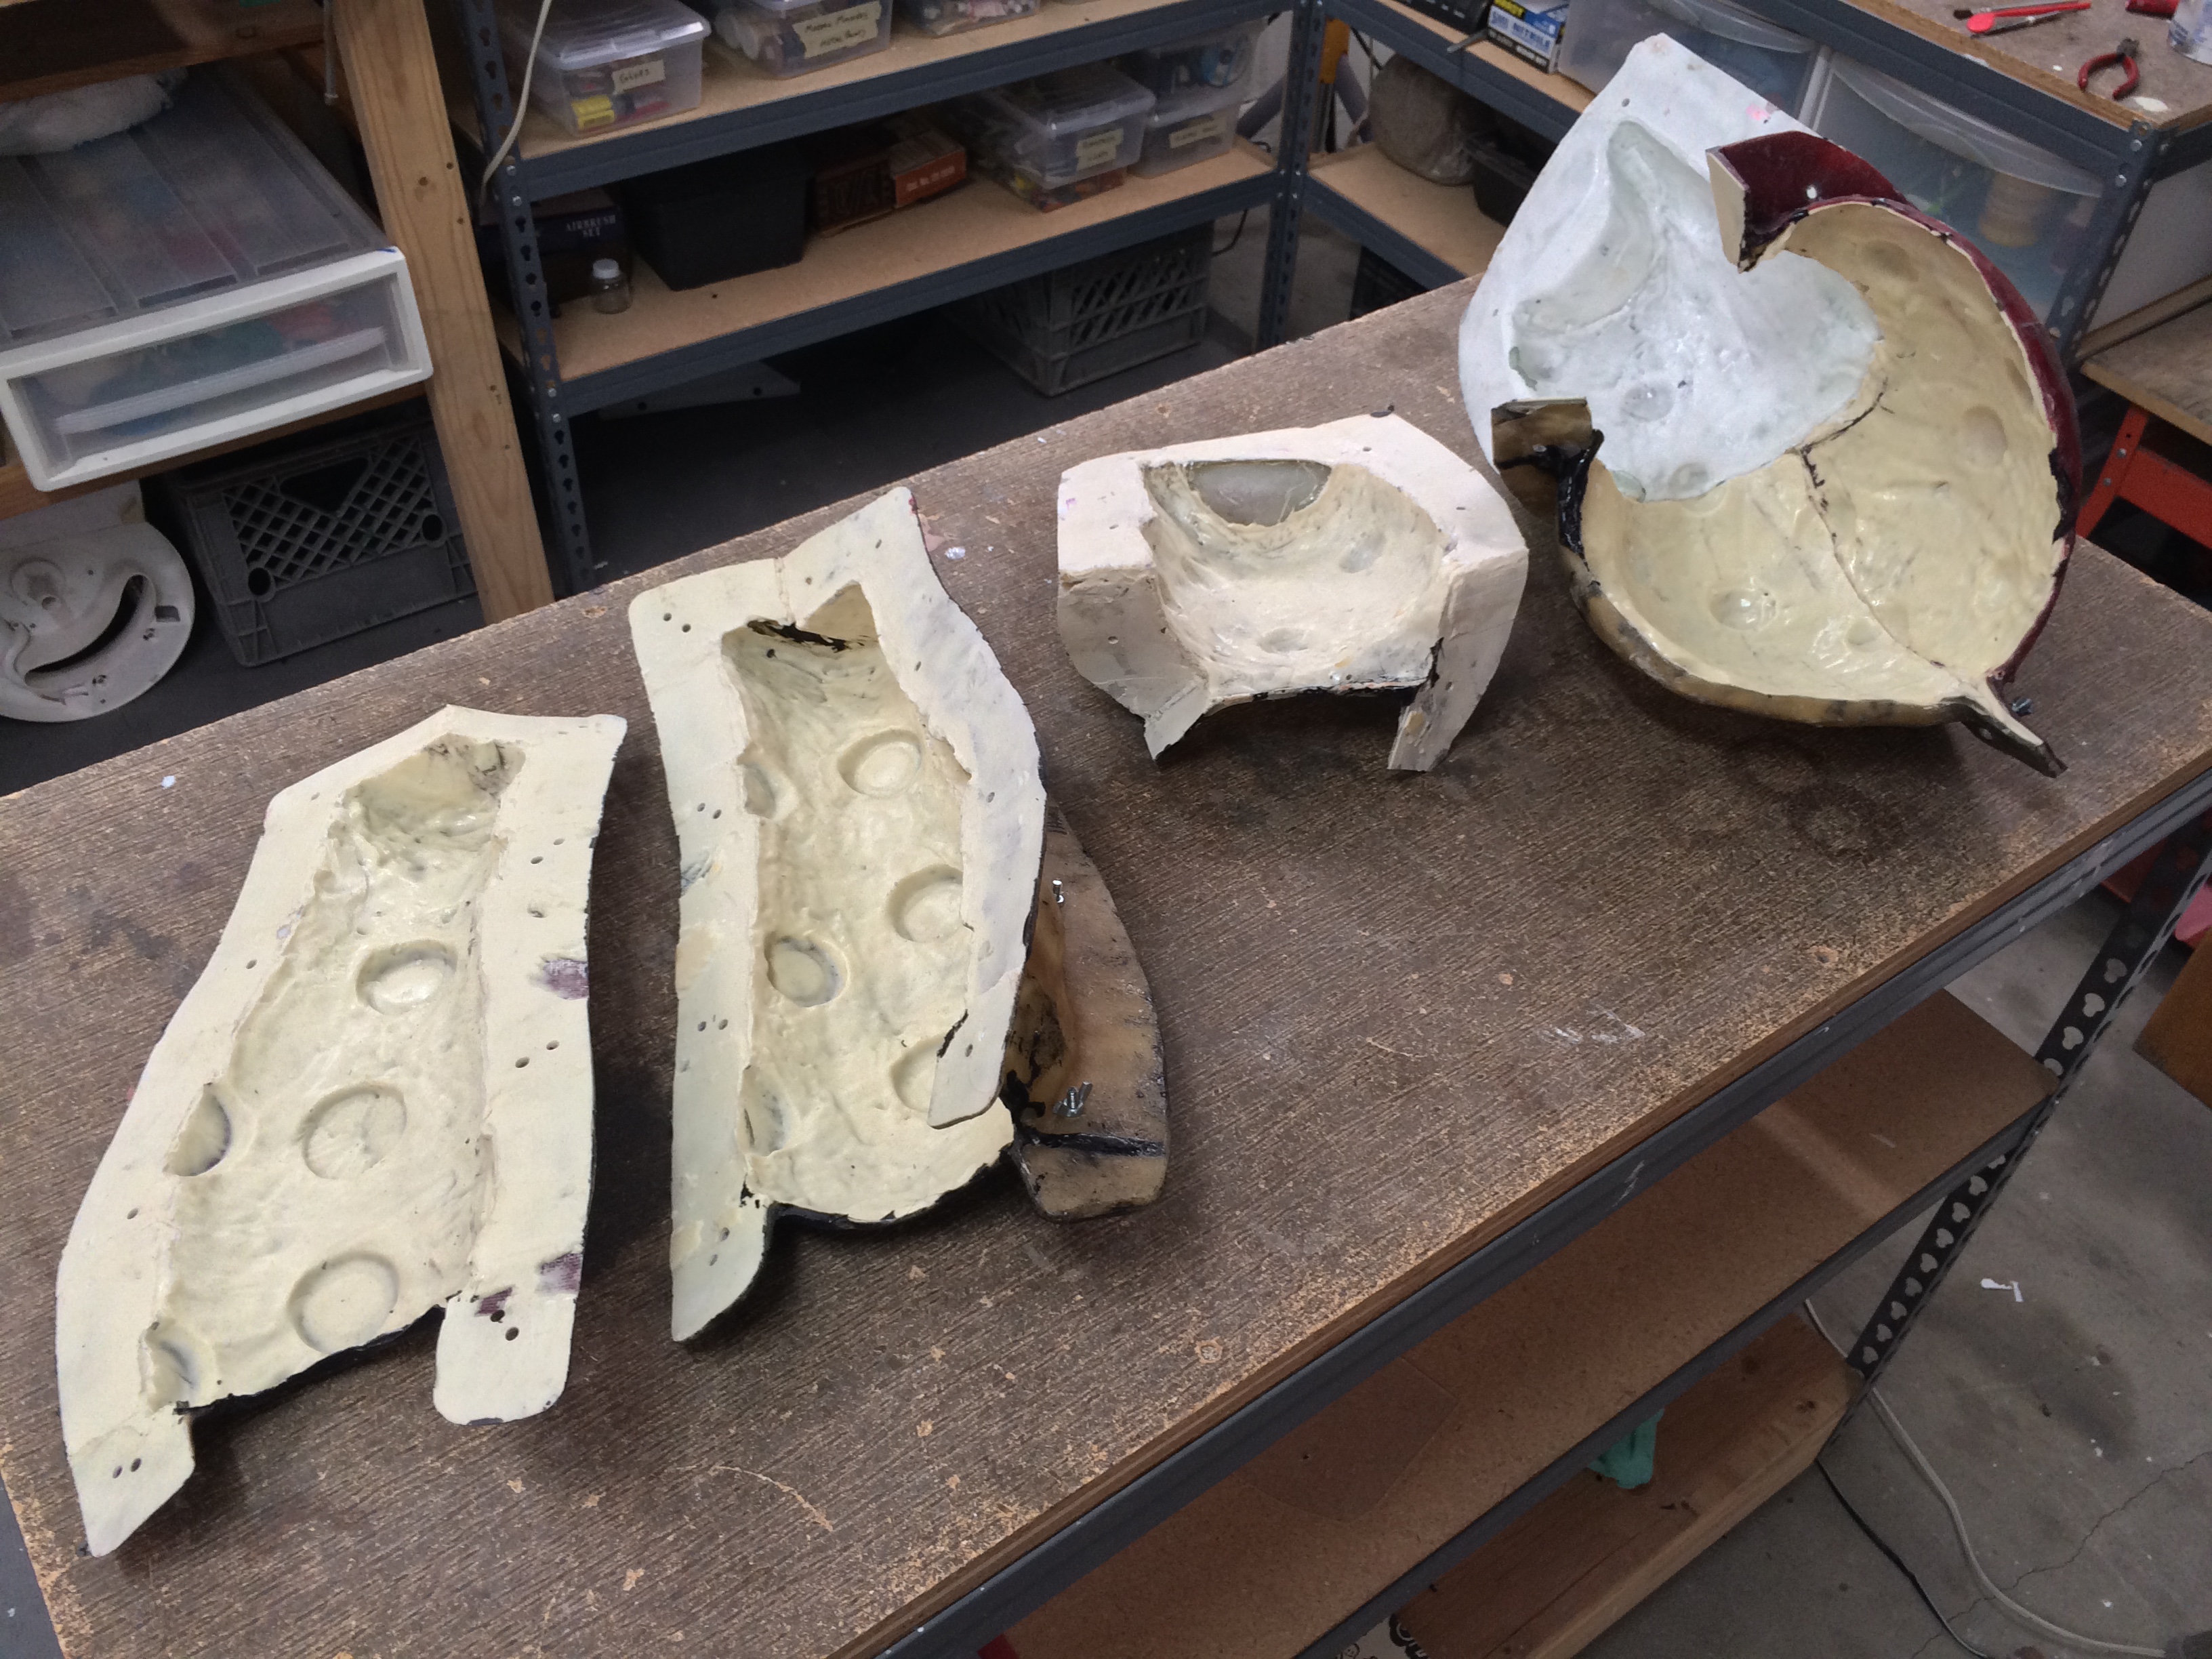
This time, I used Rebound 25 and made brush-on molds for each section of the Arm, with fiberglass mold jackets. These came out excellent, and have been serving me well since.
Casts are slush-cast in Smooth-On ONXY resin.
In Part 2, I’ll talk about getting the Arm plated with real metal chrome and adding magnetic flanges to hold it all together!