


I’ve been wanting to upgrade my painting setup for a while now, and my switch last year from rattle-can to catalyzed primers and clear coats was the final push I needed to start planning. I also own a fantastic little compressor that, unfortunately, had developed an annoying leak. So I decided to tackle both projects at once! The whole project took me about a day (a few hours here and there, broken up by finding the correct fittings and parts), and less than $100.
*NOTE: most of the following links are Amazon Affiliate links: they cost you nothing, but may help support my business!
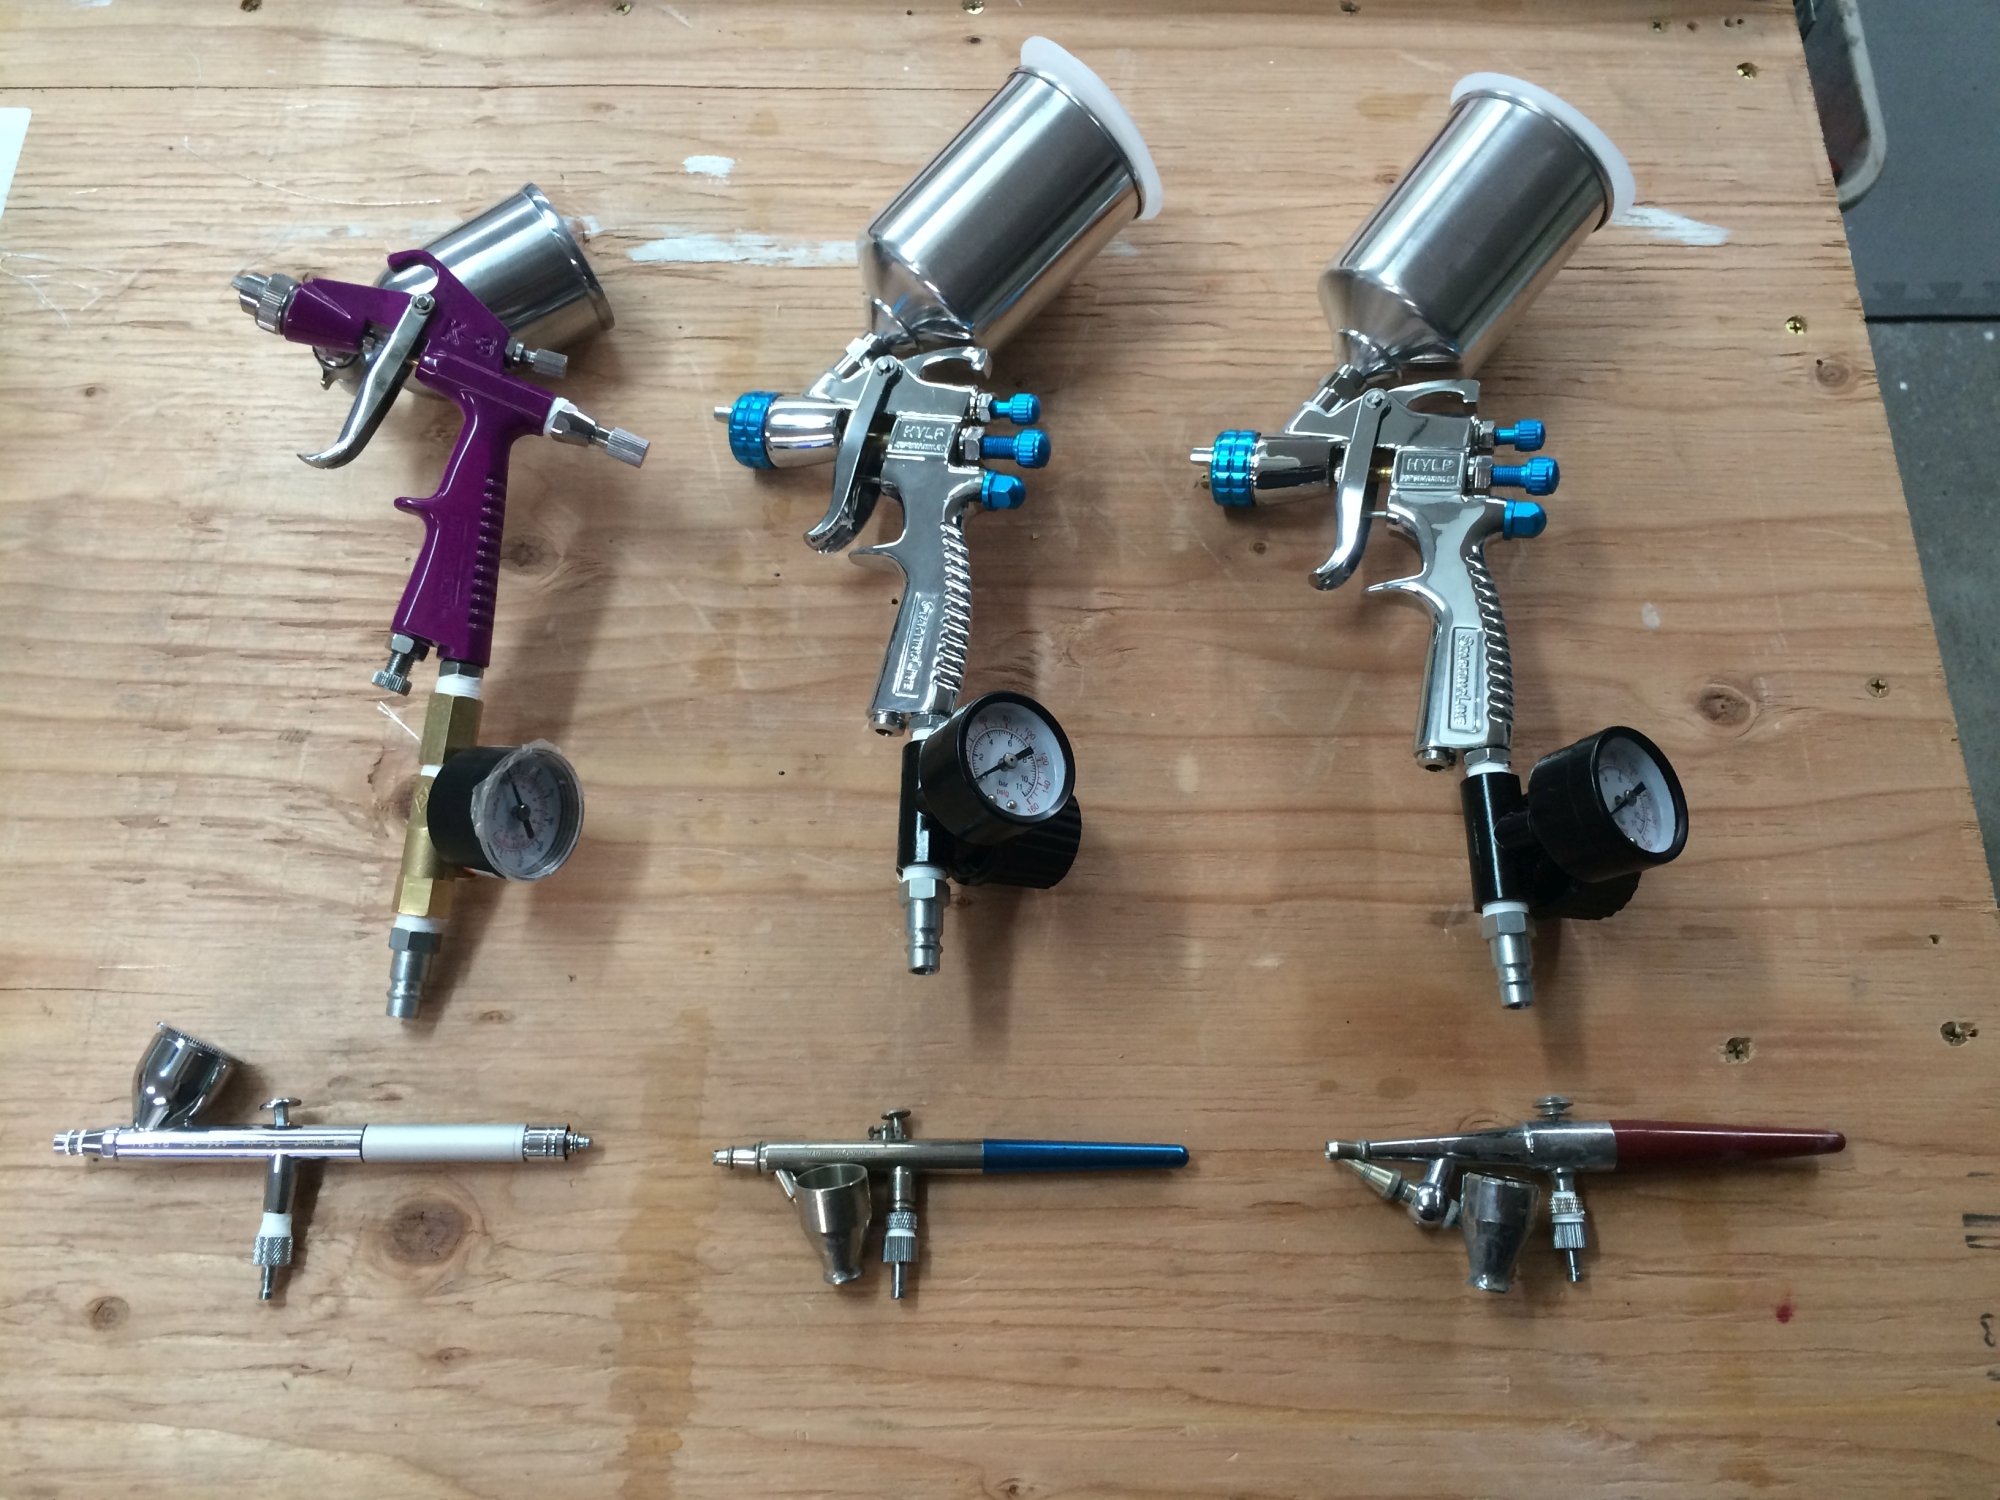
My compressor puts out 7 CFM at 40 PSI (CFM measures volume, PSI measures pressure). The guns I use happen to want around 8 CFM of air at 30 PSI. – riiiiiight on the edge. I have 3 HVLP guns: 2 new DeVilbiss StartingLine Detail guns (1 for colors, 1 for clear), a Harbor Freight Touchup gun (I used an ordinary drill bit to bore out the nozzle, doubling the size to ~1.2 mm for primer), and 3 airbrushes: an Iwata Eclipse HP-CS, an ancient Badger dual-action, and a Pasche Model H.
I swapped all the standard 1/4″ connectors, both on my compressor and my air lines, to these High Flow Type V connectors (wrapping all fittings in thread tape first). That alone has made the difference between my compressor constantly lagging behind when spraying primer (making me pause while it caught up), to actually catching up enough to shut off WHILE PAINTING.
Changing out the quick connector on the compressor itself meant adding a couple extra fittings, simply because of the spacing of the instrument panel and my desire to not get stabbed by a much longer fitting (plus a rubber hose).
")
")
")
Working in a small, enclosed space, size and noise were major factors in picking a compressor. I have a fantastic little 10 gallon compressor from California Air Tools: the model 10020C. It’s a convenient size, and amazingly quiet for how much work it does! Here in Los Angeles, it also deposits a LOT of water in its tank, which is not so good.
A lot of catalyzed paints, especially urethane base ones, are very sensitive to moisture. A little bit of water in your air lines can totally ruin a finish. You don’t want water in your air lines!
There are different way to dry out your air. I got a DeVilbiss QC3 moisture / particle filter (honestly, I tried to do some research on alternatives, but I ended up just copying my friend Harrison of Volpin Props). The replacement filters cost more than I’d like to spend, though, so I took a couple of extra steps…
Compressor Upgrade
The main reason air compressors make water is that motors get hot, and heat up the air. A lot. Compressing air also heats it up. A lot. When air expands as it’s deposited into the tank, it cools. Cooling results in condensation – water. That’s why every compressor has a little drain valve on the bottom of the tank – to let the water out! (You should be doing this more than you do – most compressors recommend every day it’s in use!)
One solution is to cool off the air before it gets deposited into the tank. It just so happened that the annoying leak on my compressor was right at that point – so I needed to poke at that piece anyway!
Ideally, as air cools all the water condensates out and you get a tank full of dry air. Shops with permanent setups will literally run dozens of feet of flexible copper coil into buckets of water, or past fans, or into commercial-grade cooling units, to cool off the air and remove the water before it goes into the tank. My compressor is on wheels, and is mobile. So I couldn’t do that.
Instead, I ran a 3/8″ copper tube from the motor, DOWN to the bottom of the tank, in a long, gradually sloping coil, and then back UP to the inlet for the tank. My first coil used 10′ of tubing, and got the air cooler, but not cool enough. Still lots of tank-water. So I added another 10′, for a total of 20′ – which works much better. (Photos show the original 10′).
")
")
")
The Up / Down pipe system is simple – water flows downhill. Making air go UP is an easy way of pulling out condensed water, since the water keeps falling DOWN. At the end of every down line, though, you need a valve to drain out the collected water – otherwise it can get gross and contaminate your air.
I decided to adapt a nifty little Automatic Tank Drain to do this for me (I got mine at Harbor Freight for $10, but this is the exact same thing). It detects when your compressor shuts off, and opens a tiny valve for a split second – the idea being all those little “spits” prevent water from building up so much that you need to manually drain it. Normally, it’s attached to the tank drain itself. I attached it to the LOWEST POINT of my copper tube, since my setup is designed to remove most water before it gets to the tank. While I was at it, I extended the tank drain using some rubber tube, so I could actually reach the manual drain without moving the whole compressor. There’s an additional manual drain on the copper tube as well, just in case. The mixing stick keeps the valve from slowly rotating as the compressor shakes and loosening any connections.
")
")
")
And it works! Mine spits when the compressor starts, not stops, but I think that actually makes more sense (removing water before it can move around seems logical to me).
The fix / upgrade to the compressor should give me mostly dry air all the time now, but for painting I decided to go a step further. The DeVilbiss filter says it should be installed “at least 20′ from the compressor” – I assume to cool off the air, have less water in the line, and probably for more consistent pressure. My compressor sits barely 2 feet from the filter. To get 20 feet of line, I could have just run some rubber hose. I didn’t. The amazingly technical drawing below shows the basic plan:
I decided to also get the air really, really dry before it got there…
HVLP Air Supply
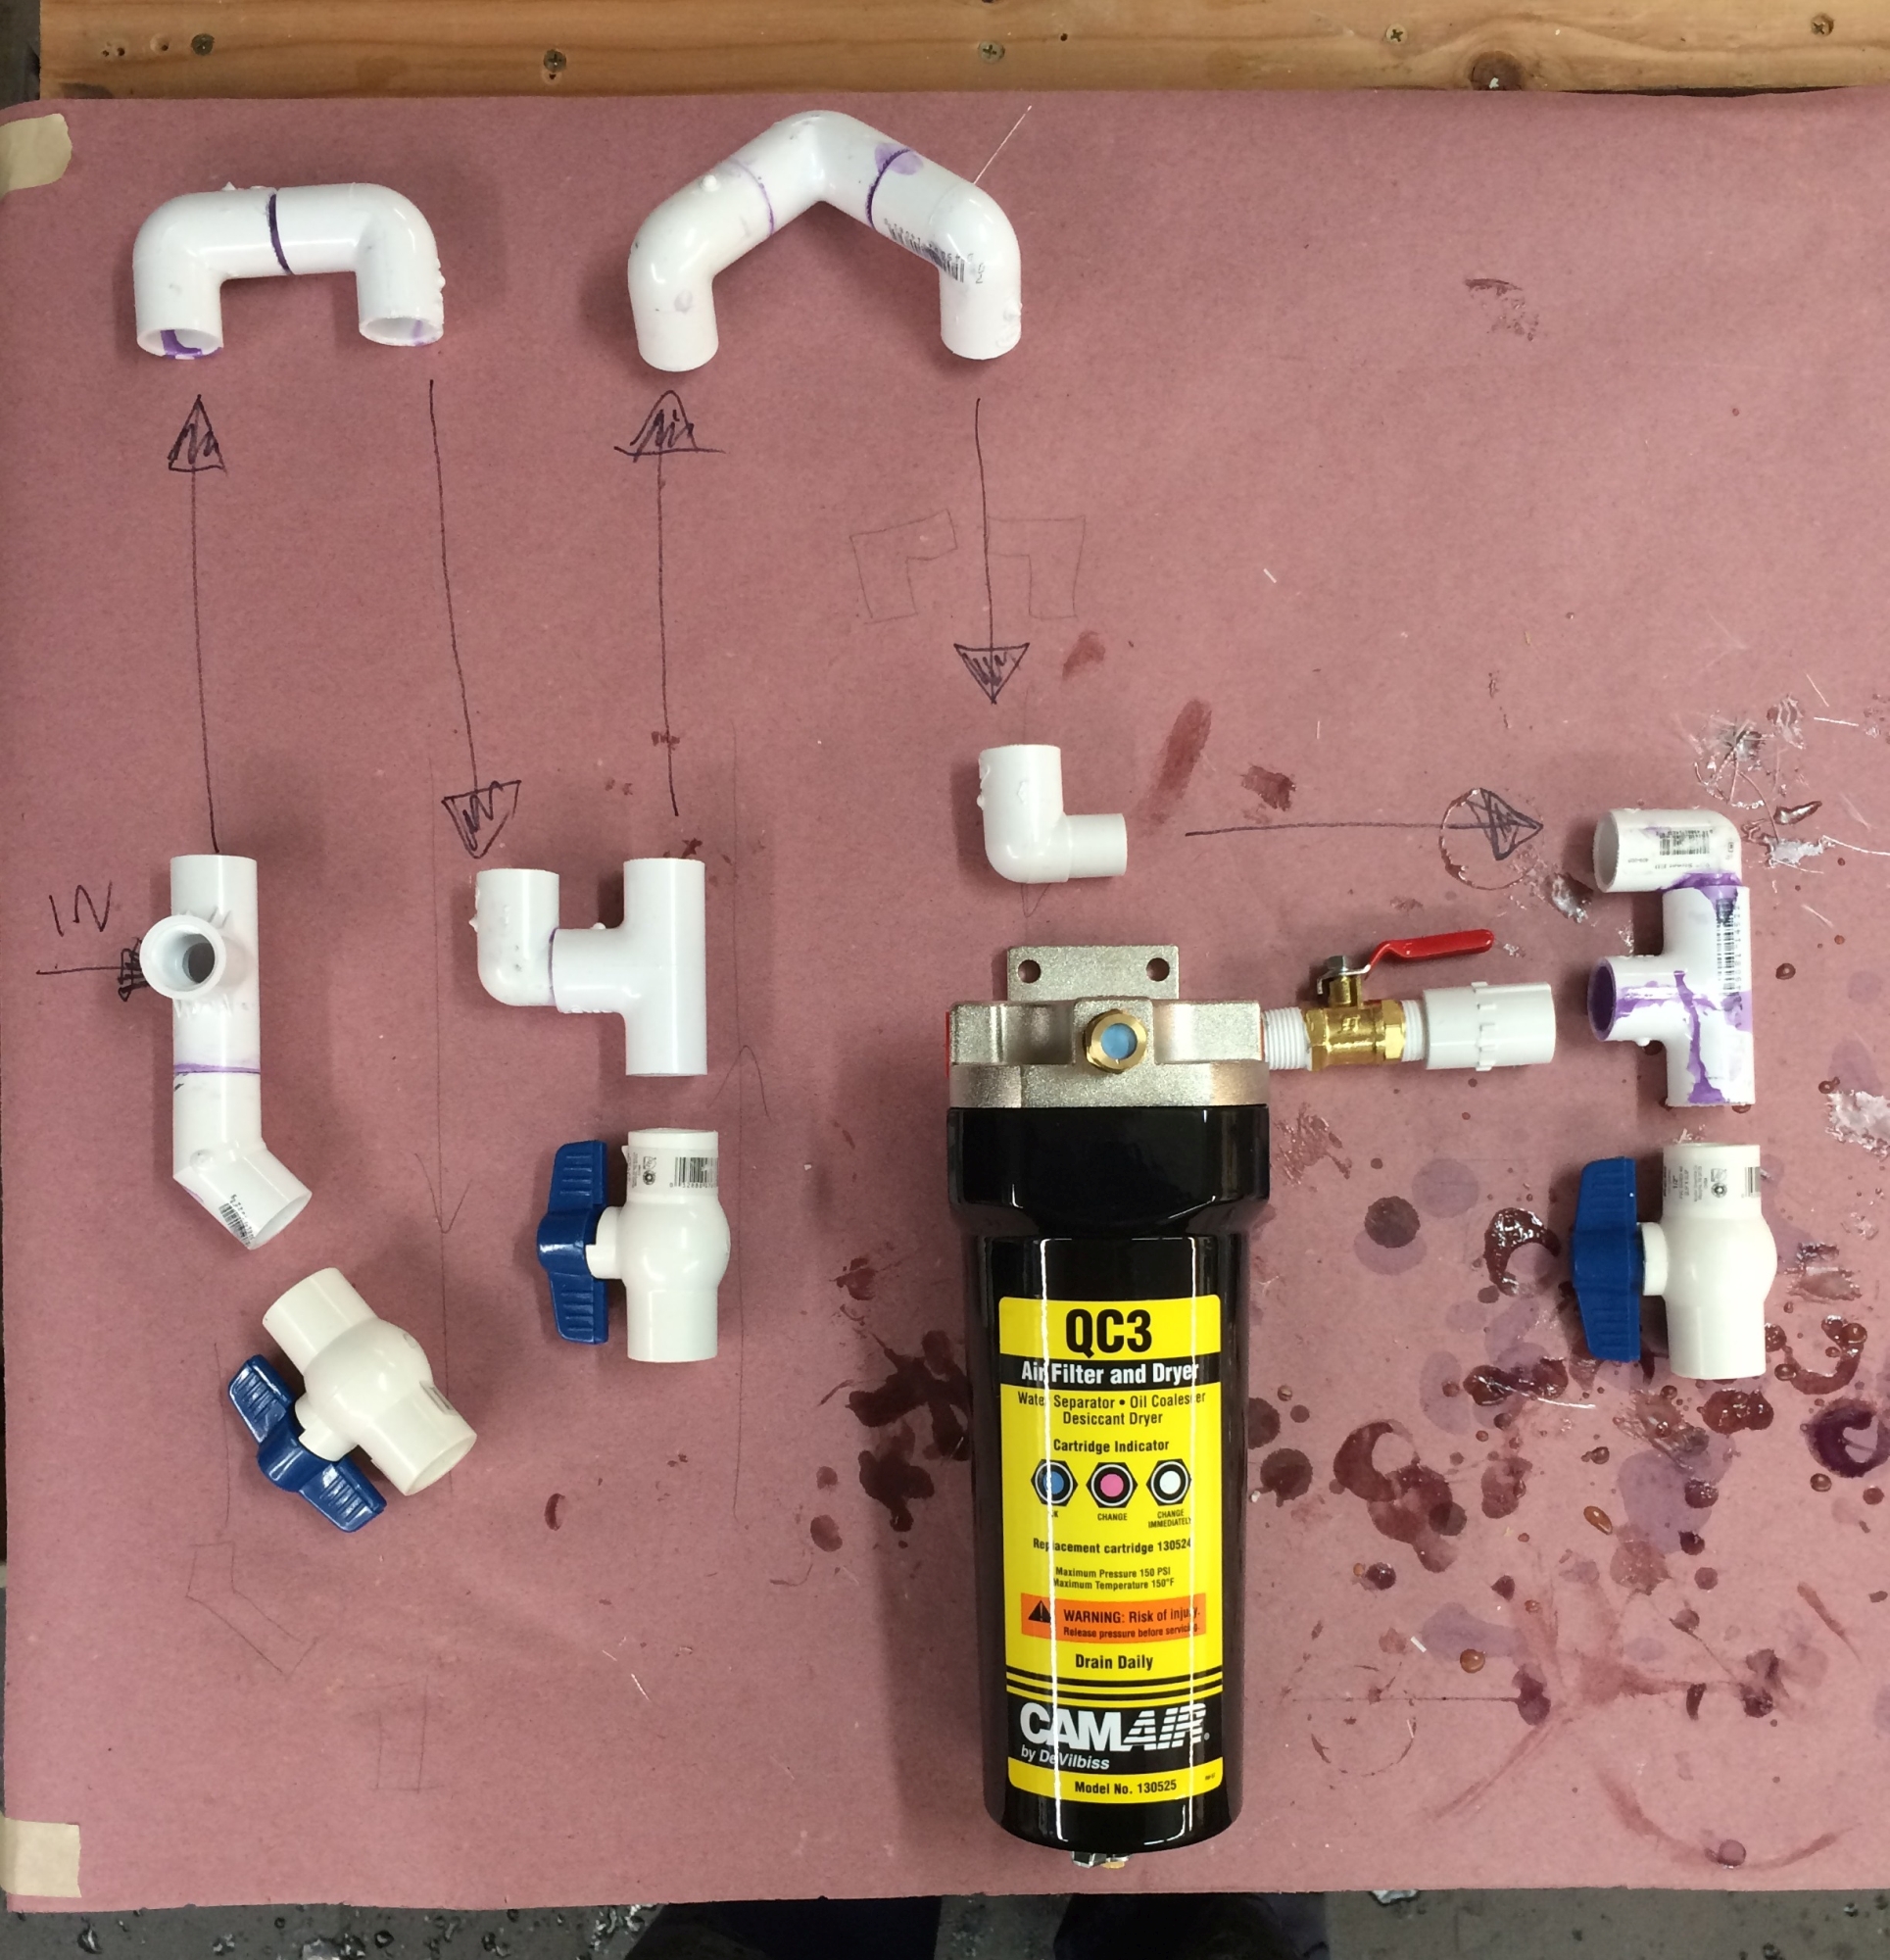
I built a series of 3 Up / Down pipes, each running the height of my spray booth (7 feet tall – nearly 30 feet in total), with a ball-valve at the end to drain out any water. I used PVC since it’s cheap and easy. Every joint is primed and glued, and the whole mess is connected to the compressor via a short length of 3/8″ rubber hose, which I made from a longer hose and a Hose Repair Kit ($2 at Harbor Freight). Valves before and after the filter mean I can close off the filter when not in use to keep it dry longer. A quick connector at the end makes it easy to attach a short rubber hose – I cut a 20′ hose in half, to shorten the line between the spray gun and the filter / regulator combo. All these connectors use the High Flow V style I mentioned earlier.
")
")
")
")
")
")
I’ll only be connecting hoses to the filter setup for HVLP and airbrush painting. Standard air tools will run off the second port on the compressor, as normal.
DISCLAIMER: PVC is not OSHA approved for this use. But schedule 40 PVC is rated for over 400 PSI, and I’m only putting in 100 PSI – well within tolerance. I’m also 100% indoors, with no weather or sunlight to damage or degrade the plastic. However, when PVC fails, it fails catastrophically – meaning it shatters / explodes. So I’ll be wrapping the pipes juuuuuust in case.
I’ve tested the whole system by filling it up to 100 PSI and leaving it overnight. The HVLP side has a very, very slow leak somewhere (I suspect the short hose) – it was down to ~50 PSI after 24 hours. The compressor, however, has held air without changing for up to 3 days! I’m getting WAY less water in the tank, and so far NONE out of the valves on the HVLP pipes.
And most important, it’s made painting a breeze! Between the increased air flow of the new connectors and more consistent pressure of a longer air path, even under constant use the compressor easily keeps up with all of my HVLP guns – even my bored-out primer gun!